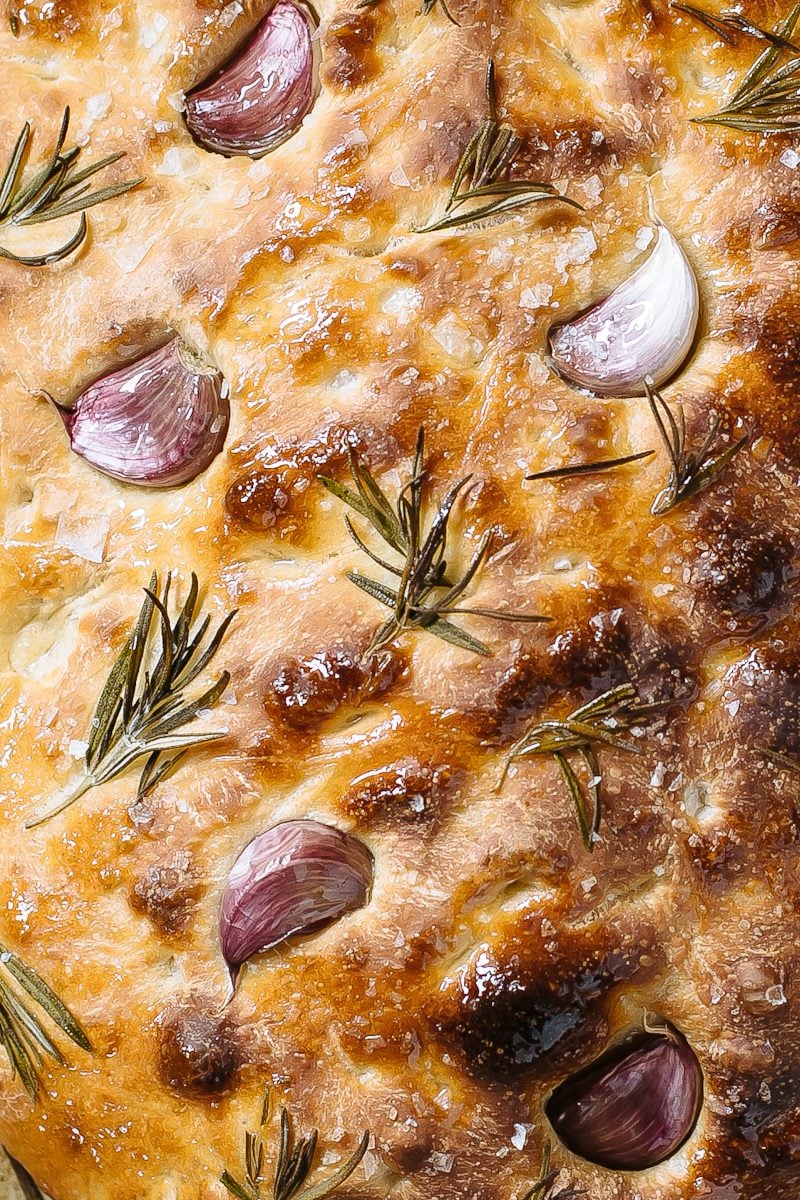

Making sourdough focaccia sounds intimidating, but beginners can absolutely master this recipe. Unlike yeasted focaccia, the sourdough version relies on your starter and time rather than precision, making it forgiving and deeply flavorful. If you’ve been intimidating by sourdough, focaccia is the perfect entry point because the wet dough is easier to handle than boules, and the rustic dimples hide any shaping imperfections.
How to Make Beginner Sourdough Focaccia
This recipe uses active sourdough starter, flour, water, and salt to create a pillowy, oil-rich focaccia with minimal kneading. Total time is about 48 hours with mostly hands-off proofing.
Ingredients
- 1 cup active sourdough starter (fed 4-8 hours prior, bubbly and peaked)
- 1 3/4 cups warm water
- 3 1/2 cups all-purpose or bread flour
- 2 teaspoons salt
- 1/2 cup olive oil (divided: 1/4 cup for dough, 1/4 cup for pan and topping)
- Toppings: fleur de sel, fresh rosemary, cracked pepper, or garlic
Method
Mix the Dough
Combine your fed starter with warm water in a large mixing bowl, stirring until mostly combined. Add flour and stir until you have a shaggy, wet dough with no dry flour pockets. Let this mixture rest for 30 minutes at room temperature (this is called autolyse). The dough will hydrate and become easier to work with.
Incorporate Salt and Oil
After the rest, sprinkle salt over the dough and drizzle in 1/4 cup olive oil. Using wet fingers, gently fold and squeeze the dough until salt and oil are distributed throughout. The dough will feel slippery and cohesive. This gentle mixing develops enough gluten for structure without aggressive kneading.
Perform Stretch and Folds
Over the next 3-4 hours, perform four sets of stretch and folds at 30-minute intervals. Wet your hand, grab one side of the dough, stretch it upward, and fold it over itself. Rotate the bowl and repeat from all four sides. This builds strength without deflating the dough. Each session takes only 1-2 minutes.
First Proof Overnight
After your final set of folds, cover the bowl with a towel or plastic wrap and let it rest at room temperature for 12-16 hours. The dough will become puffy, airy, and dotted with bubbles. You’ll know it’s ready when it has nearly doubled and jiggles slightly when moved.
Shape into the Pan
Coat a 9×13 inch rectangular baking pan generously with 1/4 cup olive oil. Turn the dough out onto a lightly oiled work surface. Don’t punch it down; instead, gently stretch it into a roughly rectangular shape and transfer it to the oiled pan. Stretch and pat it to fill the pan, then cover loosely and let it rise for 2-4 hours until puffy and dimple-able.
Dimple and Top
About 30 minutes before baking, preheat your oven to 425°F. Using your fingertips, create dimples all over the focaccia surface, pressing down firmly but not all the way through to the pan. Drizzle lightly with remaining olive oil and sprinkle your chosen toppings generously.
Bake Until Golden
Transfer the pan to the preheated oven and bake for 25-35 minutes until the top is deep golden brown and the edges are crispy. The focaccia should sound hollow when tapped on the bottom. Let it cool in the pan for 10 minutes before turning out onto a wire cooling rack.
Cool and Serve
Focaccia is best served warm or at room temperature within a few hours of baking. The texture will be crispier on the edges and tender in the center. Slice it into squares or rectangles and enjoy plain or with olive oil for dipping.
- Feed your starter 4-8 hours before mixing so it’s at peak activity (doubled, bubbly, ready to fall). A sluggish starter will slow down your whole timeline.
- If your kitchen is cool (below 68°F), your first proof may take 18-24 hours. If it’s warm (above 75°F), watch for 10-14 hours. Poke the dough; if your finger leaves a slow-filling indentation, it’s ready.
- Don’t skip the dimpling step. Those fingerprints create texture, add surface area for crust, and give the focaccia its signature rustic appearance.
What to Look For in Sourdough Focaccia Baking Equipment
- Rectangular Baking Pan: A 9×13 inch metal baking pan distributes heat evenly for crispy, golden edges. Look for steel or aluminum with a light color to prevent over-browning. Glass pans work but heat differently and may brown the bottom too quickly.
- Sourdough Starter Container: A clear glass jar (quart-sized minimum) lets you see fermentation activity and bubbles. Wide mouth makes stirring and feeding easier. Mason jars are cheap and reliable, though specialty starter jars with measurements printed on the side save guesswork.
- Kitchen Scale: Sourdough baking is weight-based for consistency. A digital scale accurate to 1 gram takes guesswork out of flour, water, and salt measurements. This single tool dramatically improves your success rate and repeatability.
- Bench Scraper or Dough Cutter: A rigid, flat tool helps you handle wet, sticky dough without it sticking to your hands. Essential for turning out dough and reshaping between folds. Metal or plastic both work; metal lasts longer.
OXO Good Grips 9×13 Baking Pan
Best for: Home bakers of all levels
This professional-grade steel pan distributes heat evenly for consistent browning and crispy focaccia edges. The light-colored surface prevents over-browning on the bottom, and the rolled edges provide comfortable grip and stacking. OXO’s durable construction withstands repeated use and dishwasher cleaning without warping. At mid-range pricing, it’s the workhorse pan every home baker needs.
Check Current Price on Amazon →Pyrex Basics 9×13 Glass Baking Dish
Best for: Budget-conscious beginners
Glass pans let you see browning from the bottom, which helps prevent burnt bases on your first attempts. Pyrex is borosilicate glass, meaning it resists thermal shock and lasts for decades. The transparent sides make it easy to monitor your focaccia’s rise and bake progress. Budget-friendly and versatile for both savory and sweet baking projects.
Check Current Price on Amazon →Rubbermaid Brilliance Sourdough Starter Jar Set
Best for: Sourdough enthusiasts managing multiple starters
This set includes clear plastic containers with measurement markings and airtight lids, removing the guesswork from feeding amounts. Unlike glass mason jars, these lightweight containers are easier to handle when warm from fermentation. The stackable design saves fridge space, and the measured markings show fermentation progress instantly. Perfect for beginners tracking starter health.
Check Current Price on Amazon →Le Creuset Cast Iron 9×13 Baking Dish
Best for: Serious bakers willing to invest
Enameled cast iron retains heat exceptionally well, creating restaurant-quality crusts on focaccia. The heavy-duty construction lasts generations and moves directly from oven to table as a statement piece. Colors range from classic cherry to modern sea salt. Le Creuset’s lifetime warranty reflects manufacturing quality. Premium pricing reflects unmatched performance and durability.
Check Current Price on Amazon →Start Baking Sourdough Focaccia Today
Sourdough focaccia is one of the most forgiving sourdough projects you can tackle. The wet dough is impossible to overwork, the dimpling step hides imperfections, and the long fermentation time lets your starter do the heavy lifting. If you’ve been intimidated by sourdough, this recipe proves you can create restaurant-quality bread at home without precision or special techniques—just time, good ingredients, and a reliable baking pan.
Start with a 9×13 inch metal baking pan and an active starter, and follow the timeline your kitchen temperature dictates. The first batch may not be perfect, but it will be delicious. By the second or third bake, you’ll have the feel of the dough down, and you’ll be producing focaccia as good as any bakery. Most importantly, you’ll have conquered sourdough and unlocked dozens of other recipes using the same method.
Frequently Asked Questions
How do I know if my sourdough starter is ready to use?
Your starter should be fed 4-8 hours before mixing and be at peak activity: doubled in volume, bubbly on top and sides, and smelling pleasantly sour. If you poke it, it should spring back slowly. A starter that’s not yet doubled or is past its peak (starting to collapse) will slow your focaccia’s timeline significantly.
Can I make this focaccia on a shorter schedule?
Sourdough requires time for flavor development, so you can’t rush it much. However, you can shorten the overnight proof to 8-10 hours in a warmer kitchen (75-78°F), then complete the second rise as usual. Cold fermentation (proofing in the fridge) extends flavor but adds 12-24 hours, not shortens it.
What if my focaccia is too dense or gummy inside?
Underproofing is the most common cause. Ensure your first proof goes the full 12-16 hours until the dough jiggles noticeably. Also check that you baked long enough (25-35 minutes) until the center is set and doesn’t jiggle. If the top is dark but the inside is still wet, lower your oven rack next time.
How should I store leftover focaccia?
Keep focaccia in an airtight container at room temperature for up to 3 days. Slice, wrap individually in parchment, and freeze for up to 3 months. Reheat slices in a 350°F oven for 5-7 minutes to restore crispness without drying them out.
Can I use instant yeast instead of sourdough starter?
Yes, substitute 1 cup starter with 1 3/4 cups flour, 1 cup water, and 1/2 teaspoon instant yeast. Reduce the first proof to 4-6 hours at room temperature. You’ll lose the complex, tangy flavor that makes sourdough special, so sourdough is worth mastering once you have an active starter.
As an Amazon Associate, Build & Bloom earns from qualifying purchases. We only recommend products we genuinely think are useful. Prices and availability vary; check Amazon for the latest.
Leave a Reply