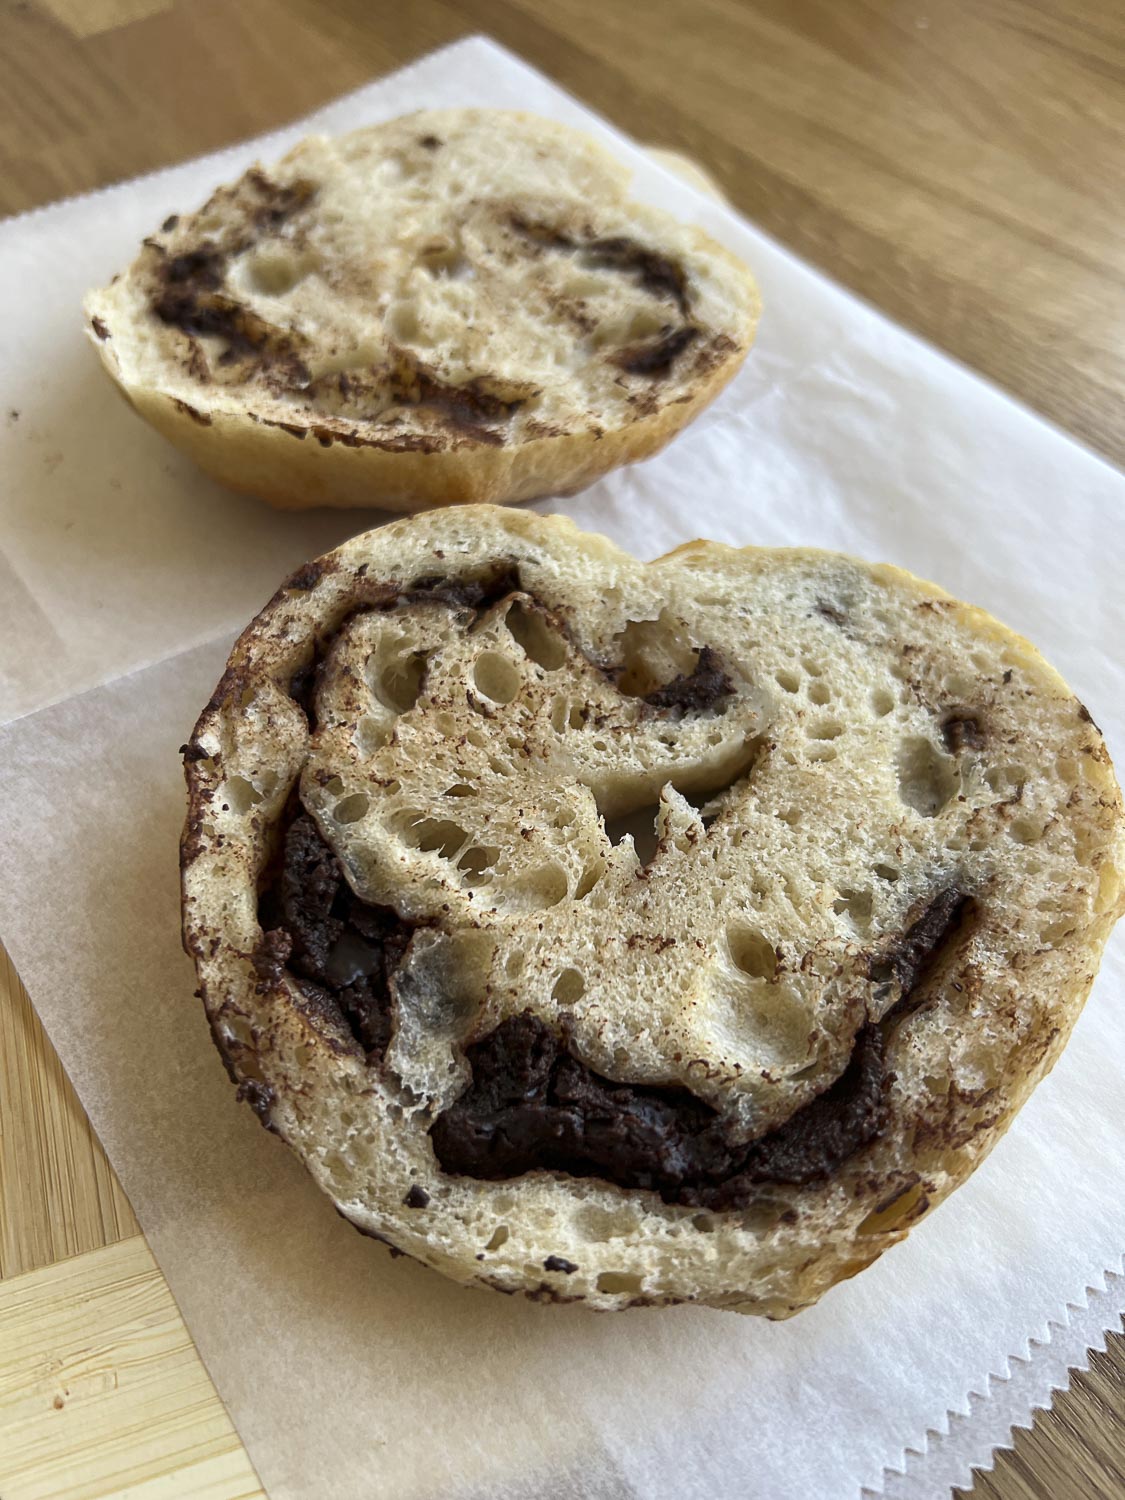

Making bagels at home seems intimidating, but sourdough bagels are actually more forgiving than you’d think. The long fermentation develops flavor naturally, while chocolate chips add a touch of sweetness that transforms ordinary bagels into something special. Whether you’re an experienced sourdough baker or trying bagels for the first time, this recipe guides you through every stage from mixing through the signature boil that creates that perfect chewy crust.
How to Make Chocolate Chip Sourdough Bagels
This recipe yields six to eight bagels with a perfectly chewy interior and crispy crust. The process spans two days, with most of that time being hands-off fermentation.
Ingredients
- Active sourdough starter: 150g (fed and bubbly)
- All-purpose or bread flour: 350g
- Water: 150ml
- Salt: 6g
- Honey or sugar: 15g
- Semi-sweet or dark chocolate chips: 80g
Method
Mix the dough
Combine your active starter, flour, and water in a large mixing bowl. Mix until all flour is hydrated and a shaggy dough forms, roughly 5 minutes by hand. Let this rest for 30 minutes to allow the flour to fully absorb the moisture. This rest period, called autolyse, makes the dough easier to handle.
Add salt and incorporate chocolate chips
After the rest, sprinkle salt and honey over the dough. Using wet hands, pinch and fold the dough repeatedly for 5-8 minutes until salt is fully incorporated and the dough becomes smoother. Fold in chocolate chips gradually, ensuring they’re evenly distributed. The dough should feel tacky but not sticky.
First bulk fermentation
Place the dough in a lightly oiled bowl and cover with plastic wrap or a damp towel. Allow it to ferment at room temperature (65-75F is ideal) for 12-16 hours. You’re looking for the dough to roughly double in volume and show visible bubbles. This long fermentation develops the characteristic sour tang and chewy texture.
Shape the bagels
Turn the dough out onto a lightly floured surface and gently divide into six to eight equal pieces. Working with one piece at a time, gently pre-shape into a round, then use your thumb to poke a hole in the center. Stretch the hole outward until it’s about 2 inches in diameter, creating a bagel ring. Place each shaped bagel on a parchment paper square.
Second fermentation
Cover the shaped bagels with a towel or plastic wrap and let them rest at room temperature for 4-6 hours, or refrigerate overnight. The bagels should be puffy and slightly increased in size. Cold fermentation in the refrigerator actually improves flavor and makes them easier to boil without losing shape.
Prepare the boiling water
Fill a large pot with water and bring to a rolling boil. Add honey or baking soda to the water (roughly 15ml honey or 15g baking soda per liter). This ingredient creates the characteristic chewy crust and helps bagels brown beautifully. You’ll know the water is ready when it’s at a vigorous boil.
Boil the bagels
Working in batches to avoid overcrowding, carefully place bagels into the boiling water. They should sink initially, then float to the surface within 30 seconds. Boil for 60-90 seconds per side, using a slotted spoon to flip them gently. Remove to a wire rack to cool slightly before transferring to the baking sheet.
Bake until golden
Preheat your oven to 425F. Arrange boiled bagels on a parchment-lined baking sheet and bake for 20-25 minutes until the crust is deep golden brown and the chocolate chips are slightly caramelized. Some chips may peek through the crust, which is perfectly normal and adds visual appeal. Cool on a wire rack for at least 10 minutes before slicing.
- Feed your starter 4-6 hours before mixing dough so it’s at peak activity with lots of visible bubbles. This ensures strong fermentation and better flavor development.
- Don’t skip the boiling step or rush it. This is what separates bagels from rolls. The boil gelatinizes the starch on the surface, creating that distinctive chewy texture.
- Chocolate chips can sink during fermentation. Fold them in gently near the end of mixing, or reserve half to sprinkle onto the boiled bagels just before baking for visual impact.
What to Look For in Bagel-Making Equipment
- Large mixing bowl: You need at least 3-4 quart capacity to accommodate the dough as it rises and ferments. Glass, ceramic, or food-grade plastic all work well. Clear containers help you monitor fermentation progress visually.
- Slotted spoon or spider strainer: Essential for safely removing bagels from boiling water without breaking them. A wide, shallow slot design works best for cradling the delicate bagel shape without piercing it.
- Wire cooling rack: Prevents steam from making your bagels soggy after baking. The elevated design allows air circulation from all sides, preserving that crispy crust you worked hard to achieve.
- Instant-read thermometer: Helps you confirm your sourdough starter is at peak activity before mixing, and monitors water temperature during boiling. Accuracy ensures consistent results batch after batch.
OXO Good Grips 3-Quart Glass Mixing Bowl with Lid
Best for: Home bakers of all levels
This durable glass mixing bowl is large enough for full bagel dough fermentation and features a secure locking lid for hands-free monitoring. The clear glass lets you watch fermentation progress, and it’s freezer, microwave, and dishwasher safe for easy cleanup. The soft grip handles stay comfortable even with heavier doughs, making it ideal for long fermentation projects.
Check Current Price on Amazon →Norpro Stainless Steel Slotted Skimmer Spoon
Best for: First-time bagel makers
This 19-inch stainless steel skimmer features a wide, shallow bowl with perfectly-sized slots that cradle bagels safely during boiling. The long handle keeps your hands well away from steam and hot water, while the sturdy construction won’t bend or warp. At an affordable price point, it’s an excellent starter tool that also works for pasta, dumplings, and other boiling tasks.
Check Current Price on Amazon →Checkered Chef Stainless Steel Wire Cooling Rack
Best for: Budget-conscious bakers
This commercial-style cooling rack fits standard half-sheet pans and features tight stainless steel wire mesh for maximum airflow around bagels. The raised feet prevent direct contact with countertops, promoting even cooling. It’s incredibly durable, dishwasher safe, and costs significantly less than boutique alternatives while maintaining professional results.
Check Current Price on Amazon →ThermoPro Instant Read Digital Meat Thermometer TempSpike
Best for: Serious home bakers
This wireless smart thermometer monitors water temperature and internal dough temperatures with precision to 0.1 degree Fahrenheit. The wireless remote alerts you when your boiling water reaches exactly 212F, and the backlit display works in any lighting condition. Bluetooth connectivity logs temperature history, helping you fine-tune fermentation conditions for consistent bagels.
Check Current Price on Amazon →Start Your Sourdough Bagel Journey Today
Chocolate chip sourdough bagels represent the perfect intersection of traditional baking technique and homemade indulgence. The two-day process might seem time-consuming, but most of those hours are passive fermentation requiring zero effort from you. Once you’ve made your first batch, you’ll understand why bagel making is so deeply satisfying – the transformation from simple dough to chewy, flavorful bagels with melted chocolate chips is genuinely magical. The kitchen smells incredible throughout the process, and the finished product is incomparably better than anything you’ll find in a store.
With the right equipment and this detailed recipe, you’re set up for success immediately. Start with quality ingredients – a vigorous sourdough starter makes all the difference – and trust the fermentation timeline rather than rushing it. Your first batch might not be perfect, and that’s completely normal. By your third batch, you’ll have developed an intuition for when dough is properly fermented and how your oven behaves. Soon, warm chocolate chip sourdough bagels fresh from your own kitchen will become a regular weekend treat that family and friends will beg you to share.
Frequently Asked Questions
How do I know when my sourdough starter is ready to use?
Your starter should be fed 4-6 hours before mixing and should have doubled in volume with a bubbly, slightly domed top and pleasant sour smell. If it seems sluggish or hasn’t risen much, let it ferment longer at room temperature. A starter at peak is bubbly throughout, not just on top.
Can I use instant yeast instead of sourdough starter?
Yes, but you’ll lose the authentic sour flavor and chewy texture. Use about 7g of instant yeast and reduce fermentation to 4-6 hours bulk, then 2-4 hours final proof. The resulting bagels will be sweeter and less complex, but still delicious with chocolate chips.
Why do my bagels sink and stay on the bottom instead of floating?
This usually means they’re under-proofed. The final fermentation wasn’t long enough, so they don’t have enough gas to provide buoyancy. Try extending the second fermentation to 6-8 hours at room temperature, or overnight in the refrigerator. Slightly proofed bagels will float within 30 seconds of hitting boiling water.
What’s the difference between boiling with honey versus baking soda?
Both create the chewy crust, but honey adds subtle sweetness and creates deeper browning, while baking soda produces a slightly more tender crumb. For chocolate chip bagels, honey is recommended since it complements the chocolate. Start with a tablespoon per liter of water and adjust to your taste preference.
How should I store finished bagels to keep them fresh?
Wrap cooled bagels individually in plastic wrap and store at room temperature for up to two days, or freeze for up to three months. Toast frozen bagels directly from the freezer without thawing. This preserves the chewy texture better than refrigeration, which stales them faster.
As an Amazon Associate, Build & Bloom earns from qualifying purchases. We only recommend products we genuinely think are useful. Prices and availability vary; check Amazon for the latest.
Leave a Reply