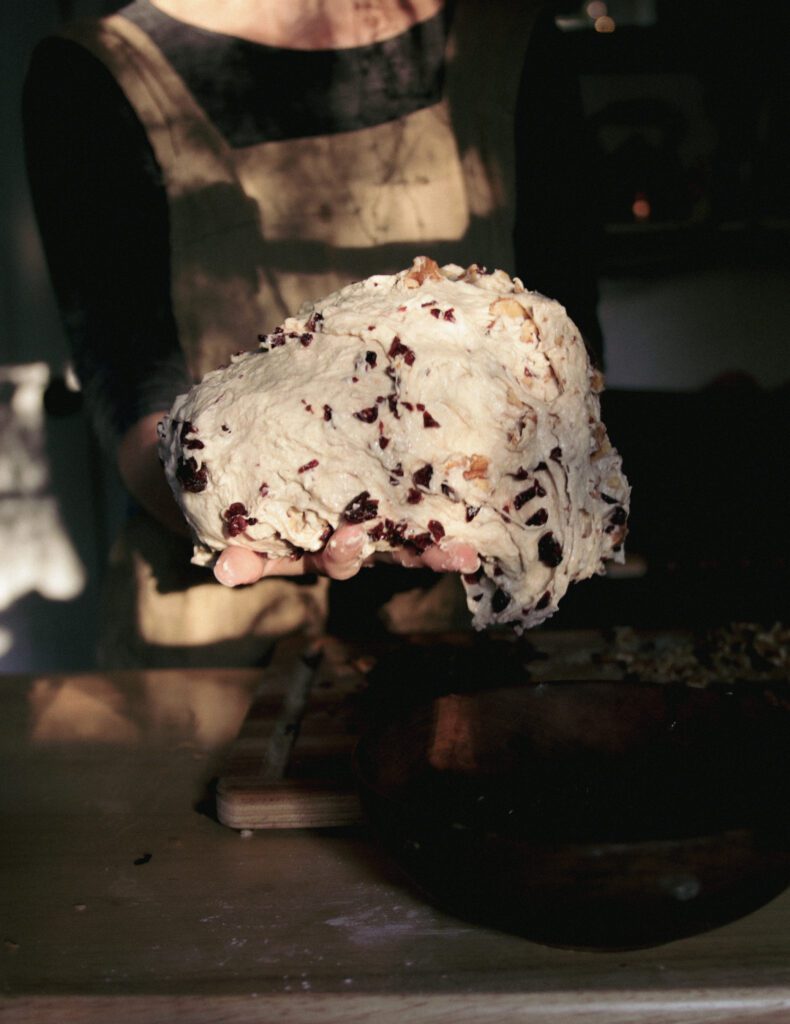

Sourdough baking can feel intimidating if you’re new to working with wild yeast cultures, but a cranberry walnut loaf is an excellent project that builds confidence. The long fermentation develops complex flavor while the mix-ins stay tucked inside the crumb, creating beautiful texture with every slice. Whether you’re a seasoned baker or working with your first starter, this recipe scales to your schedule and rewards patience with an unforgettable loaf.
How to Make Cranberry Walnut Sourdough Bread
This recipe uses a simple wet dough approach with a cold overnight rise, making it forgiving for home bakers. Plan for 24-36 hours of total time from mixing to cooling.
Ingredients
- 1 cup active sourdough starter (fed 4-8 hours prior, bubbly and doubled)
- 1.5 cups warm water (around 75-80 degrees Fahrenheit)
- 3.5 cups all-purpose or bread flour
- 1.5 teaspoons salt
- 0.75 cup dried cranberries
- 0.75 cup raw walnuts, roughly chopped and toasted
Method
Mix the dough
Combine your active starter with warm water in a large mixing bowl, stirring until mostly dissolved. Add flour and mix by hand or with a dough hook until all dry flour is incorporated and the dough is shaggy. There should be no dry flour pockets visible. Let this mixture rest for 30 minutes to one hour (this resting period is called autolyse).
Add salt and begin folding
Sprinkle salt over the rested dough and incorporate it using a pinch-and-fold technique: grab the dough from one side, fold it over the center, rotate the bowl slightly, and repeat 10-12 times. The dough will firm up. Cover with a damp cloth and rest for 30 minutes.
Fold in cranberries and walnuts
Perform another series of 6-8 stretch-and-folds, this time incorporating the toasted walnuts and dried cranberries gradually as you work. Distribute them evenly throughout the dough. Cover and rest for 30 minutes.
Continue bulk fermentation
Perform 2-3 more sets of gentle stretch-and-folds at 30-minute intervals over the next 2-3 hours. The dough should increase in volume by 30-50% and jiggle slightly when moved. After the final fold, cover and let it rest at room temperature for 1-2 hours (or until visibly puffy).
Shape and cold proof overnight
Turn the dough onto a lightly floured surface and gently pre-shape into a round. Rest for 20 minutes, then perform a final shaping by folding the edges toward the center with intention and tension. Place seam-side up in a floured banneton or bowl lined with a kitchen towel. Cover and refrigerate for 12-24 hours.
Preheat and score
Place a Dutch oven or covered baking vessel in your oven and preheat to 475 degrees Fahrenheit for at least 45 minutes. Turn the cold dough out onto parchment paper. Using a sharp blade or lame, score the top with a single long slash or your preferred pattern, cutting about 0.25 inch deep.
Bake covered
Transfer the dough (on parchment) into the preheated Dutch oven. Cover and bake for 20 minutes at 475 degrees. This traps steam and helps the loaf expand. Remove the lid and bake for another 25-30 minutes until the crust is deep golden brown.
Cool completely
Remove the loaf and transfer to a cooling rack. This step is essential: the interior continues to set as it cools. Wait at least 1-2 hours before slicing, or the crumb will appear gummy. A fully cooled loaf cuts cleanly and shows off the cranberry and walnut distribution.
- Active starter is the foundation of success–it should be bubbly, doubled in volume, and smell pleasantly sour before you mix. If your starter is sluggish, feed it and wait longer or warm it slightly.
- Don’t skip the cold overnight proof. This long, slow fermentation develops flavor and makes the dough easier to score and handle while cold.
- Toast your walnuts in a dry pan over medium heat for 5-7 minutes before adding them. This deepens their flavor and prevents them from becoming bitter during the long fermentation.
What to Look For in Sourdough Baking Equipment
- Dutch Oven or Bread Cloche: A heavy covered vessel traps steam during the initial bake, allowing the loaf to expand and develop a crispy crust. Look for cast iron or enameled ceramic that can handle oven temperatures of 500+ degrees Fahrenheit.
- Kitchen Scale: Sourdough baking is a science. Weighing ingredients in grams ensures consistency and helps you troubleshoot if a loaf doesn’t turn out as expected. Digital scales with tare buttons are most practical.
- Banneton or Proofing Basket: This specially shaped basket supports your dough during cold proofing and prevents it from spreading. Round bannetons are traditional and work well for boules (round loaves). Oval versions suit batards (oblong loaves).
- Bread Lame or Scoring Blade: A sharp, controlled cut into the dough before baking allows the loaf to expand predictably and creates the signature ear. Dedicated scoring tools are inexpensive and safer than using kitchen knives.
Staub Cast Iron Round Cocotte Dutch Oven
Best for: Serious sourdough bakers seeking heirloom quality
The Staub cocotte is purpose-built for bread baking with its tight-fitting lid and superior heat retention. Cast iron distributes heat evenly, ensuring a dark, crispy crust and open crumb structure. Available in multiple sizes; the 3.75-quart is ideal for a standard sourdough loaf. The enamel coating prevents rust and requires minimal seasoning maintenance. Generations of bakers trust this for consistent results.
Check Current Price on Amazon →Lodge Enameled Cast Iron Dutch Oven
Best for: Budget-conscious bakers starting out
Lodge delivers cast iron quality at a fraction of premium prices. The enamel coating comes in classic colors and handles heat up to 500 degrees Fahrenheit. A 5-quart version accommodates most home sourdough batches. While slightly heavier and rougher in finish than luxury brands, Lodge ovens perform identically for bread baking. An excellent entry point into sourdough without breaking the bank.
Check Current Price on Amazon →Leuanshi Digital Kitchen Scale
Best for: New bakers learning to measure by weight
This affordable digital scale displays grams and ounces clearly, includes a tare button to zero out container weight, and has a 5 kg capacity. The flat stainless steel platform is easy to clean. No intimidating buttons or settings–just place your bowl, press tare, and pour. For the price, it’s excellent for following sourdough recipes that rely on precise ingredient ratios.
Check Current Price on Amazon →Hario V60 Acaia Pearl Digital Scale
Best for: Precision bakers and professionals
Though marketed for coffee, this Italian-engineered scale is prized by artisan sourdough bakers for its accuracy to 0.1 grams and ultra-fast response time. It connects to your phone via Bluetooth to track hydration percentages and baker’s math automatically. The design is minimalist and beautiful. It represents a significant investment, but serious bakers appreciate the precision and data-logging capabilities for recipe development.
Check Current Price on Amazon →Final Recommendation
Cranberry walnut sourdough is one of the most rewarding breads to bake at home because the fermentation process develops incredible depth while the mix-ins add textural interest and visual appeal. The recipe respects your schedule with its flexible timing, and the cold overnight proof is actually a feature, not a bug–it gives you freedom to bake whenever you wake up. Invest in a quality Dutch oven and a banneton basket, and you’ll have the two pieces of equipment that matter most. Everything else enhances the experience but isn’t essential.
Start with this recipe using your existing tools if needed, then upgrade slowly based on what frustrates you most. If you struggle with measurements, get the scale first. If your loaves spread instead of rise, upgrade to a proper banneton. The sourdough community is generous with knowledge, so don’t hesitate to ask questions in baking forums if something doesn’t work. Your first loaf might not be perfect, but the second one will be better, and by the fifth, you’ll have internalized the feel of proper fermentation. That’s when the magic of sourdough truly unlocks.
Frequently Asked Questions
How do I know when my sourdough starter is ready to use?
Your starter should be fed 4-8 hours before mixing and should have doubled in volume with a bubbly, foamy surface. It should smell pleasantly sour and tangy, not acetone-like. When you poke it, it should spring back slowly but not immediately flatten. If unsure, perform the float test: drop a small spoon of starter into water. If it floats, it’s ready.
Can I speed up the fermentation if I’m short on time?
Yes, but you’ll sacrifice flavor. Warmer temperatures (around 78 degrees Fahrenheit) speed up fermentation. You can reduce the bulk fermentation time by 1-2 hours and the cold proof to 6-8 hours instead of overnight. However, the extended cold proof develops the complex, tangy flavor that makes sourdough special, so avoid rushing if possible.
What if my dough is too sticky to work with?
Sticky dough is normal in sourdough and often produces a more open, flavorful crumb. Instead of adding flour, wet your hands lightly and use a dough scraper. If the dough is genuinely unmanageable, your hydration was too high–reduce water by 50 grams next time. Always measure by weight, not volume, for consistency.
Can I use frozen or fresh cranberries instead of dried?
Dried cranberries work best because they hold their shape and don’t release excess moisture. Fresh cranberries will make the dough wetter and may blur together during fermentation. If using frozen, thaw and pat dry first. Avoid cranberry juice or sauce, which will ruin the dough structure.
Why does my loaf have a thick, gummy layer under the crust?
This happens when the loaf is sliced before fully cooling. The interior still contains steam that hasn’t fully set. Always cool for at least 1-2 hours on a rack before cutting. The crumb will appear dry and open once cooled completely. Patience with cooling is non-negotiable for proper texture.
As an Amazon Associate, Build & Bloom earns from qualifying purchases. We only recommend products we genuinely think are useful. Prices and availability vary; check Amazon for the latest.
Leave a Reply