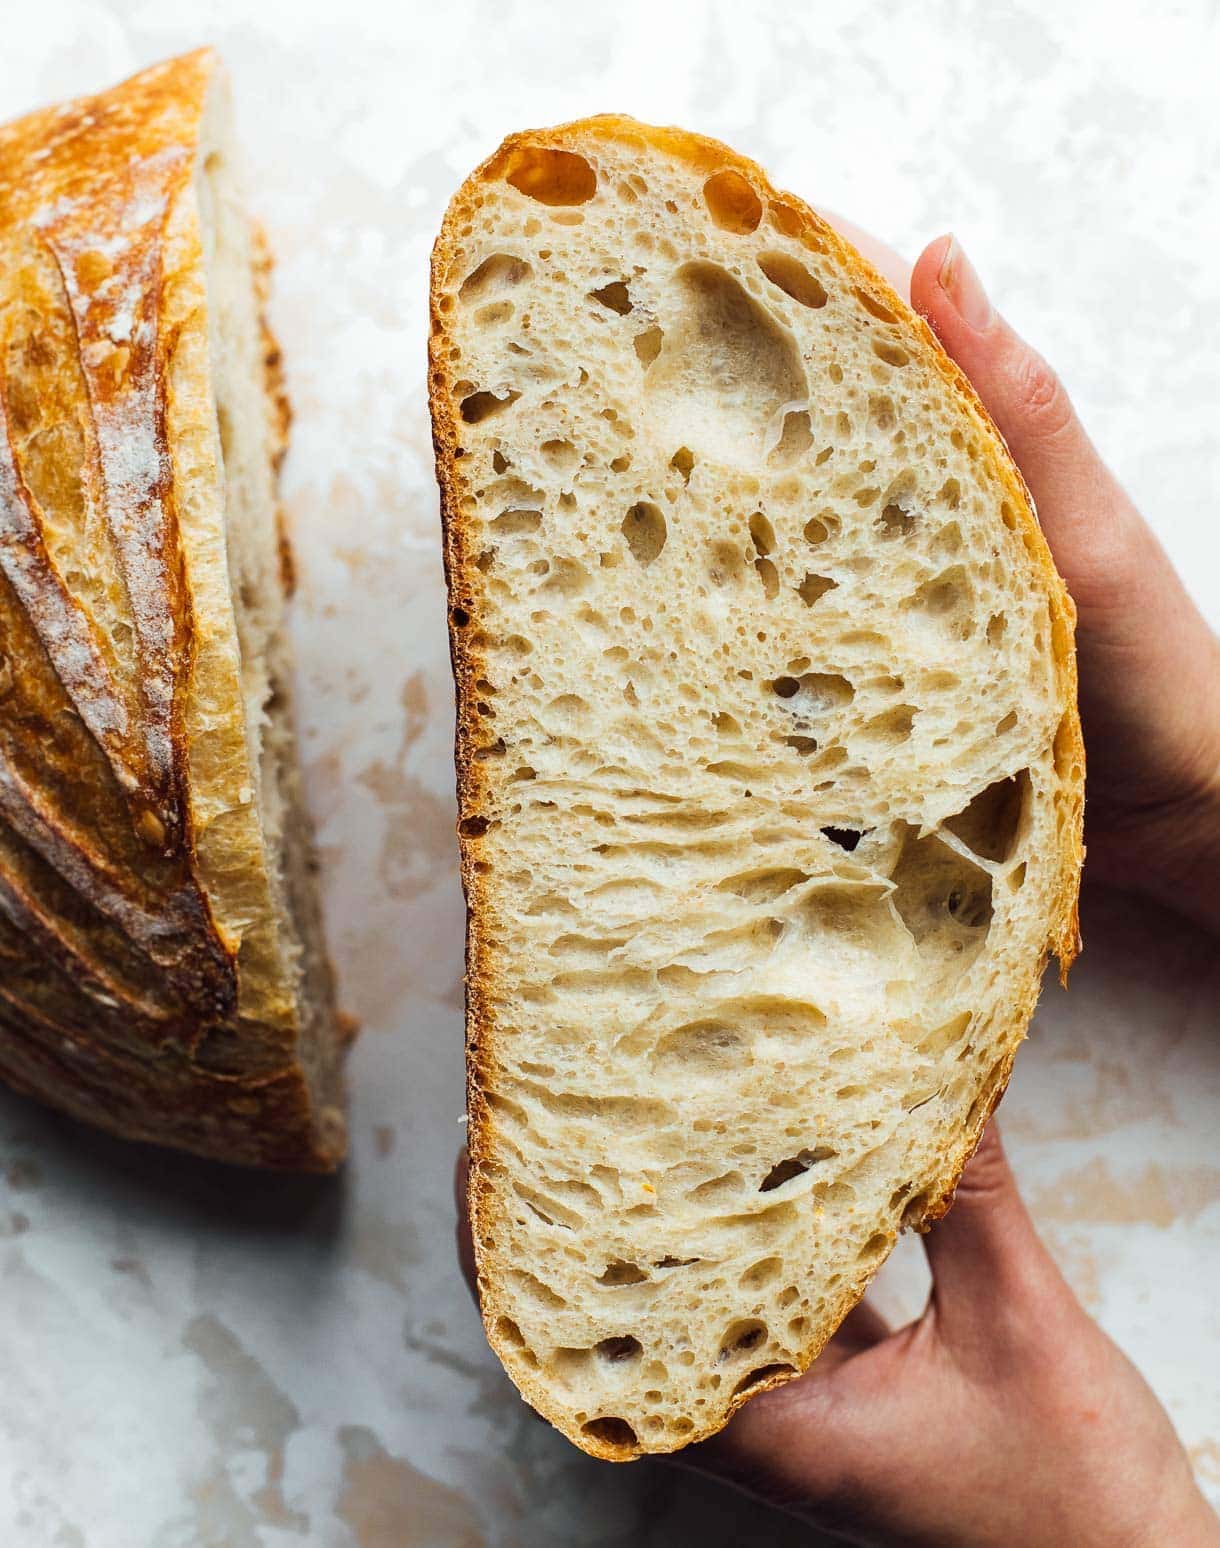

You’ve seen those gorgeous loaves of sourdough with their perfect golden crust and airy interior, and you want to bake one at home. The good news: sourdough is absolutely achievable for home bakers, even beginners. What it requires isn’t fancy equipment or special skills—just time, patience, and understanding the fermentation process. In this guide, we’ll walk you through every stage of making delicious sourdough bread from start to finish.
How to Make Homemade Sourdough Bread
Sourdough baking is a multi-day process broken into distinct phases: mixing, bulk fermentation, shaping, and final proof. Each step builds on the last to develop deep flavor and the characteristic texture sourdough lovers crave.
Ingredients
- Active sourdough starter (fed and bubbly) – 100g
- Bread flour or all-purpose flour – 500g
- Water – 350ml (filtered or tap, room temperature)
- Sea salt – 10g
- Additional flour for dusting and handling
Method
Mix Your Dough (Autolyse)
Combine flour and water in a large mixing bowl, stirring until all flour is hydrated and no dry bits remain. This is called the autolyse. Let this rest for 30 minutes to an hour at room temperature. This resting period allows the flour to fully absorb water, which improves gluten development and makes the dough easier to handle later.
Incorporate Starter and Salt
After the autolyse, add your active sourdough starter and salt to the dough. Wet your hands and gently squeeze and fold the dough until starter and salt are fully incorporated. This should take 5-10 minutes of folding motions. The dough will feel sticky and shaggy at this point, which is completely normal.
Perform Stretch and Folds
Over the next 2-3 hours, perform four sets of stretch and folds at 30-minute intervals. For each set, wet your hand, grab one side of the dough, stretch it upward, and fold it over the center. Rotate the bowl and repeat from all four sides. These folds build strength without traditional kneading and develop gluten structure gradually.
Begin Bulk Fermentation
After your final set of stretches and folds, let the dough bulk ferment at room temperature (68-75F is ideal) for 4-6 hours total. You’re looking for visible bubbles throughout the dough and a volume increase of about 30-50%. The dough should feel airy but not overproofed. This is the most flavor-developing stage of your sourdough.
Pre-shape and Bench Rest
Turn your dough out onto a lightly floured surface and pre-shape it into a round by gently pulling the edges toward the center. Let it rest for 20-30 minutes. This relaxation period allows the gluten to recover after handling and prepares the dough for its final shaping.
Final Shape
Flip your pre-shaped dough so the seam side is down. Fold the top third down toward you and seal gently. Then fold the bottom third up and seal. Finally, roll the dough toward you tightly, creating surface tension. This shaping traps gas and creates the structure needed for oven spring and a beautiful score mark.
Cold Proof Overnight
Place your shaped dough seam-side up in a proofing basket or bowl lined with a floured kitchen towel. Cover and refrigerate for 12-16 hours. This cold fermentation develops complex flavors, makes scoring easier, and gives you flexibility in baking timing. The dough will be cold and less puffy than a room-temperature proof.
Score and Bake
Preheat a covered baking vessel (Dutch oven) in a 450F oven for 45 minutes. Remove cold dough from the fridge, turn it onto parchment paper, and score the top with a sharp blade at a 30-degree angle. Carefully transfer to the hot vessel, cover, and bake for 20 minutes. Remove the cover and bake another 25-30 minutes until deep golden brown. Cool completely on a rack before slicing.
- Keep your starter at room temperature and feed it 4-8 hours before using. It should be actively bubbling and at peak rise—roughly doubled from when you fed it.
- Water temperature matters: use cooler water (65-68F) in summer to slow fermentation and warmer water (75-80F) in winter to speed it up, targeting a bulk fermentation of 4-6 hours total.
- Don’t skip the cold proof. Refrigerating overnight makes your dough easier to score, improves flavor development, and prevents overproofing, which is the most common mistake.
Essential Sourdough Baking Equipment Guide
- Dutch Oven or Covered Baking Vessel: This piece of equipment is non-negotiable for sourdough. The covered vessel traps steam during the first part of baking, which allows the dough to expand (oven spring) and develop that signature crispy, caramelized crust. Look for one that fits your oven and can handle 500F temperatures.
- Bench Scraper or Dough Cutter: A bench scraper is invaluable for handling sticky dough, dividing portions, and cleaning your work surface. It provides leverage when shaping and helps you perform stretch-and-fold motions without adding excessive flour. A stainless steel or plastic scraper works equally well.
- Proofing Basket or Banneton: This specialty basket (or a bowl lined with a kitchen towel) holds your shaped dough during its final proof. It supports the dough’s structure and creates those beautiful ring patterns. Baskets are inexpensive but optional—a bowl works perfectly fine for beginners.
- Kitchen Scale: Sourdough baking relies on precise ratios rather than cup measurements. A digital scale measuring in grams ensures consistency, reproducibility, and better results. This is one investment that will improve every bake you do.
Le Creuset Enameled Cast Iron Dutch Oven (5.5 QT)
Best for: Serious home bakers seeking professional results
The gold standard for sourdough baking, this French-made Dutch oven distributes heat evenly and retains it perfectly, creating exceptional oven spring and crust development. The 5.5-quart capacity accommodates most home sourdough loaves. Its enamel coating resists wear and eliminates seasoning maintenance. This is an investment piece that will outlast decades of baking and become a kitchen heirloom.
Check Current Price on Amazon →Tramontina Enameled Cast Iron Dutch Oven (5.5 QT)
Best for: Budget-conscious beginners testing sourdough
This Brazilian-made Dutch oven performs nearly identically to premium brands at a fraction of the cost. The cast iron construction and enamel coating handle sourdough baking beautifully, with excellent heat retention and distribution. It’s slightly lighter than competitors, making it easier to handle, and is fully oven-safe to 500F. Perfect for bakers who want to commit to sourdough without premium pricing.
Check Current Price on Amazon →OXO Good Grips Stainless Steel Bench Scraper
Best for: New sourdough bakers learning dough handling
This ergonomic bench scraper makes working with sticky sourdough dough dramatically easier. The stainless steel blade glides smoothly under dough for turns and folds, while the comfortable grip reduces hand fatigue during multi-hour baking sessions. The measurement markings on the blade help portion doughs accurately. At under $10, it’s an essential tool that pays for itself in improved technique within a few bakes.
Check Current Price on Amazon →Staub Round Cocotte Cast Iron Dutch Oven (3.75 QT)
Best for: Bakers who want luxury construction and elegant presentation
Staub’s French heritage shines in this premium Dutch oven, featuring superior enamel that resists chipping and a matte black interior that hides staining. The self-basting lid design (with interior knobs) encourages optimal steam circulation, resulting in exceptional crust development. While smaller than some options, the 3.75-quart capacity suits artisan-style boules perfectly. This is a showpiece worth displaying.
Check Current Price on Amazon →Start Your Sourdough Journey Today
Making sourdough bread at home is one of the most rewarding kitchen projects you can undertake. Yes, it takes time and patience—but that’s actually a feature, not a bug. The long fermentation develops complex flavors that commercial yeast can’t match, and the hands-on process connects you to bread-making traditions going back centuries. You don’t need expensive equipment or advanced skills. With a mature starter, basic ingredients, and the steps outlined above, you’re equipped to bake extraordinary loaves that rival your local bakery.
Start with your first loaf, document what happens at each stage, and trust the process. Your second loaf will be better than your first. By your tenth loaf, you’ll have internalized the rhythm of sourdough and begun adapting recipes to your kitchen’s temperature and humidity. Join the global community of home sourdough bakers—share photos, ask questions, and celebrate your crusty, tangy, hole-filled victories. The best time to start was yesterday; the second-best time is right now.
Frequently Asked Questions
How do I know if my sourdough starter is ready to use?
Your starter should be fed 4-8 hours before use and be actively bubbly with a slightly domed or peaked top. At its peak, it should have roughly doubled from feeding and smell pleasantly sour. If you poke it and it springs back slowly, it’s ready. If it falls flat, feed it again and wait longer.
What if my dough is too sticky to handle?
Sourdough dough is naturally stickier than sandwich bread dough—this creates the open crumb structure you want. Rather than adding flour, wet your hands instead. If it’s genuinely too sticky to shape, you may have overproofed it or used too much water. For future bakes, reduce water by 5% or shorten bulk fermentation by 30 minutes.
Can I bake sourdough without a Dutch oven?
A Dutch oven is highly recommended because it traps steam for crust development, but you can use a covered baking stone, heavy roasting pan with foil cover, or even a clay pot. The key is trapping steam in the first 20 minutes of baking. Results won’t be quite as dramatic, but you’ll still get good bread.
Why does my sourdough have a gummy interior?
Underbaking is the most common cause. Sourdough needs longer baking than commercial bread—aim for 45-50 minutes total in a covered Dutch oven, checking for deep golden-brown color. Overproofing also causes this, as does slicing too soon. Cool your loaf completely (at least 1 hour) before cutting, as the crumb continues setting as it cools.
How long can I store sourdough, and what’s the best way?
Sourdough keeps for 3-4 days at room temperature in a paper bag or cloth, which maintains crispness. For longer storage, slice and freeze for up to 3 months. Never refrigerate whole loaves, as cool temperatures accelerate staling. Thaw frozen slices at room temperature or toast directly from frozen.
As an Amazon Associate, Build & Bloom earns from qualifying purchases. We only recommend products we genuinely think are useful. Prices and availability vary; check Amazon for the latest.
Leave a Reply