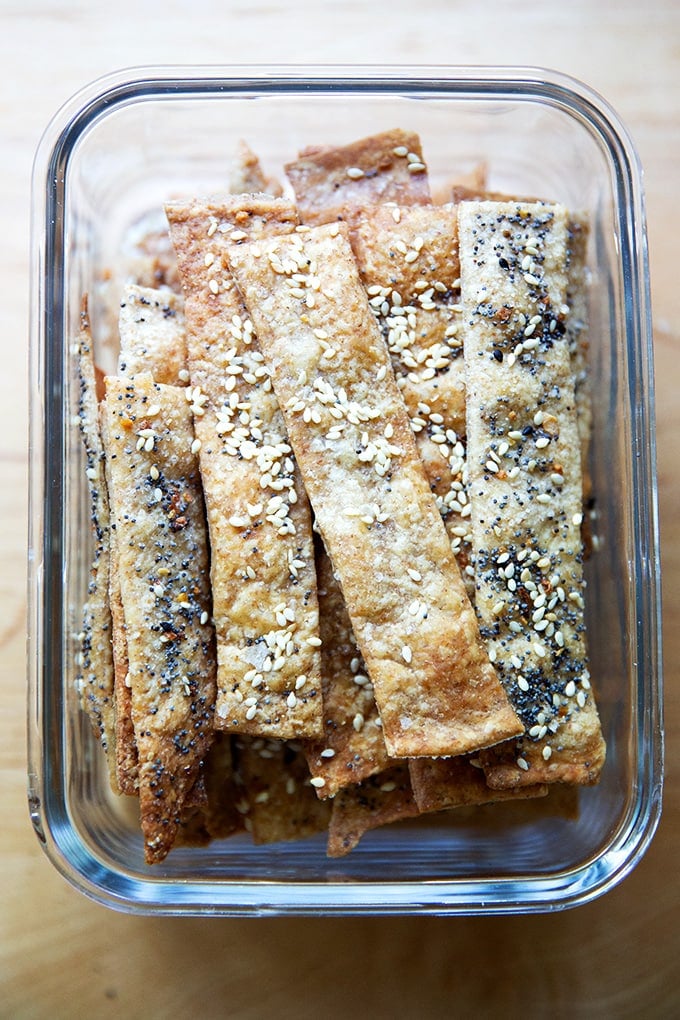

If you maintain a sourdough starter, you know the guilt of discarding perfectly good starter each week. These easy crackers are the answer: they transform that discard into something delicious and crispy, use minimal ingredients you already have on hand, and come together in under 30 minutes from mixing to eating. No special skills required—just a bowl, an oven, and about 20 minutes of hands-on time.
How to Make Sourdough Discard Crackers
This recipe turns one cup of sourdough discard into a full sheet pan of addictive crackers. The dough is simple and forgiving, making it perfect for beginner bakers.
Ingredients
- 1 cup active sourdough discard (room temperature)
- 1 cup all-purpose flour
- 1/4 cup neutral oil (vegetable, canola, or light olive oil)
- 1 teaspoon sea salt
- 1/2 teaspoon garlic powder or Italian seasoning (optional but recommended)
Method
Mix the dough
In a medium bowl, combine the sourdough discard, flour, oil, salt, and your chosen seasoning. Stir with a wooden spoon until a shaggy dough forms. The mixture will be slightly sticky but should come together without additional liquid. Mix for about one minute until all flour is incorporated.
Knead briefly
Turn the dough out onto a clean work surface and knead for 2-3 minutes by hand. You’re not aiming for a smooth, elastic dough like bread; just work out any lumps and bring it to a cohesive ball. This develops enough gluten to hold the crackers together during baking.
Prepare for rolling
Preheat your oven to 375°F. Line a baking sheet with parchment paper. Divide the dough in half—this makes it much easier to roll out thin without the pieces becoming too large to handle.
Roll out the dough
Place the first piece of dough between two sheets of parchment paper. Using a rolling pin, roll it as thin as possible—aim for about 1/8 inch thickness or even thinner for extra-crispy crackers. The thinner you roll, the crunchier they’ll be. Peel away the top parchment and transfer the bottom parchment with dough to your prepared baking sheet.
Cut into pieces
Using a sharp knife or pizza cutter, cut the rolled dough into roughly 1.5-inch squares or rectangles. Don’t separate them yet; just score the dough so pieces break apart easily after baking. This step takes just a minute and ensures even-sized crackers.
Bake until crispy
Bake at 375°F for 12-15 minutes, checking at the 12-minute mark. The crackers should be golden brown and feel completely firm to the touch—not soft or bendy. Bake longer if needed for maximum crispness. The edges will brown slightly faster than the center, which is normal and adds flavor.
Cool completely
Remove the baking sheet from the oven and let the crackers rest on the pan for 5 minutes. This allows them to firm up further. Transfer to a wire rack to cool completely before breaking into individual pieces. They will continue to crisp as they cool.
Store properly
Once fully cooled, store the crackers in an airtight container at room temperature for up to one week. Keep them away from moisture and steam to maintain their crunch. If they soften, pop them back in a 300°F oven for 5 minutes to re-crisp.
- Don’t skip the rolling-thin step—thicker crackers will be chewy rather than crispy. Aim for transparency when you hold them up to light.
- Season the second batch differently: try everything bagel seasoning, za’atar, rosemary and sea salt, or just nutritional yeast for a cheesy flavor.
- If your discard is very thick and stiff, add a tablespoon of water at a time until the dough is workable but not wet.
What to Look For in Sourdough Baking Equipment
- Rolling Surface Quality: A smooth, non-porous work surface or marble board prevents sticking and allows even rolling. Non-stick surfaces reduce the need for excess flour, which can toughen the crackers.
- Rolling Pin Weight and Length: A heavier rolling pin (wooden or marble) requires less pressure and rolls more evenly. A 16-18 inch length handles full batches efficiently without repositioning constantly.
- Parchment Paper Quality: Heavy-duty, reusable parchment or silicone baking mats prevent sticking without adding flour. Silicone mats are especially helpful because they allow you to easily transfer dough to the oven.
- Oven Thermometer Accuracy: Many home ovens run hot or cold, affecting bake time and browning. An accurate thermometer ensures 375°F is truly 375°F, preventing burnt or underbaked crackers.
RSVP Marble Rolling Pin
Best for: Serious home bakers and sourdough enthusiasts
This weighted marble rolling pin distributes pressure evenly and stays naturally cool, preventing dough from sticking without requiring extra flour. At 16 inches long with a comfortable grip, it’s ideal for rolling thin cracker dough and other pastries. The smooth marble surface is naturally non-stick, making it easy to clean and perfect for repeated batches. Home bakers consistently praise its durability and the quality of thin, even rolls it produces.
Check Current Price on Amazon →Mrs. Anderson’s Silicone Baking Mat
Best for: Budget-conscious bakers wanting reusable parchment
These reusable silicone baking mats eliminate the need for parchment paper and create a naturally non-stick surface perfect for rolling crackers. At a fraction of the cost of continuous parchment purchases, they save money long-term while reducing waste. The mats are food-safe, easy to clean, and work in ovens up to 480°F. They’re thin enough to allow easy dough transfer and tough enough to withstand years of use.
Check Current Price on Amazon →Prepara Heavy-Duty Parchment Paper
Best for: New bakers who prefer disposable, reliable parchment
This chlorine-free, unbleached parchment paper is thicker and more durable than standard brands, preventing tears during rolling and transfer. It’s pre-cut to fit standard baking sheets, saving prep time. The paper releases crackers easily without sticking, and the heavy weight means you can reuse each sheet 2-3 times. It’s the most popular parchment choice for sourdough crackers and pastries.
Check Current Price on Amazon →Matfer Bourgeat Wooden Rolling Pin
Best for: Professional-level bakers seeking premium craftsmanship
This French-made hardwood rolling pin is handcrafted from dense, sustainably-sourced wood that becomes smoother and more non-stick with use. At 18 inches, it handles large batches effortlessly. The tapered design allows precise control for ultra-thin crackers, and the weight reduces strain on wrists during rolling. This is the choice of professional pastry chefs and serious home bakers who value durability and heirloom-quality tools.
Check Current Price on Amazon →Final Recommendation
Sourdough discard crackers are one of the easiest ways to use up your weekly starter maintenance and impress family and friends with homemade, addictive snacks. The beauty of this recipe lies in its simplicity—five ingredients, one bowl, and 20 minutes of work produce restaurant-quality crackers that cost pennies. Whether you’re a sourdough beginner or seasoned baker, these crackers prove that some of the best kitchen wins come from the simplest processes.
Invest in just one quality tool—a good rolling pin or silicone mat—and you’ll transform your cracker-making process from frustrating to effortless. The equipment recommendations above range from budget-friendly to splurge-worthy, but even the most affordable options will serve you beautifully for years. Once you master this basic recipe, you’ll find yourself making a batch weekly, experimenting with different seasonings, and wondering why you ever threw sourdough discard away.
Frequently Asked Questions
Can I use inactive or refrigerated sourdough discard?
Yes, both work fine. Active (recently fed) discard creates slightly airier crackers due to fermentation activity, but refrigerated discard produces equally delicious, crispy results. The difference is minimal for this recipe. Room-temperature discard mixes more easily, so warm up cold discard for 15 minutes if possible.
What if my crackers turned out chewy instead of crispy?
This usually means either the dough wasn’t rolled thin enough or the oven temperature was too low. For the next batch, roll to nearly transparent thinness and use an oven thermometer to confirm 375°F. If crackers are still soft after cooling, they weren’t fully dried out—bake 5 more minutes at 300°F to re-crisp them.
Can I add other seasonings or toppings?
Absolutely. Before baking, brush with water and sprinkle everything bagel seasoning, nutritional yeast, finely chopped rosemary, sesame seeds, or grated Parmesan. You can also mix seeds into the dough itself. Keep toppings light so they crisp rather than burn.
How do I prevent crackers from puffing up or becoming thick?
Roll as thin as possible before baking, and press down gently on the dough with the rolling pin at the end to ensure no air pockets. Some initial puffing is normal and desired for a light crunch, but ultra-thin rolling prevents this from becoming excessive.
How long do these crackers stay crispy?
In an airtight container at room temperature, they stay perfectly crispy for 5-7 days. Humidity is their enemy, so keep them away from steam and moisture. If they soften, a quick 5-minute stint in a 300°F oven re-crisps them instantly.
As an Amazon Associate, Build & Bloom earns from qualifying purchases. We only recommend products we genuinely think are useful. Prices and availability vary; check Amazon for the latest.
Leave a Reply