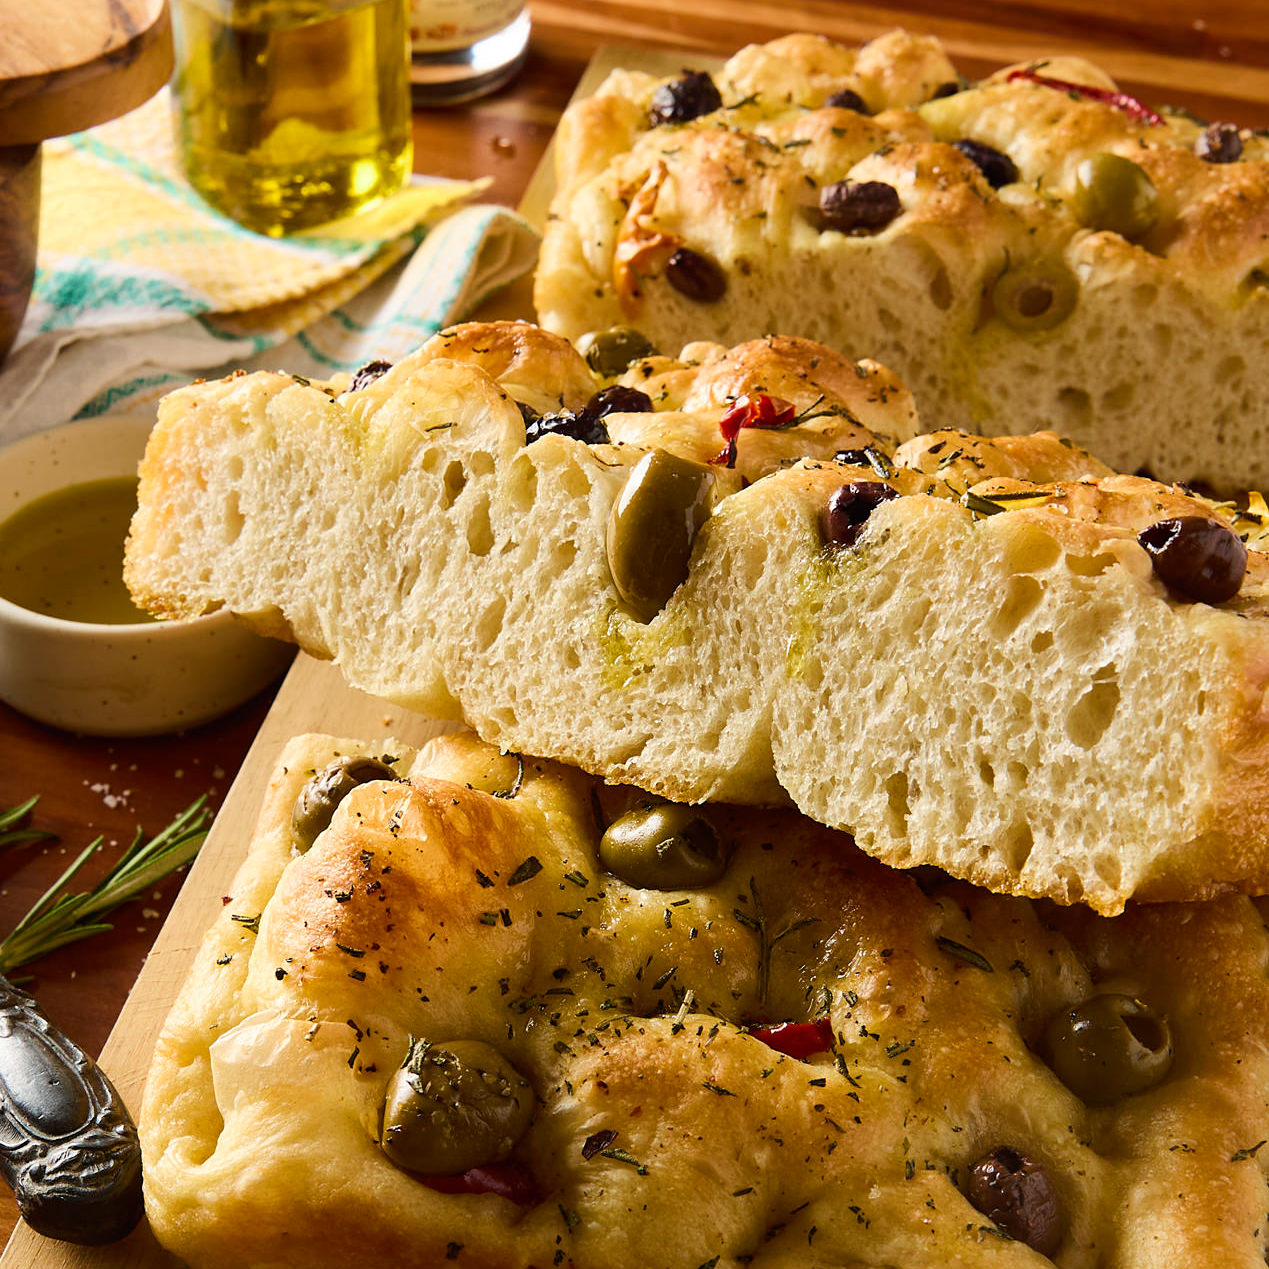

Making sourdough focaccia at home sounds intimidating, but it’s actually one of the easiest breads to master once you understand the basic rhythm. Unlike rustic loaves that demand shaping skill, focaccia relies on a wet dough that practically spreads itself across your pan. If you’ve been hesitant to bake with sourdough, focaccia is the forgiving entry point that delivers bakery-quality results every single time.
How to Make Easy Sourdough Focaccia
This method uses a long, slow fermentation to develop deep flavor while keeping hands-on time minimal. The wet dough becomes stretchy and airy naturally.
Ingredients
- 1 cup active sourdough starter (fed 4-8 hours prior, bubbly and at peak)
- 1.5 cups warm water (around 80-85 degrees F)
- 3.5 cups bread flour (or all-purpose flour)
- 1.5 teaspoons fine sea salt
- 3 tablespoons extra virgin olive oil (plus more for topping)
- Coarse sea salt and fresh rosemary sprigs for finishing
Method
Mix the dough
Combine your active starter, warm water, and flour in a large mixing bowl. Stir until all flour is incorporated and no dry bits remain. This is called the autolyse phase. Let rest for 30 minutes to an hour, allowing the flour to fully hydrate. This rest period makes the dough easier to work with and improves gluten development.
Add salt and incorporate olive oil
Sprinkle salt over the rested dough and drizzle with olive oil. Using wet hands, fold the dough over itself repeatedly for 2-3 minutes until salt and oil are fully distributed. The dough will feel slippery and loose, which is exactly right. This folding motion builds strength without traditional kneading.
Perform stretch-and-fold sessions
Over the next 4 hours, perform three to four stretch-and-fold sessions spaced about 60 minutes apart. Wet your hand, grab one side of the dough, stretch it up and fold it over itself, then rotate the bowl and repeat. After each session, you’ll notice the dough becoming smoother and more cohesive. These folds develop the gluten network that creates those signature air pockets.
Execute the bulk fermentation
After your final fold, let the dough rest at room temperature for 4-8 hours until it’s visibly puffy and increased in volume by about 50 percent. You’re looking for gentle bubbles visible around the edges and a jiggly texture when you gently shake the bowl. Don’t aim for dramatic doubling; sourdough focaccia benefits from a controlled rise.
Shape into the baking pan
Oil a rectangular baking pan generously with olive oil. Transfer the entire dough to the pan, using oiled hands to gently stretch it toward the corners. The dough will be slack and won’t hold tension like typical bread dough. Let it relax for 10-15 minutes, then stretch it again. This two-step stretching prevents shrinking during final proof.
Create the dimple pattern
Cover the pan loosely with plastic wrap or a kitchen towel and refrigerate overnight for 12-18 hours. This cold fermentation adds flavor and makes the dough easier to dimple. Before baking, remove from the refrigerator and let warm to room temperature for 1-2 hours. Once ready, using your fingertips or knuckles, press dimples all over the surface, creating the signature focaccia texture. Brush with olive oil, then sprinkle with coarse salt and rosemary.
Final proof and bake
Allow the dimpled dough to rest for 30-45 minutes at room temperature. Preheat your oven to 450 degrees F. Bake for 20-25 minutes until the top is deep golden brown and slightly crispy. The edges should be darker than the center. Remove from the oven and brush with a final light coating of olive oil while still warm. This keeps the crust tender.
Cool and serve
Let the focaccia cool in the pan for 5-10 minutes, then transfer to a wire rack. While it’s tempting to slice immediately, letting it cool slightly keeps the interior crumb from compressing. Serve warm or at room temperature with good olive oil for dipping.
- If your kitchen is cold, fermentation will take longer; if it’s warm, reduce times accordingly. Aim for visible dough activity (bubbles and rise) rather than clock time.
- Don’t skip the overnight cold fermentation in the refrigerator–it develops superior flavor and makes the dough much easier to handle and dimple.
- Focaccia is forgiving with toppings. After dimpling and before the final proof, try caramelized onions, sun-dried tomatoes, or sliced olives pressed into the surface.
What to Look For in Sourdough Baking Equipment
- Dough scraper or bench knife: A stiff, flat tool made of metal or plastic that lets you handle wet, sticky dough without using flour. Essential for stretch-and-fold sessions and transferring dough between containers. Prevents over-flouring your dough, which weakens gluten and dries out the crumb.
- Instant-read thermometer: Measures water and dough temperature to ensure proper fermentation speed. Sourdough success depends on temperature control–too cold and fermentation stalls, too hot and it races out of control. An accurate thermometer removes guesswork.
- Rectangular baking pan: A metal sheet pan or baking dish that’s roughly 9×13 inches allows focaccia to spread evenly and develop crispy edges. Look for heavy-duty steel that conducts heat evenly and doesn’t warp. Ceramic or glass options work but heat differently and may require temperature adjustment.
- Wire cooling rack: Allows air to circulate under the focaccia after baking, preventing steam from soggifying the bottom crust. Keeps the bread from sweating and maintains that coveted crispy exterior while the interior sets.
OXO Good Grips Dough Scraper
Best for: All sourdough bakers
This stainless steel bench knife features a comfortable grip and sharp edges that cleanly cut through sticky dough. The 4.5-inch width is ideal for stretch-and-fold work and transferring dough. Dishwasher safe, durable, and an absolute workhorse in any sourdough kitchen. Most reviewers note it transforms handling wet doughs from frustrating to straightforward, making it an indispensable tool regardless of skill level.
Check Current Price on Amazon →Winco Plastic Dough Scraper
Best for: Budget-conscious beginners
An affordable plastic alternative that handles stretch-and-fold work without the metal price tag. The flexible plastic blade glides under dough smoothly, and the straight edge scrapes bowl edges clean. At a fraction of the cost of premium options, it’s a smart entry point for testing whether you’ll stick with sourdough baking long-term. Many bakers keep both plastic and metal versions on hand.
Check Current Price on Amazon →ThermoPro Instant Read Digital Meat Thermometer
Best for: Sourdough beginners monitoring fermentation
This fast-reading digital thermometer shows dough temperature in seconds, removing temperature guesswork from fermentation timing. The probe is thin enough to insert without damaging dough, and the large LCD display reads clearly. Perfect for verifying that your water is the right temperature and tracking how bulk fermentation is progressing at different room temperatures. Essential for troubleshooting slow or overly fast fermentation.
Check Current Price on Amazon →Bread Boss Stainless Steel Bench Scraper
Best for: Serious home bakers
A premium-grade bench knife with a polished stainless steel blade and ergonomic handle designed specifically for bread work. The weight and balance make stretch-and-fold sessions feel effortless, and the edge stays sharp through hundreds of uses. Professional bakeries use versions of this tool, so you’re investing in equipment trusted by people who bake bread daily. The quality justifies the higher price point.
Check Current Price on Amazon →Final Recommendation
Sourdough focaccia is achievable for any baker willing to embrace patience and let fermentation do the heavy lifting. The wet dough actually works in your favor–it creates those characteristic large, irregular air pockets without requiring advanced shaping skill. Start with quality equipment like a good dough scraper and thermometer, follow the fermentation timeline without rushing, and you’ll produce focaccia that rivals your favorite bakery. The overnight cold fermentation is the secret ingredient that delivers flavor and reliability, so don’t skip it even when time feels tight.
Once you master the basic formula, focaccia becomes your blank canvas for creativity. Top it with fresh rosemary and sea salt, or experiment with caramelized onions, roasted garlic, or herb-infused oils. The dough itself is forgiving enough that minor variations in temperature or timing won’t ruin your results. Keep a reliable thermometer nearby, use a proper bench scraper to handle the sticky dough confidently, and trust the process. Within a few bakes, making exceptional sourdough focaccia will feel as natural as mixing a simple salad.
Frequently Asked Questions
Can I use whole wheat flour instead of bread flour?
Yes, but whole wheat absorbs more water, so you may need to add an extra 2-3 tablespoons of water to achieve the right dough consistency. Whole wheat focaccia will have a denser crumb and nuttier flavor. You can also do a 50/50 blend of whole wheat and bread flour for a middle ground.
What if my sourdough starter isn’t very active?
If your starter doesn’t have lots of visible bubbles and isn’t doubling between feedings, fermentation will take longer. Feed it regularly (once or twice daily) for several days until it’s vigorous again. You can still bake, but extend all fermentation times by 50 percent and watch for dough activity rather than relying on clock time.
How do I know when the bulk fermentation is complete?
Look for the dough to increase visibly in volume (roughly 50 percent more) and observe bubbles around the edges and throughout. When you tilt the bowl gently, the dough should jiggle slightly. The surface might show some small dome shape, but it shouldn’t double dramatically like commercial yeast doughs–sourdough ferments more subtly.
Can I skip the overnight cold fermentation?
Technically yes, but you’ll sacrifice flavor complexity and the dough will be harder to handle. The cold rest allows flavor compounds to develop and makes the dough less sticky and easier to dimple. If you’re rushed, at least refrigerate for 4-6 hours instead of overnight.
Why is my focaccia dense or gummy inside?
This usually means underbaking or not cooling enough before slicing. Focaccia needs a full 20-25 minutes at temperature to bake through, and the interior sets slightly as it cools. Try cooling for at least 15-20 minutes before slicing. If it’s still wet, your oven may run cool, so use an oven thermometer to verify the actual temperature.
As an Amazon Associate, Build & Bloom earns from qualifying purchases. We only recommend products we genuinely think are useful. Prices and availability vary; check Amazon for the latest.
Leave a Reply