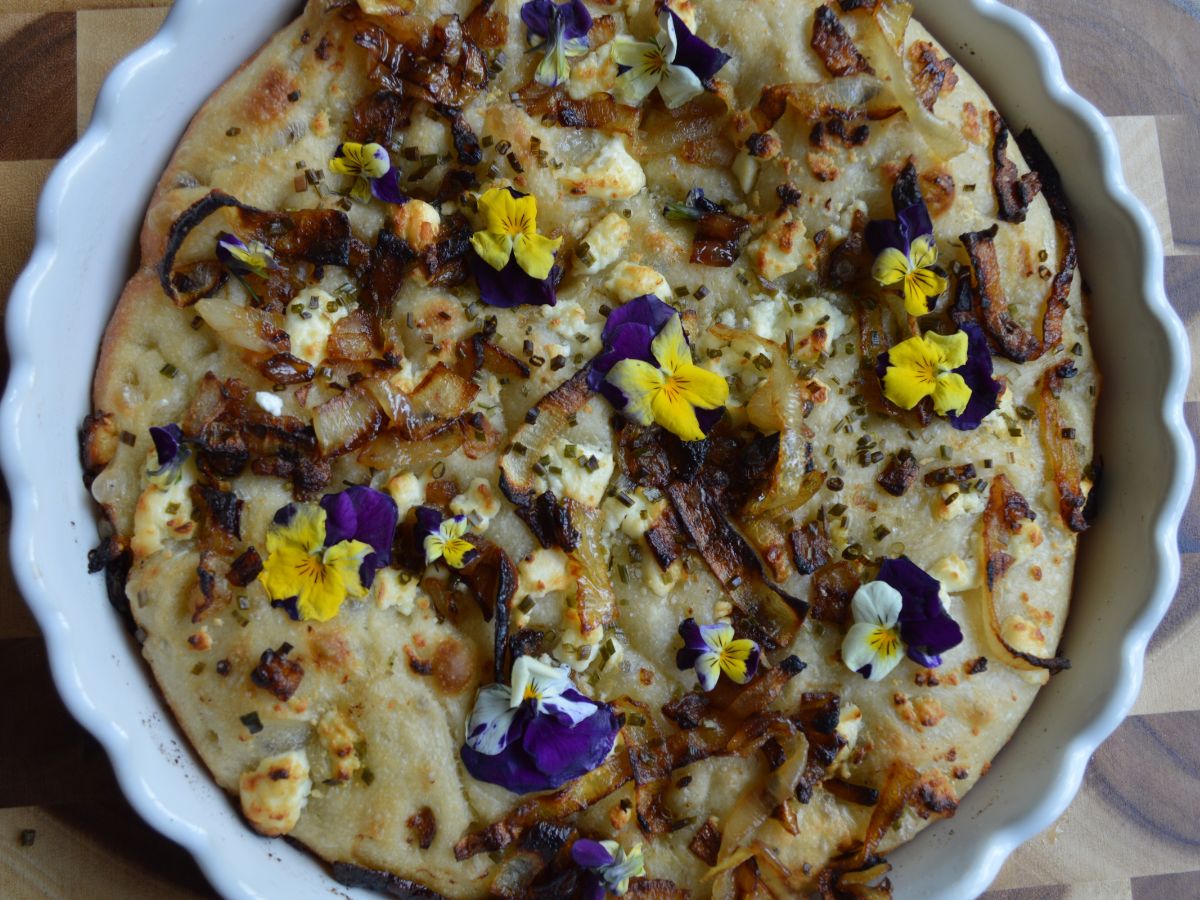

If you have a sourdough starter sitting in your fridge, you already have the foundation for incredible focaccia bread. Unlike yeasted versions, sourdough focaccia develops complex flavor over just a few hours, with a pillowy crumb and crispy, oil-glistened crust. This recipe transforms basic pantry staples into bakery-quality bread without any commercial yeast or complicated shaping techniques.
How to Make Sourdough Focaccia Bread
This sourdough focaccia comes together in about 4 hours total with minimal active work. The dough is forgiving, the toppings are customizable, and the results are consistently impressive.
Ingredients
- 1 cup active sourdough starter (fed and bubbly)
- 1.5 cups warm water
- 3.5 cups all-purpose or bread flour
- 2 teaspoons salt
- 3 tablespoons olive oil, plus more for topping
- Fresh rosemary, sea salt flakes, and optional garlic for topping
Method
Mix the dough
Combine your active starter with warm water in a large mixing bowl and stir until mostly combined. Add flour and salt, then mix with a wooden spoon or dough whisk until all dry flour is incorporated. The dough will be shaggy and slightly sticky at this stage. Let it rest for 30 minutes (autolyse).
Develop gluten through stretching
Wet your hand and perform a series of stretches: lift one section of dough, stretch it gently upward, and fold it over the rest. Rotate the bowl and repeat 6-8 times. This builds strength without aggressive kneading. Rest for 30 minutes, then repeat this stretch sequence two more times with 30-minute intervals between.
Add olive oil and bulk ferment
After your final stretch set, drizzle 3 tablespoons of olive oil over the dough and gently fold it in until fully incorporated. Cover the bowl with a damp cloth and let the dough rise at room temperature for 1.5 to 2 hours until it’s puffy and jiggles slightly when the bowl is gently shaken. You should see visible bubbles at the surface.
Shape into the baking vessel
Pour 2 tablespoons of olive oil into a 9×13 inch baking pan and spread evenly. Transfer your dough to the oiled pan. Gently stretch it to fill the corners, working slowly and letting it relax as needed to avoid tearing. Don’t force it; if it springs back, wait 5 minutes and stretch again. The dough should be about half an inch thick.
Create the signature dimples
Wet your fingertips and press firmly into the dough all over, creating deep dimples spaced about an inch apart. These dimples trap oil and create the focaccia’s characteristic texture. Work gently but confidently to avoid deflating the dough entirely. Let the shaped dough rest for 30 minutes while you preheat your oven.
Top and final proof
Drizzle additional olive oil generously over the dimpled dough. Sprinkle with sea salt flakes and fresh rosemary (or your preferred toppings). Let the pan sit at room temperature for 30 minutes while your oven preheats to 425 degrees Fahrenheit. You want the dough to rise noticeably but not double completely.
Bake until golden
Place the pan in your preheated oven and bake for 20-25 minutes until the top is deep golden brown and the edges have pulled away slightly from the pan sides. The focaccia should sound hollow when you tap the bottom. Let it cool in the pan for 10 minutes, then transfer to a cooling rack.
- Use a starter that’s been fed 4-8 hours before mixing and shows lots of bubbles; active starter is crucial for good rise and flavor
- Don’t skip the autolyse step; those initial 30 minutes allow the flour to fully hydrate, making subsequent stretching much easier
- If your kitchen is cool, extend fermentation times by 15-30 minutes; if it’s warm, shorten them slightly. The dough should feel airy and jiggly, not just time-based
Essential Tools for Making Sourdough Focaccia
- Quality mixing bowl (at least 3-quart capacity): A large, sturdy bowl prevents overflow during stretching and folding. Glass or stainless steel conducts heat evenly, helping fermentation consistency. Vertical sides make folding easier than shallow bowls.
- Dough whisk or strong wooden spoon: A dough whisk combines flour and starter efficiently without requiring arm strength. Better than regular whisks for thick dough. Wooden spoons work but require more effort.
- Ceramic or steel 9×13 baking pan: Dark steel pans brown the bottom faster; ceramic distributes heat more gently. Avoid glass, which can cause over-browning. Size matters: too small and focaccia overflows; too large and it spreads thin.
- Kitchen thermometer for fermentation tracking: An inexpensive thermometer helps predict fermentation speed by monitoring dough temperature. Warmer doughs ferment faster, allowing you to adjust timing rather than guessing.
Pyrex Mixing Bowl Set with Lids
Best for: Home bakers who need reliable, heat-safe bowls for sourdough
This classic glass mixing bowl set includes multiple sizes and matching lids for storage. The 3-quart bowl is perfect for sourdough focaccia fermentation; you can see your dough rise through the sides, and the glass doesn’t retain odors. Heat-safe glass handles both warm starter and room-temperature rises without issues. The vertical sides make stretching and folding efficient. Lids keep your dough covered and protected during fermentation.
Check Current Price on Amazon →OXO Good Grips Dough Whisk
Best for: First-time sourdough makers who want an easier mix
This specialized dough whisk features a coiled wire design that cuts through thick dough without requiring excessive arm strength. The comfortable grip and ergonomic handle reduce fatigue during the initial mixing phase. Unlike standard whisks, it won’t clog with sticky dough. The tool is dishwasher-safe and costs far less than stand mixers, making it ideal for home bakers testing the sourdough waters before investing in larger equipment.
Check Current Price on Amazon →Chicago Metallic Professional Baking Pan 9×13
Best for: Budget-conscious bakers who want reliable focaccia results
This commercial-grade steel pan delivers consistent browning without the premium price of specialty brands. The dark surface accelerates the crust development that makes focaccia special, while the sturdy construction handles years of use. Non-stick coating reduces sticking and makes cleanup quick. At under $15, this is the most economical option for getting professional focaccia results at home without sacrificing quality.
Check Current Price on Amazon →All-Clad Stainless Steel Mixing Bowl
Best for: Serious home bakers seeking durability and professional performance
All-Clad’s mixing bowl represents the premium end of fermentation vessels. Stainless steel resists staining and odor retention far better than glass. The brushed finish hides fingerprints and water spots. The weight and construction feel professional-grade, and the bowl is induction-ready for warming starter gently. While pricier than alternatives, this bowl will last decades and justify itself through daily use in a serious home kitchen.
Check Current Price on Amazon →Start Baking Sourdough Focaccia Today
Sourdough focaccia is one of the most rewarding breads you can make at home, and the ingredient list is almost insultingly simple. What makes it special is time, technique, and the fermentation magic of your sourdough starter. The stretch-and-fold method requires no special skills, just patience and clean hands. Most of the actual baking time is passive fermentation, meaning you can make focaccia on a busy day without it consuming your schedule.
Investing in just one quality mixing bowl and baking pan will transform your focaccia results. The Pyrex bowl set gives you visibility into your dough’s progress, while a good baking pan creates that perfect combination of crispy bottom and tender crumb. Start with the budget-friendly options, and upgrade to premium tools as your focaccia skills develop. Within a few attempts, you’ll have a reproducible technique that rivals bakery focaccia at a fraction of the cost.
Frequently Asked Questions
Can I make sourdough focaccia without a stand mixer?
Absolutely. The stretch-and-fold method described in this recipe requires no equipment beyond a bowl and wet hands. It actually develops excellent gluten structure without the stress that heavy mixing can create. Many sourdough bakers prefer hand-folding because you can feel the dough’s progress.
What if my sourdough starter isn’t doubling between feedings?
A starter doesn’t need to double to be usable for focaccia; it just needs visible bubbles and a pleasant sour smell. Young or slow starters will still work; you may need to extend fermentation times by 30-60 minutes. If your starter smells like nail polish or paint thinner, it needs more regular feedings before using.
Can I refrigerate the dough overnight for baking the next day?
Yes. After shaping in the pan and creating dimples, cover loosely and refrigerate for 8-16 hours. This cold fermentation actually improves flavor. Remove from the fridge 1-2 hours before baking to take the chill off, then bake as directed. The internal temperature of the dough may affect baking time by 2-3 minutes.
What toppings work best for sourdough focaccia?
Rosemary and sea salt are traditional, but olives, coarse garlic, sun-dried tomatoes, caramelized onions, or nutritional yeast all work beautifully. Add toppings just before baking so they don’t dry out. Avoid watery toppings like fresh tomatoes, which release moisture and soften the crust.
How do I know when focaccia is fully baked?
The top should be deep golden brown with slightly darker edges. Tap the bottom; it should sound hollow. An internal thermometer should read 205-210 degrees Fahrenheit at the thickest point. If the top browns too quickly, tent loosely with foil and continue baking until the bottom is crispy.
As an Amazon Associate, Build & Bloom earns from qualifying purchases. We only recommend products we genuinely think are useful. Prices and availability vary; check Amazon for the latest.
Leave a Reply