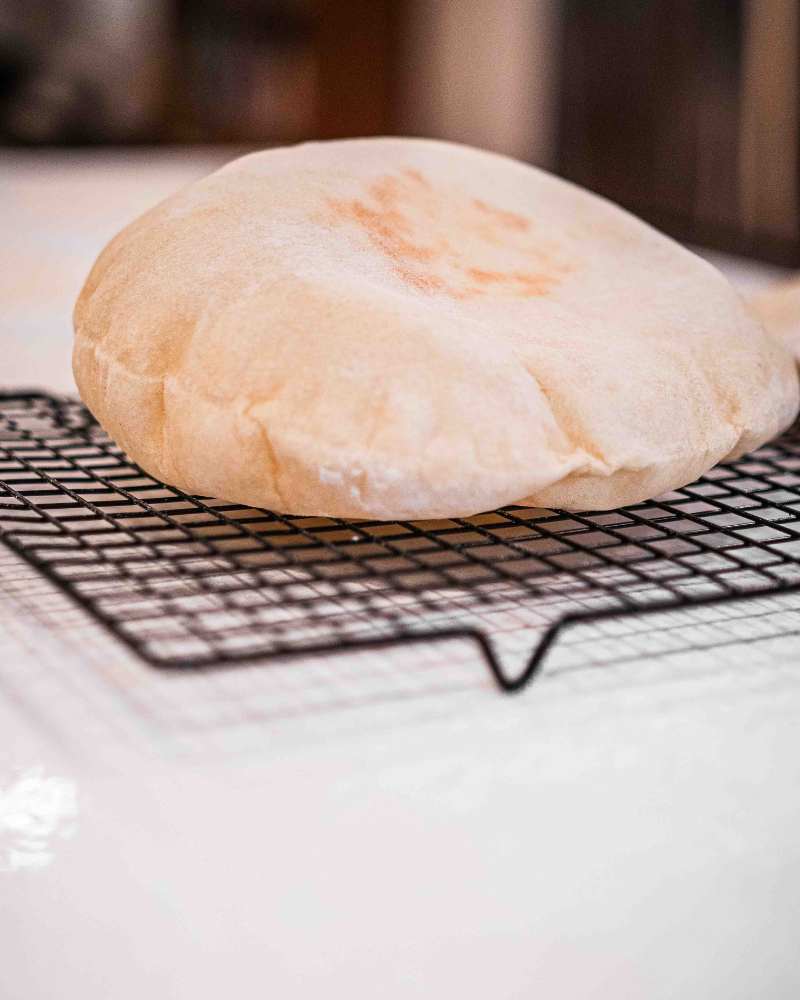

If you’ve mastered basic sourdough but want to try something faster and more versatile, pita bread is the perfect next project. Unlike a full loaf that needs 12+ hours of proofing, sourdough pita bread comes together in one day and gives you beautiful, pocket-filled flatbreads perfect for sandwiches, dips, or breakfasts. The tangy sourdough flavor develops while you sleep, and cooking happens in just minutes on your stovetop.
How to Make Sourdough Pita Bread
This recipe yields 6-8 pita breads and relies on a simple dough that ferments overnight before cooking. The key is getting your skillet hot enough to create steam, which causes the dough to puff into those signature pockets.
Ingredients
- 1 cup active sourdough starter (fed 4-8 hours prior, bubbly and peaked)
- 1.5 cups warm water (around 75-80 degrees F)
- 3.5 cups all-purpose or bread flour
- 2 teaspoons salt
- 1 tablespoon olive oil (optional, for enrichment)
Method
Mix the dough
Combine your active sourdough starter with warm water in a large bowl, stirring until the starter breaks up and clouds the water. Add flour, salt, and olive oil. Mix with a wooden spoon or your hands until a shaggy dough forms with no dry flour remaining. The dough should be slightly sticky but manageable.
Knead and rest
Turn the dough onto a clean work surface and knead for 5-8 minutes until it becomes smooth and elastic. Return it to a lightly oiled bowl, cover with a damp cloth or plastic wrap, and let it rest at room temperature for 30 minutes. This autolyse period helps the flour fully hydrate.
Bulk fermentation
Perform 3-4 sets of stretch and fold over the next 2 hours, working at 30-minute intervals. Wet your hand, grab one side of the dough, stretch it up and fold it over the top, rotate the bowl, and repeat. This builds strength without traditional kneading and develops flavor.
Cold overnight rise
After bulk fermentation, transfer the dough to a covered container or bowl and refrigerate for 8-12 hours. The cold fermentation develops deep sourdough flavor and makes the dough easier to divide and shape. The dough should be puffy but not over-proofed when you remove it.
Divide and shape
Remove the dough from the refrigerator and turn it onto a lightly floured surface. Using a bench scraper or knife, divide it into 6-8 equal portions. Gently shape each piece into a ball by pulling the edges toward the center and rotating it on the work surface. Let the balls rest under a cloth for 15-20 minutes.
Roll out individual pitas
Working with one ball at a time, use a rolling pin to flatten it into a circle about 1/4-inch thick. Try to keep the thickness even so it puffs uniformly. A dough diameter of 4-5 inches is ideal. Stack finished pitas between parchment paper to prevent sticking.
Heat your cooking surface
Place a cast iron skillet or heavy-bottomed pan over medium-high heat for 3-5 minutes until it’s very hot. You should be able to feel significant heat radiating from it. A properly heated surface is essential for the pita to puff dramatically.
Cook the pitas
Carefully place one rolled pita onto the hot skillet and cook for 1-2 minutes until the bottom is lightly spotted and starting to brown. Flip it over and cook the other side for another 1-2 minutes. The dough should puff up like a balloon as steam forms between the layers. Remove and wrap in a clean kitchen towel to keep warm and soft while you finish the remaining pitas.
- Feed your sourdough starter 4-8 hours before making the dough. It should be at peak rise with visible bubbles and a pleasant sour smell, not liquid or collapsed.
- Don’t skip the cold overnight fermentation. This is what gives sourdough pita its distinctive tangy flavor and makes the dough more forgiving to work with.
- Keep cooked pitas wrapped in a cloth towel immediately after cooking. The steam stays trapped inside, keeping them soft and flexible for hours.
Essential Equipment for Making Sourdough Pita Bread
- Cast Iron Skillet: A heavy skillet retains heat exceptionally well and distributes it evenly across the cooking surface. This ensures consistent puffing and browning. A 10-12 inch skillet is ideal for pita-sized dough portions.
- Rolling Pin: A sturdy rolling pin lets you achieve even thickness across each pita, which is critical for uniform puffing. Tapered or straight designs both work well; choose based on your hand comfort.
- Kitchen Scale: Sourdough baking benefits from precision. A scale helps you divide dough into equal portions so every pita cooks at the same rate and develops consistent pockets.
- Bench Scraper: This flat tool makes dividing sticky dough clean and easy. It also helps with shaping and transferring dough without unnecessary handling or additional flour.
Lodge Cast Iron Skillet 10.25 Inch
Best for: Sourdough pita makers wanting reliable, even heat
Lodge’s preseasoned cast iron is the gold standard for stovetop flatbread cooking. The 10.25-inch size is perfect for pita portions, and the thick construction holds heat evenly for consistent puffing and browning. Pre-seasoned and ready to use out of the box, it improves with age and use. Cast iron also works beautifully on any cooktop from gas to electric to induction. At this price point, you’re getting a heirloom-quality tool that will outlast you.
Check Current Price on Amazon →Oxo Good Grips Stainless Steel Rolling Pin
Best for: Home bakers wanting precise, even dough thickness
This stainless steel rolling pin features soft rubber handles that reduce hand fatigue during repeated rolling sessions. The weighted design makes flattening dough easier without excessive pressure. Its tapered ends give you control over thickness, and the smooth surface prevents sticking without needing extra flour. Dishwasher safe and backed by Oxo’s reputation for kitchen ergonomics.
Check Current Price on Amazon →Escali Primo Precision Kitchen Scale Digital
Best for: New sourdough bakers wanting to master dough portioning
This user-friendly digital scale displays weight in grams or ounces and has a large, easy-to-read LCD screen. The stainless steel platform accommodates various bowls and containers, and the tare function lets you zero out between ingredients. Batteries included and it shuts off automatically to save power. Escali is trusted by home bakers and professionals alike.
Check Current Price on Amazon →Winco Stainless Steel Bench Scraper
Best for: Bakers who work with sticky dough regularly
This professional-grade bench scraper from Winco features a sharp stainless steel blade and comfortable wooden handle. It divides dough cleanly without tearing or compressing, and scrapes work surfaces efficiently. At 5 inches wide, it’s compact enough to store easily but wide enough to handle substantial dough portions. Restaurant kitchens rely on this exact tool.
Check Current Price on Amazon →Ready to Bake Your First Batch
Sourdough pita bread is one of the most rewarding projects for home bakers because the results are immediate and delicious. Unlike loaves that need expert scoring and baking adjustments, pita comes together quickly on the stovetop and rewards you with soft, warm bread in minutes. The overnight fermentation builds complex sourdough flavor without requiring constant attention, making it perfect for busy home bakers.
Start with the equipment essentials: a heavy skillet, rolling pin, and kitchen scale. These three items will serve you for decades of baking beyond just pitas. Once you’ve nailed this recipe, you’ll find yourself making pitas weekly for sandwiches, dips, breakfast pockets, and more. The formula is forgiving, the process is meditative, and the moment you see that first dough puff into a perfect pocket is pure magic.
Frequently Asked Questions
Why didn’t my pita bread puff up?
Puffing depends on heat and moisture. Make sure your skillet is very hot before cooking (test with a drop of water that should sizzle immediately). Also ensure your dough circles are rolled to an even 1/4-inch thickness. If one area is too thin, it won’t trap steam effectively.
Can I make the dough ahead and freeze it?
Yes. After the cold fermentation but before rolling, you can freeze individual dough balls in an airtight container for up to 2 weeks. Thaw overnight in the refrigerator, then let rest at room temperature for 20 minutes before rolling and cooking.
What if my sourdough starter is weak or sluggish?
Feed it more frequently (twice daily) for 3-5 days before using it in this recipe. A weak starter won’t provide enough leavening power. You want it visibly bubbly and at peak rise when you mix the dough, with a pleasant sour aroma.
Can I use whole wheat flour?
Partially, yes. Substitute up to 25% of the all-purpose flour with whole wheat flour. Going beyond that will make the pitas denser and less puffy. Whole wheat flour also absorbs more water, so you may need an extra tablespoon of water.
How long do baked pitas stay fresh?
Wrapped in a cloth at room temperature, they stay soft for 1-2 days. For longer storage, place cooled pitas in a freezer bag and freeze for up to 3 months. Reheat from frozen by wrapping in foil and warming in a 350-degree oven for 10-12 minutes.
As an Amazon Associate, Build & Bloom earns from qualifying purchases. We only recommend products we genuinely think are useful. Prices and availability vary; check Amazon for the latest.
Leave a Reply