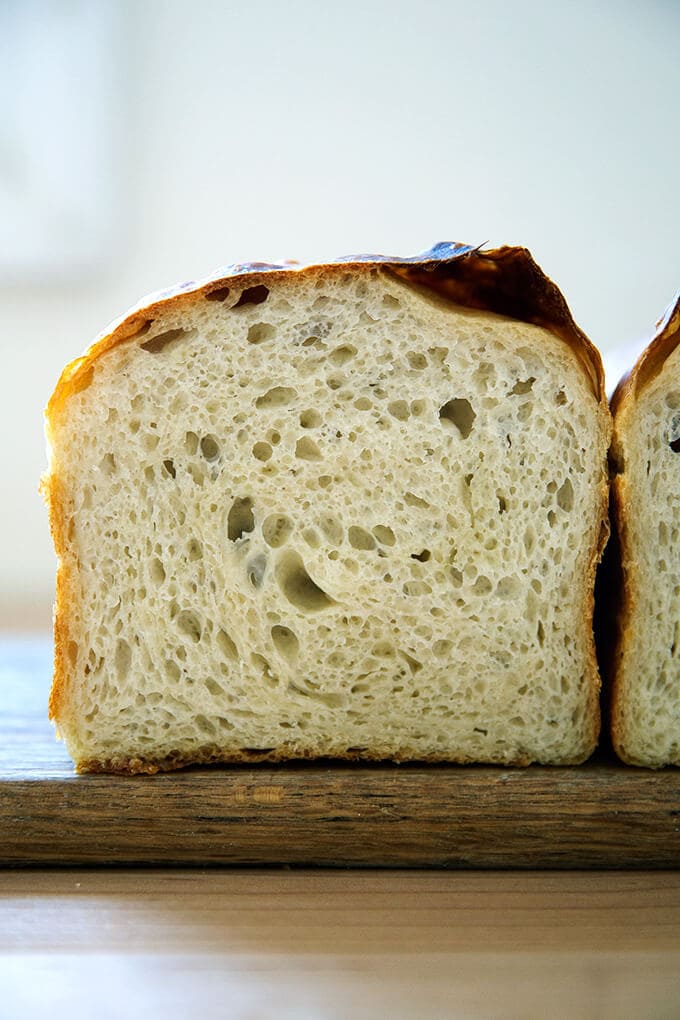

Sourdough sandwich bread seems intimidating, but it’s one of the most forgiving breads you can bake at home. Unlike artisan loaves that demand shaping precision and scoring technique, sandwich bread is built for texture and flavor–you simply need a healthy starter, patience, and basic kitchen tools. This recipe delivers a loaf with a subtle tang, open crumb structure, and enough structure to hold sandwich fillings without falling apart.
How to Bake Easy Sourdough Sandwich Bread
This recipe uses a long, cool fermentation to develop flavor and digestibility. Total active time is under 20 minutes; the rest is waiting for your dough to rise.
Ingredients
- 1 cup (240ml) active sourdough starter at peak (bubbly and doubled in size)
- 1.5 cups (360ml) warm water, around 75-80F
- 3.5 cups (420g) bread flour or all-purpose flour
- 1.5 teaspoons (9g) fine sea salt
- Optional: 1 tablespoon honey or sugar to feed the dough
Method
Mix the dough
Combine active starter, warm water, and flour in a large mixing bowl. Stir until all flour is moistened and no dry bits remain. The dough will be shaggy and sticky. Let this mixture rest for 30-60 minutes at room temperature; this rest period is called autolyse and helps gluten develop naturally.
Add salt and perform stretch-and-folds
After autolyse, sprinkle salt over the dough and incorporate it by pinching and folding the dough onto itself for 2-3 minutes until salt is fully distributed. Perform four sets of stretch-and-fold movements over the next 2 hours, spaced 30 minutes apart. Each time, gently stretch one side of the dough over the center, rotate the bowl, and repeat until you’ve worked all four sides.
Bulk fermentation at room temperature
After your final stretch-and-fold set, let the dough rest at room temperature (68-72F is ideal) for 4-6 hours. The dough should increase in volume by about 50-75% and show visible bubbles on the surface. If your kitchen is cool, this may take longer. You’re aiming for the dough to feel pillowy and alive, not necessarily doubled in size.
Pre-shape and rest
Turn the dough out onto a lightly floured surface and gently pre-shape it into a round by folding the edges toward the center. Let it rest on the counter for 20-30 minutes to relax the gluten. This makes the final shaping easier and more forgiving.
Shape for the loaf pan
After the rest, shape the dough into an oval or rectangle that fits your loaf pan. Start by flattening the dough gently with your hands, then roll it tightly from one end toward you, sealing the seam as you go. Place it seam-side up in a floured banneton or loaf pan lined with a cloth.
Cold overnight fermentation
Cover your shaped dough and refrigerate it for 12-24 hours. This slow, cold fermentation develops flavor and makes scoring and handling easier. You can also skip this step and do a 2-3 hour room-temperature final proof, but the fridge method gives better flavor and more forgiving timing.
Preheat and score
About 30 minutes before baking, preheat your oven to 450F with a Dutch oven or covered baking vessel inside. Once hot, carefully turn your cold dough out of the pan onto parchment paper. Make one or two slashes across the top with a sharp blade or lame–this controls where the bread expands and creates that signature sourdough ear.
Bake covered, then uncovered
Transfer the dough on parchment into your preheated hot Dutch oven. Bake covered for 20 minutes to trap steam (this creates a crispy crust), then remove the lid and bake for another 25-30 minutes until deep golden brown. The internal temperature should reach 205-210F at the center. Cool on a wire rack for at least 1 hour before slicing.
- If your sourdough starter is sluggish or room temperature is cold, extend the bulk fermentation time by 1-2 hours. The dough should visibly rise and feel airy, not a specific timeline.
- A Dutch oven is crucial for trapping steam and creating that bakery-style crispy crust. If you don’t have one, create a steam environment by placing a pan of boiling water on the oven rack below your bread.
- Test your dough’s readiness with the poke test: gently poke the cold dough with your finger. If the indent slowly springs back halfway, it’s perfectly proofed. If it springs back completely, it needs more time; if it doesn’t spring back at all, you may be slightly overproofed (but still bake it).
Essential Equipment for Sourdough Bread Success
- Dutch oven or covered baking vessel: Traps steam during the first phase of baking, creating the signature crispy, caramelized crust and proper oven spring. Cast iron is traditional but enameled steel works equally well.
- Kitchen scale for measuring: Sourdough baking is precision work. Weighing ingredients in grams rather than cups ensures consistent results and eliminates guesswork about flour density and hydration.
- Banneton proofing basket or cloth-lined bowl: Supports your shaped dough during final fermentation and prevents it from spreading. The flour-dusted surface helps you achieve clean scoring and prevents sticking.
- Bread lame or sharp scoring blade: Allows you to make clean, deliberate slashes in your dough before baking. This controls where the bread expands and creates the attractive sourdough ear while preventing random tears.
Lodge Enameled Cast Iron Dutch Oven, 5.5 Quart
Best for: Serious home bakers wanting bakery-quality results
The Lodge enameled Dutch oven is the gold standard for home bread baking. Its 5.5-quart capacity accommodates large loaves, the heavy cast iron distributes heat evenly for consistent browning, and the enamel coating resists acidic sourdough over time. The lid traps steam perfectly during the critical first 20 minutes of baking. This piece lasts decades with minimal care and doubles as your go-to pot for braises, stews, and Dutch oven cooking.
Check Current Price on Amazon →Tramontina Enameled Cast Iron Dutch Oven, 6 Quart
Best for: Budget-conscious bakers who don’t want to compromise on performance
Tramontina delivers comparable performance to premium brands at nearly half the price. The 6-quart capacity gives you room for larger loaves, the enamel coating is durable, and the heat retention rivals much pricier options. While it’s slightly lighter than Lodge cast iron, it still performs excellently for sourdough and retains heat well enough for bakery-quality crusts. Perfect for beginners testing whether Dutch oven bread baking is worth the investment.
Check Current Price on Amazon →Pyrex 2-Quart Glass Baking Dish with Lid
Best for: Starting bakers with limited budget and kitchen space
If you’re nervous about investing in cast iron, a glass baking dish with a tight-fitting lid creates adequate steam and costs under $15. Glass heats differently than cast iron, so you may need to adjust oven temperature down 25F to prevent over-browning, but it absolutely works for sourdough sandwich bread. The glass allows you to monitor browning without opening the oven, and it’s dishwasher safe. This is a smart entry point before upgrading to cast iron.
Check Current Price on Amazon →Etekcity Digital Kitchen Scale, Food Scale with Bowl
Best for: Home bakers wanting accuracy without spending on commercial-grade equipment
This compact digital scale measures up to 11 pounds in 0.1-ounce increments, accurate enough for sourdough precision baking. The included bowl clips on securely, and you can tare (zero) between ingredients for quick measuring. It’s water-resistant, runs on two AAA batteries, and costs less than $20. No fancy features means no unnecessary complexity–just reliable gram and ounce measurement for all your bread baking needs.
Check Current Price on Amazon →Start Baking Sourdough Sandwich Bread Today
Homemade sourdough sandwich bread beats store-bought in flavor, texture, and cost. This recipe is forgiving enough for beginners but sophisticated enough to keep experienced bakers engaged. The long fermentation develops complex flavor and natural digestibility that commercial yeast breads can’t match. With a healthy starter and a Dutch oven, you’re 90% of the way to success.
The equipment recommendations above cover the essentials without overwhelming you with gadgets. Start with a Dutch oven and a basic kitchen scale–these two tools alone unlock professional-quality bread. As you develop confidence and rhythm, add a banneton and scoring lame to refine your technique. Within a few bakes, you’ll develop an intuition for fermentation timing that no recipe can fully explain. The real magic happens in your kitchen, not in measuring cups and timers.
Frequently Asked Questions
Can I make this recipe without a Dutch oven?
Yes, but steam management is crucial. Place a pan of boiling water on the rack below your bread and bake in a preheated 450F oven for the same 45-50 minutes. Your crust may be less crispy than Dutch oven bread, but it will still taste delicious. Alternatively, cover the loaf loosely with foil for the first 20 minutes to trap some moisture.
What if my sourdough starter isn’t active or bubbly?
Feed your starter with equal parts flour and water (by weight) and wait 4-8 hours until it’s visibly bubbly and has doubled in volume. Peak ripeness is when it’s doubled and just starting to recede–use it at this exact moment for best results. If your starter is sluggish, keep it at room temperature and feed daily for 3-5 days before baking.
How do I know when my dough is properly fermented?
During bulk fermentation, the dough should increase 50-75% and show visible bubbles on the surface. During the cold final proof, the poke test is your guide: gently press your cold dough with your finger and it should slowly spring back halfway. If it springs back completely, it needs 2-4 more hours (or overnight if already refrigerated); if it doesn’t spring back at all, bake it immediately.
Can I skip the overnight cold fermentation?
Yes. After shaping, let the dough rise at room temperature for 2-3 hours instead of refrigerating overnight. You’ll get less flavor development but still respectable bread. The advantage of cold fermentation is that you can prep bread in the evening, refrigerate it, and bake fresh bread in the morning with minimal hands-on time.
Why is my crust not crispy?
Insufficient steam is the most common cause. Make sure your Dutch oven is fully preheated (at least 30 minutes at 450F), and keep it covered for the first 20 minutes of baking. If using a water pan method instead, ensure the water is boiling and the oven is fully sealed. Also confirm your baking temperature is actually 450F with an oven thermometer, as many ovens run cool.
As an Amazon Associate, Build & Bloom earns from qualifying purchases. We only recommend products we genuinely think are useful. Prices and availability vary; check Amazon for the latest.
Leave a Reply