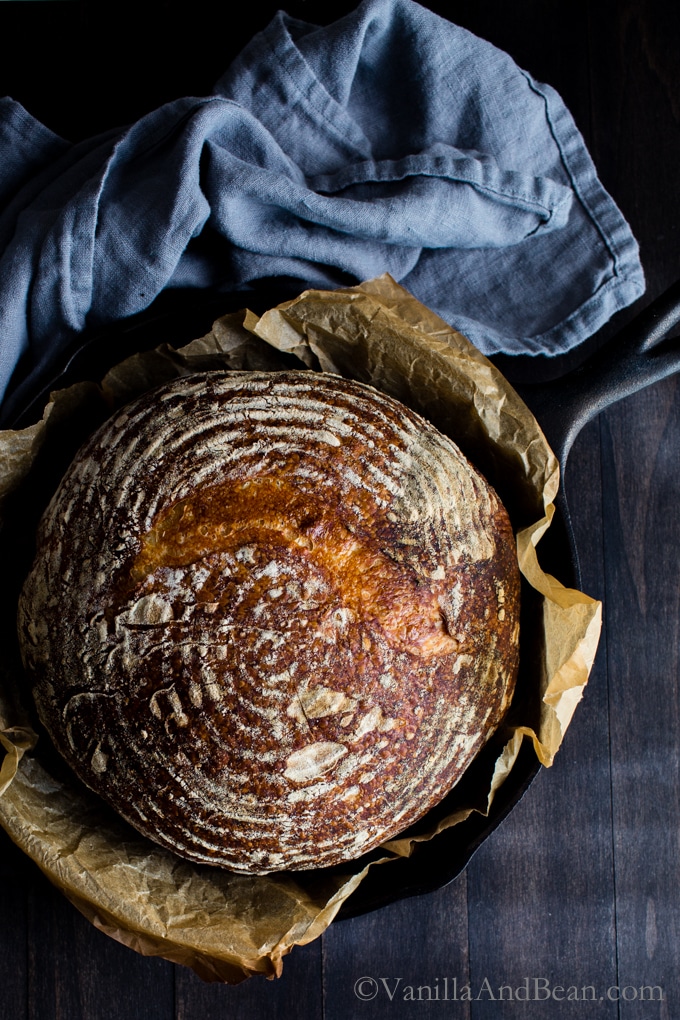

If you’ve scrolled through sourdough recipes and felt overwhelmed by complex timings and mysterious language, Emilie’s everyday approach is your answer. This recipe strips away the pretension and focuses on what actually works: simple ingredients, a reliable schedule, and techniques that forgive minor mistakes. Whether you’re a curious beginner or a seasoned baker tired of finicky methods, this everyday sourdough delivers beautiful, tangy loaves with minimal stress.
How to Bake Emilie’s Everyday Sourdough
This sourdough recipe relies on a mature, active starter and a slow bulk fermentation that develops flavor naturally. The process spans two days, but active mixing and shaping takes less than 30 minutes total.
Ingredients
- 500g all-purpose or bread flour (about 4 cups)
- 350ml filtered or tap water (about 1.5 cups)
- 100g active sourdough starter fed 4-8 hours prior (discard half, feed with equal parts flour and water)
- 10g fine sea salt (about 2 teaspoons)
- Extra flour for dusting and handling
Method
Mix your dough
Combine water and your active starter in a large bowl, stirring until the starter disperses throughout. Add flour and mix with your hands until all dry flour is incorporated and the dough comes together. Let this mixture rest for 30-60 minutes (called autolyse). This rest allows the flour to fully hydrate and makes the dough easier to handle.
Incorporate salt and knead
Sprinkle salt over the rested dough and incorporate it using a pinching and folding motion with wet hands. Work the salt in thoroughly. The dough will feel sticky at first but will firm up as you work it. Continue for 5-8 minutes until the dough feels cohesive and slightly strengthened.
First bulk fermentation (8-12 hours at room temperature)
Transfer dough to a clean bowl. Over the next 4-5 hours, perform 4 sets of stretch-and-fold motions, spaced 30 minutes apart. Simply wet your hand, grab one side of the dough, stretch it up and fold it over the middle, then rotate the bowl 90 degrees and repeat. This builds strength without aggressive kneading. Let the dough rest undisturbed for the remaining hours until it increases by 50-75% and shows visible bubbles on the surface.
Pre-shape and rest
Turn the dough onto a lightly floured surface. Using your hands and a bench scraper, gently pre-shape it into a round by pulling the dough toward you in several motions, creating surface tension. Let it rest for 20-30 minutes. This bench rest allows the gluten to relax slightly before final shaping.
Final shape and cold proof
Shape the dough by flipping it seam-side up, then folding the edges toward the center with intention and slight tension. Flip it seam-side down and use your hands to create a taut, round loaf. Place it seam-side up in a floured proofing basket or bowl lined with a kitchen towel. Cover and refrigerate for 12-18 hours. The cold proves the dough slowly and develops deeper flavor.
Score and bake
Preheat your oven to 450F with a heavy, covered baking vessel inside for 45 minutes. Carefully turn your cold dough onto parchment paper and score the top with a sharp blade using a single confident slash or an X pattern. This controls where the bread expands. Transfer parchment and dough into the hot vessel, cover, and bake for 20 minutes to trap steam.
Finish baking uncovered
Remove the lid and bake for an additional 25-35 minutes until the crust is deep golden brown. The total bake time depends on your oven, so look for color rather than strict timing. Remove and cool completely on a rack before slicing, as the interior continues to set as it cools.
- A mature starter is essential — it should double within 4-8 hours of feeding and smell pleasantly tangy, not acetone-like. If yours is sluggish, feed it daily for a week at room temperature.
- Room temperature during bulk fermentation matters greatly. In cooler homes (65-68F), expect longer times; in warmer homes (75-78F), reduce times by 1-2 hours. Aim for 50-75% volume increase as your visual cue, not the clock.
- Don’t skip the cold proof overnight in the fridge. This step is what makes Emilie’s method so forgiving — the dough slows down, develops complex flavor, and becomes easier to score cleanly.
Essential Equipment for Sourdough Baking
- Dutch oven or covered baking vessel: Traps steam during the first half of baking, which allows the crust to develop properly and the crumb to open up. A Dutch oven is the gold standard, but any heavy pot with a tight-fitting lid works. Minimum 4-5 quart capacity.
- Kitchen scale: Sourdough baking relies on ratios and percentages, not cups. A digital scale ensures consistency between bakes and removes guesswork. Accuracy to 1 gram is sufficient for home bakers.
- Proofing basket or banneton: Supports the shaped dough during cold fermentation and prevents it from spreading into a flat disk. A round banneton or a bowl lined with a floured towel both work equally well for everyday sourdough.
- Bench scraper and lame or sharp blade: A bench scraper handles the sticky dough gently and helps shape without adding excess flour. A lame (bread scoring tool) or very sharp serrated knife creates clean, controlled scores that improve oven spring and crust aesthetics.
Le Creuset Enameled Cast Iron Dutch Oven, 5.5 Quart
Best for: Serious home bakers seeking a lifetime investment
The gold standard for sourdough baking. This enameled cast iron Dutch oven distributes heat evenly, retains moisture perfectly during covered baking, and will last decades with minimal care. The 5.5-quart size accommodates larger loaves. Its heavy construction and tight-fitting lid create the ideal environment for developing a thick, crackling crust while keeping the interior moist and open-crumbed.
Check Current Price on Amazon →Lodge Enameled Cast Iron Dutch Oven, 5 Quart
Best for: Budget-conscious bakers who don’t want to compromise on performance
An excellent value alternative to premium brands. Lodge’s enameled Dutch oven performs nearly identically to costlier options, with the same heat retention and moisture trapping that sourdough requires. The matte black enamel interior actually prevents sticking better than glossy finishes. At less than half the price of luxury competitors, it’s an easy recommendation for anyone starting their sourdough journey.
Check Current Price on Amazon →Etekcity Digital Kitchen Scale with Bowl
Best for: First-time sourdough bakers who want accuracy without complexity
This scale includes a removable bowl, eliminating the need to tare between additions if you prefer that workflow. It measures to 1-gram precision up to 11 pounds, displays in grams or ounces, and has a simple interface with no learning curve. The compact footprint won’t dominate your counter, and the affordable price point makes it easy to recommend to friends eager to try sourdough.
Check Current Price on Amazon →Hario V60 Drip Scale with Timer
Best for: Precision-focused bakers who want integrated timing
While designed for pour-over coffee, this scale excels in bread baking with 0.1-gram precision and a built-in timer. The glass top is temperature-resistant, and the minimalist display shows weight and elapsed time simultaneously. It’s overkill for basic sourdough but beloved by advanced bakers who track fermentation times with scientific precision and want one tool to handle all measuring needs.
Check Current Price on Amazon →Start Your Sourdough Journey Today
Emilie’s everyday sourdough removes the mystique from bread baking and replaces it with a straightforward, flexible process that rewards consistency over precision. The 48-hour timeline fits naturally into a weekend or weekday schedule, and the 20 minutes of active work makes sourdough far less demanding than most people assume. You need just four ingredients, a Dutch oven, and patience — everything else is technique that you’ll refine with each loaf.
Begin with your starter. If you don’t have one, now is the time to capture wild yeast or obtain a culture from a friend. While your starter develops over the first week, gather your equipment. A quality Dutch oven and kitchen scale are the only real investments; everything else is optional and can be substituted with common kitchen items. Then bake your first loaf, expecting it to teach you more than any article can. Your second loaf will be noticeably better. By your fifth loaf, you’ll understand Emilie’s everyday approach so deeply that you’ll adapt it naturally to your climate, schedule, and preferences — which is exactly where great baking begins.
Frequently Asked Questions
What if my sourdough starter isn’t strong yet?
A weak starter will produce a flat, dense loaf. Feed your starter daily at room temperature for 5-7 days until it reliably doubles in 4-8 hours after feeding. Once it passes the float test (a spoonful floats in water), it’s ready for baking. Patience with starter development pays dividends.
Can I skip the overnight cold proof?
Skipping the cold proof is possible but not recommended for everyday sourdough. The cold fermentation develops flavor depth that room-temperature fermentation alone cannot achieve. If time is critical, reduce the bulk fermentation to 6-8 hours at room temperature, but expect less complex flavor and slightly more difficult scoring.
How do I know when bulk fermentation is done?
Watch for a 50-75% increase in volume and visible bubbles throughout the dough, especially at the edges. The surface should look slightly domed and porous. This visual assessment is more reliable than strict timing since room temperature varies. If unsure, let it go another 30 minutes.
Why did my crust turn out pale or soft?
A pale crust usually means the oven wasn’t hot enough or the covered baking time was too long, preventing direct heat. A soft crust means insufficient cooling time after baking — always cool completely on a rack. Ensure your oven has preheated fully for 45 minutes and that the thermometer is accurate.
Can I freeze shaped dough for later baking?
Yes. After shaping, refrigerate for 2-4 hours, then transfer to a freezer bag and freeze for up to 2 weeks. Bake directly from frozen, adding 10-15 minutes to the total baking time. Flavor actually improves slightly with this method due to extended fermentation.
As an Amazon Associate, Build & Bloom earns from qualifying purchases. We only recommend products we genuinely think are useful. Prices and availability vary; check Amazon for the latest.
Leave a Reply