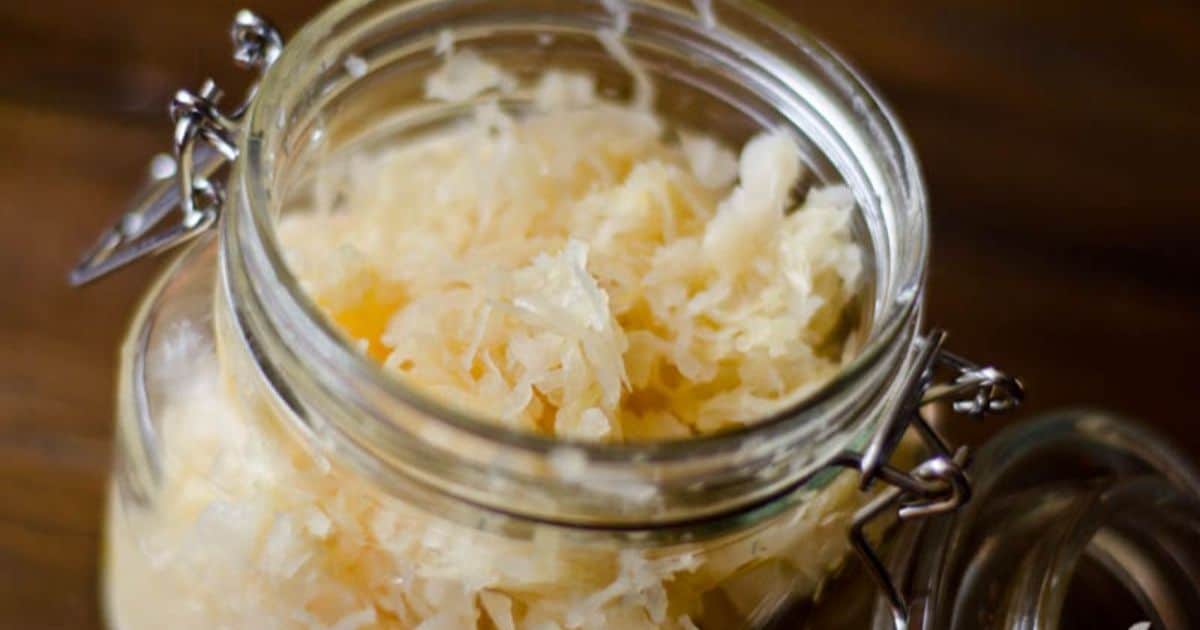

If you’re following a paleo lifestyle, you already know that gut health matters. Fermented foods are one of the most powerful ways to restore healthy bacteria and improve digestion–yet many traditional fermented recipes include grains, sugar, or additives that don’t fit paleo principles. The good news: fermented vegetables, fruits, and bone broths are naturally paleo-friendly, require minimal equipment, and transform ordinary ingredients into probiotic powerhouses in just days.
How to Make Paleo-Friendly Fermented Vegetables at Home
This foundational fermented vegetable recipe works with almost any vegetable combination. The salt brine creates an anaerobic environment where beneficial lactobacillus bacteria thrive, naturally preserving your vegetables while increasing their nutritional density.
Ingredients
- 3-4 cups fresh vegetables (cabbage, carrots, beets, radishes, or leafy greens), cut into bite-sized pieces
- 2-3 tablespoons unrefined sea salt (approximately 2-3% of vegetable weight)
- Filtered water (chlorine can inhibit fermentation)
- Optional: 1 tablespoon fresh ginger, turmeric root, or garlic for flavor
- Optional: 1/2 teaspoon whole caraway or mustard seeds
Method
Prepare and pack your vegetables
Wash vegetables thoroughly and cut them into consistent, manageable pieces–roughly 1/4 to 1/2 inch chunks work best. Pack the cut vegetables tightly into a clean glass jar, pressing down gently as you layer. Add any optional aromatics like ginger slices or garlic cloves between layers to distribute flavor evenly throughout the batch.
Create the salt brine solution
Dissolve your sea salt in filtered water at a ratio of about 2-3 tablespoons salt per quart of water. Stir until completely dissolved. This salty liquid is crucial: it inhibits harmful bacteria while allowing beneficial lactobacillus to flourish. Taste the brine–it should taste pleasantly salty, similar to a potato chip.
Cover vegetables completely with brine
Pour the salt solution over your packed vegetables until they are fully submerged. This is critical because vegetables exposed to air can develop mold. If needed, use a smaller glass jar filled with water as a weight, or purchase a specialized fermentation weight to keep everything beneath the brine surface.
Create an anaerobic seal
Screw the jar lid on loosely–tight enough to prevent contamination, but loose enough that gases produced during fermentation can escape. Alternatively, cover with cloth and secure with a rubber band. Place the jar away from direct sunlight on your counter or in a cool pantry where temperature stays between 65-75 degrees Fahrenheit.
Monitor fermentation for 3-7 days
Each day, observe the jar. You’ll notice bubbles rising, the brine becoming cloudy, and a distinctive tangy aroma developing–all signs of successful fermentation. Taste a small piece after 3 days; if you prefer more sourness, let it continue for several more days. The longer it ferments, the more probiotic activity occurs.
Taste test and transfer to cold storage
When the flavor reaches your preference, tightly seal the jar and move it to your refrigerator. Cold temperature dramatically slows fermentation, preserving your finished product. Properly stored fermented vegetables last 4-6 months refrigerated, though the probiotic count decreases over time.
Serve with paleo meals
Use fermented vegetables as a condiment alongside roasted meats, grilled fish, or salads. A small portion (1-2 tablespoons) with each meal provides beneficial bacteria without overwhelming your palate. The brine itself is also valuable–drizzle it on vegetables or add to bone broth for extra probiotic content.
- Start with a 2% salt ratio by weight if precision matters to you; use a kitchen scale for best results. This takes guesswork out of fermentation and produces consistent, reliably delicious batches.
- Save the fermentation brine after removing vegetables–it’s packed with beneficial bacteria and can be used as a starter culture for future batches, speeding up fermentation time to 2-3 days.
- Mix vegetable types for complex flavor profiles: try combining cabbage, turmeric root, and ginger for an anti-inflammatory blend, or radish with garlic and dill for a peppery probiotic punch.
What to Look For in Fermentation Supplies
- Glass jar quality and size: Choose food-grade glass jars with wide mouths (quart-size or larger) for easy packing and removal. Wide-mouth mason jars are ideal because they’re affordable, durable, and have standardized lids. Avoid plastic, which can harbor bacteria, and narrow-mouth jars, which make packing vegetables difficult.
- Fermentation weights or airlocks: Weights keep vegetables submerged below the brine, preventing mold growth. Look for glass weights, silicone stoppers, or specialized fermentation lids with one-way airlocks that allow gas escape while preventing oxygen entry. These aren’t mandatory but reduce failure rates significantly.
- Unrefined sea salt quality: Use mineral-rich sea salt without anti-caking agents or iodine, which inhibit fermentation. Pink Himalayan salt and Celtic sea salt work excellently. Avoid table salt, which contains additives that cloud brine and interfere with bacterial growth.
- Water filtration method: Chlorine in tap water kills beneficial bacteria before fermentation begins. A simple carbon filter pitcher, activated charcoal filter, or boiled-then-cooled water removes chlorine safely. If you’re serious about fermentation, a dedicated water filter system ensures consistency.
Bormioli Rocco Fido Glass Jar with Hermetic Lid (2-Liter)
Best for: Serious fermenters and everyday use
This Italian-made glass jar features a distinctive wire bail closure with a rubber gasket that creates a true hermetic seal without being airtight–perfect for fermentation. The 2-liter capacity accommodates multiple vegetable batches simultaneously. The wide mouth (3-inch opening) makes packing vegetables effortless, and the glass is thick enough for years of reliable use. The design has been trusted for fermentation across Europe for generations.
Check Current Price on Amazon →Ball Wide Mouth Mason Jar Quart Size (Set of 12)
Best for: Beginners and budget-conscious fermenters
The classic American choice for fermentation, Ball mason jars are inexpensive, widely available, and highly functional. The wide-mouth design (2.75-inch opening) allows easy vegetable packing, and the two-piece lid system (flat lid plus screw band) creates a semi-permeable seal ideal for fermentation. While not as elegant as specialty fermentation jars, they perform equally well at a fraction of the cost.
Check Current Price on Amazon →Kilner Fermentation Jar Kit with Airlock Lid (1-Liter)
Best for: First-time fermenters who want idiot-proof results
This British-made jar system includes a specialized airlock lid that allows carbon dioxide to escape while preventing oxygen from entering. The silicone gasket and locking clips ensure a perfect seal every time, eliminating guesswork. The 1-liter size is manageable for experimentation, and the included glass weight keeps vegetables perfectly submerged. This kit is the most foolproof option for fermentation newcomers.
Check Current Price on Amazon →Le Parfait Super Jar Fermentation Set (2-Liter with Accessories)
Best for: Dedicated fermenters wanting aesthetic appeal
French Le Parfait jars combine sophisticated design with functional excellence. The 2-liter capacity with wire-bail closure and rubber gasket creates an ideal fermentation environment. This premium option includes both a fermentation weight and detailed instructions, making it suitable for serious practitioners who appreciate craftsmanship. The jars double as elegant serving vessels for finished fermented foods.
Check Current Price on Amazon →Make Fermented Foods Part of Your Paleo Practice
Fermented vegetables represent one of the simplest, most rewarding additions to a paleo lifestyle. They require minimal equipment, basic ingredients, and just a few days of patience to transform ordinary vegetables into probiotic-rich foods that support digestive health, nutrient absorption, and immune function. The process is forgiving enough for beginners yet flexible enough for endless experimentation with flavors and vegetable combinations.
Start with a single mason jar and basic salt brine this week. By next month, you’ll have multiple batches fermenting, each one developing unique flavors based on your vegetable choices and fermentation duration. Your gut–and your palate–will thank you for introducing these living foods into your daily meals.
Frequently Asked Questions
How do I know if my fermentation went wrong or developed mold?
Good fermentation smells pleasantly sour and tangy. Bad fermentation develops a pink, orange, or fuzzy mold on the surface, or smells rotten and musty. White sediment at the bottom is beneficial yeast and is normal. If you see concerning mold, discard the entire batch–it’s not worth the risk. Proper submersion beneath brine prevents most mold issues.
Can I ferment on a windowsill or does it need darkness?
Fermentation works best away from direct sunlight, which can degrade chlorophyll and create bitter flavors. A dark pantry or kitchen cabinet is ideal, maintaining temperatures between 65-75 degrees Fahrenheit. If you must use a windowsill, cover the jar with cloth or place it behind a curtain. Consistent temperature matters more than darkness.
How much fermented food should I eat daily for gut health benefits?
Start small with 1-2 tablespoons per meal to allow your gut microbiome to adjust gradually. Most paleo practitioners consume 1/4 to 1/2 cup daily of fermented vegetables with meals. Listen to your body–some people experience digestive adjustment (bloating, changes in bowel movements) during the first week as beneficial bacteria establish themselves.
Can I use tap water for fermentation, or must I filter it?
Chlorinated tap water can inhibit or slow fermentation by killing beneficial bacteria before they colonize. Filtered water, boiled-then-cooled water, or distilled water works best. If you only have chlorinated water available, boil it and let it cool completely, which removes most chlorine through evaporation.
Are there vegetables I should avoid fermenting?
Avoid high-water vegetables like cucumbers and tomatoes unless you’re experienced–their soft texture breaks down into mush. Leafy greens ferment quickly (1-2 days) and work well. Root vegetables, cabbage, and cruciferous vegetables are ideal for beginners. Hard vegetables like carrots and beets ferment slowly (7-14 days) but develop complex flavors.
As an Amazon Associate, Build & Bloom earns from qualifying purchases. We only recommend products we genuinely think are useful. Prices and availability vary; check Amazon for the latest.
Leave a Reply