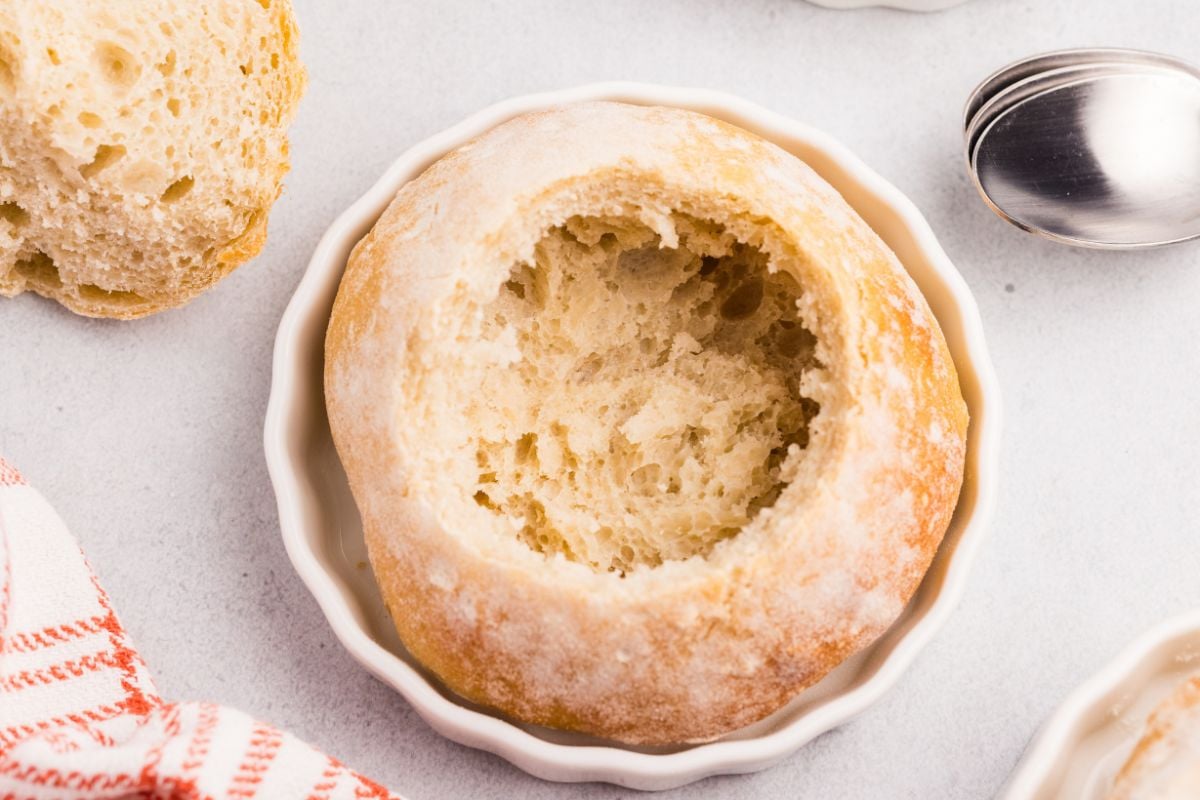

Sourdough bread bowls are a showstopping way to serve soup, stew, or salad—but they look far more complicated to make than they actually are. If you’ve got active sourdough starter and basic baking skills, you can create beautiful, crusty edible bowls that will impress your family and guests. This guide walks you through the entire process, from shaping to baking.
How to Make Sourdough Bread Bowls
Sourdough bread bowls require patience and a healthy starter, but the actual hands-on time is minimal. Follow these steps to create bowls that are crispy outside, chewy inside, and perfect for any filling.
Ingredients
- 1 cup active sourdough starter (fed 4-8 hours prior, at peak bubble)
- 1.5 cups warm water (around 80-90 degrees F)
- 3.5 cups bread flour or all-purpose flour
- 1.5 teaspoons salt
- Olive oil for greasing
- Optional: sesame seeds, herbs, or coarse sea salt for topping
Method
Mix the dough
Combine your active starter with warm water in a large mixing bowl, stirring until mostly incorporated. Add flour and mix until a shaggy dough forms with no dry flour pockets. Let this mixture rest for 30 minutes (autolyse). This resting period allows the flour to fully hydrate and develops better gluten structure.
Add salt and knead
Sprinkle salt over the rested dough and incorporate it thoroughly using stretch-and-fold motions or a stand mixer. Continue mixing until the dough is smooth and elastic, roughly 8-10 minutes by hand or 5-6 minutes in a mixer. The dough should feel tacky but not sticky.
Bulk ferment the dough
Transfer the dough to a lightly oiled bowl, cover with a damp cloth or plastic wrap, and let it rise at room temperature for 6-8 hours or overnight in the refrigerator. You’re looking for the dough to roughly double in size and show visible bubbles on the surface. Cold fermentation (overnight in the fridge) develops flavor and makes shaping easier.
Divide and pre-shape
Turn the fermented dough onto a lightly floured surface and gently divide it into 4-6 equal portions (depending on desired bowl size). Pre-shape each portion into a loose round by folding the edges toward the center. Let these rest on the counter for 20 minutes under a towel to relax the gluten.
Shape around bowls
Invert an oven-safe bowl and lightly oil the outside. Take a pre-shaped dough round and gently stretch it over the oiled bowl, working from the center outward until it drapes evenly. The dough should cover about three-quarters of the bowl, creating a bowl shape. Place the dough-covered bowl on a parchment-lined baking sheet, seam-side down.
Final proof
Cover the shaped dough bowls with a towel and let them proof for 1-2 hours at room temperature, or until they appear puffy and slightly jiggly when you gently shake the pan. You want them risen but not over-proofed, which would cause them to collapse in the oven.
Score and bake
Preheat your oven to 450 degrees F with a baking stone or steel on the middle rack for 30 minutes. Lightly score the top of each bread bowl with a sharp knife (optional, for aesthetics), brush with water, and sprinkle with toppings if desired. Bake for 25-35 minutes until the bowls are deep golden brown and sound hollow when tapped.
Cool and remove
Transfer the baking sheet to a cooling rack and let the bread bowls cool for 10-15 minutes until they’re firm enough to handle. Gently lift each bread bowl from its mold and set upright on the cooling rack. Cool for at least 30 minutes before serving to set the crust properly.
- Use an oven-safe ceramic or glass bowl roughly 3-4 inches in diameter for ideal portion-sized bread bowls. Avoid plastic—it will melt. Grease the outside generously so the dough releases cleanly after baking.
- If your dough is sticky or difficult to stretch, let it rest for an additional 5-10 minutes between shaping attempts. The gluten will relax, making the dough more cooperative and less likely to tear.
- Create steam in your oven by placing a hot cast iron skillet with water on the bottom rack. This helps develop a crispy, crackling crust on your bread bowls during the first 15 minutes of baking.
Essential Tools for Sourdough Bread Bowls
- Oven-Safe Bowls: Ceramic or glass bowls rated for oven use are critical for shaping bread bowls. They must withstand 450+ degrees F without cracking. Look for smooth surfaces that allow easy dough release and sizes between 3-5 inches in diameter for proper portions.
- Dutch Oven or Baking Stone: Either tool creates the hot, humid environment sourdough needs for oven spring and crust development. A Dutch oven traps steam for extra crispiness, while a baking stone allows for direct heat contact. Choose whichever matches your oven capacity and baking style.
- Bread Lame or Sharp Knife: A scoring tool lets you make clean, decorative slashes on dough before baking. While a sharp serrated knife works, a dedicated bread lame provides better control and prevents tearing. This step is optional but improves appearance and crust expansion.
- Dough Thermometer: Sourdough success depends on temperature management. A reliable thermometer lets you monitor water temperature, dough temperature, and oven temperature precisely. Digital instant-read thermometers are inexpensive and eliminate guesswork from fermentation timing.
Emile Henry Ceramic Oven-Safe Bowls (Set of 4)
Best for: Home bakers wanting durable, attractive bread bowl molds
These French-made ceramic bowls are specifically designed for heat, reaching temperatures of 500 degrees F with a smooth glazed finish that allows dough to release cleanly. The 5-inch diameter creates perfect individual-serving bread bowls, and the set of four means you can make multiple bowls simultaneously. Available in classic white or vibrant colors, they double as serving bowls for finished soups and stews, making them a versatile kitchen investment.
Check Current Price on Amazon →Pyrex Glass Oven-Safe Mixing Bowls (8-Cup)
Best for: Budget-conscious bakers already owning glass bowls
Pyrex glass bowls are affordable, reliable, and rated to 425 degrees F, sufficient for bread bowl baking. The 8-cup size is versatile for multiple shaping needs, and their transparency lets you monitor dough placement from underneath. While not as elegant as specialty bakers’ bowls, they’re practical, widely available, and cost-effective for testing the bread bowl technique.
Check Current Price on Amazon →Le Creuset Enameled Cast Iron Dutch Oven (5.5-Quart)
Best for: Sourdough bakers wanting steam control and multi-purpose use
While technically a Dutch oven rather than a bread bowl mold, this classic tool revolutionizes sourdough baking by trapping steam for superior crust development. The 5.5-quart capacity accommodates large loaves, and the vibrant enamel coating is both functional and decorative. Le Creuset’s lifetime warranty and heirloom quality make it a worthwhile investment for any serious bread baker who wants foolproof results.
Check Current Price on Amazon →Staub Ceramic Round Cocotte (4-Quart, Black)
Best for: Premium bakers seeking professional-grade baking vessel
Staub’s cocottes combine French heritage craftsmanship with superior heat retention and steam management. The interior enamel is smoother than Le Creuset’s, preventing dough sticking, while the tight-fitting lid ensures consistent moisture. The 4-quart size is ideal for bread bowls or artisan loaves, and the sleek matte black finish transitions seamlessly from oven to table for impressive presentations.
Check Current Price on Amazon →Final Recommendation
Sourdough bread bowls are an achievable goal for any home baker with an active starter and basic equipment. The process requires patience during fermentation but minimal actual hands-on time—most of the work is the dough resting and rising. Start with what you have at home: even a basic glass oven-safe bowl works perfectly for shaping. As you grow more comfortable with the technique, invest in specialty tools like a bread lame or proofing basket to elevate your results.
The real magic of bread bowls lies in their presentation and functionality. Imagine ladling a steaming pot of chowder or French onion soup directly into a crusty, still-warm sourdough bowl that guests will eat alongside their meal. That memorable moment is worth the extra effort. Make these for your next dinner party, family gathering, or quiet weekend dinner, and you’ll discover why bread bowls have become a staple of sophisticated home cooking.
Frequently Asked Questions
How long can I store sourdough bread bowls after baking?
Sourdough bread bowls stay fresh at room temperature in a paper bag for 2-3 days. After that, they dry out noticeably. For longer storage, wrap cooled bowls tightly and freeze for up to one month. Refresh frozen bowls by spritzing lightly with water and reheating in a 350-degree F oven for 10 minutes.
Can I make bread bowl dough ahead and freeze it?
Yes. Shape your dough around the molds, cover tightly with plastic wrap, and freeze for up to two weeks. When ready to bake, let the frozen dough thaw at room temperature for 2-3 hours until puffy, then bake as normal. This makes bread bowls convenient for entertaining since much of the work is done in advance.
What’s the difference between bread bowls and regular sourdough bread?
Bread bowls are shaped around an oven-safe mold during baking, creating an edible hollow container. Regular sourdough is baked in a standard round or oval shape. The technique is identical; only the shaping and mold differ. The inside of a bread bowl can be hollowed out after cooling to make room for filling.
Why did my bread bowl dough deflate when I shaped it?
Over-proofing during bulk fermentation is the most common culprit. If dough has already doubled and shows large surface bubbles, it’s ready to shape. Over-proofed dough loses gluten strength and collapses. Reduce bulk fermentation time next batch, or proof in the refrigerator overnight, which slows fermentation and gives you more flexibility.
Can I use a bread bowl made the day before for serving soup?
Absolutely. Bread bowls taste better the next day as flavors develop and the crust firms further. Store cooled bowls at room temperature in a paper bag, then briefly reheat in a 350-degree F oven for 5 minutes to crisp the exterior before serving. This restores any moisture loss and makes them taste freshly baked.
As an Amazon Associate, Build & Bloom earns from qualifying purchases. We only recommend products we genuinely think are useful. Prices and availability vary; check Amazon for the latest.
Leave a Reply