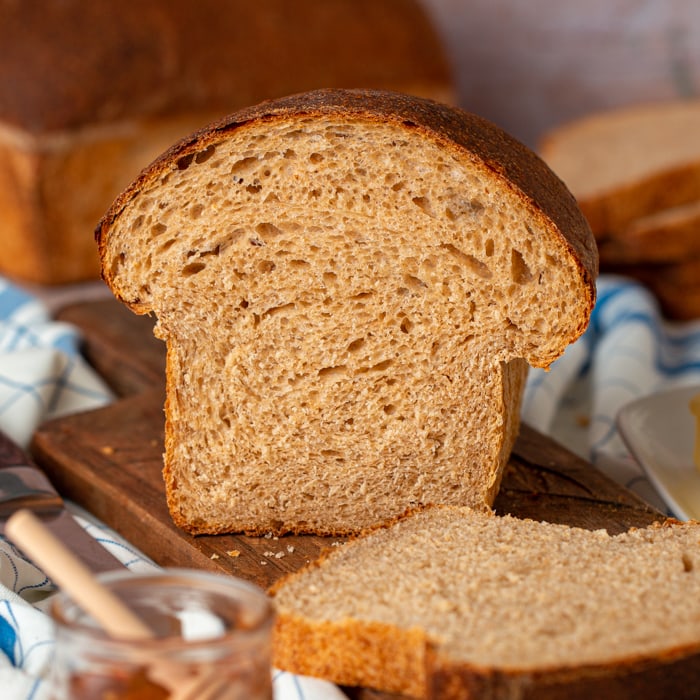

Baking sourdough at home feels intimidating, but honey wheat sourdough sandwich bread is actually one of the most forgiving loaves to master. Unlike crusty artisan boules that demand precise shaping and scoring, sandwich loaves are baked in a pan where the dough does most of the work for you. The honey adds subtle sweetness and helps the crust brown beautifully, while whole wheat flour creates nutty flavor and better nutrition without the density of a 100% whole grain loaf. If you’ve got an active sourdough starter and basic kitchen equipment, you can have bakery-quality sandwich bread on your table in three days.
How to Bake Honey Wheat Sourdough Sandwich Bread
This method uses a long, cool fermentation to develop complex flavor while keeping the crumb tender and moist. You’ll mix once, fold several times, and let time do the heavy lifting.
Ingredients
- 1 cup active sourdough starter (fed 4-8 hours prior, bubbly and at peak)
- 1.5 cups whole wheat flour
- 2 cups bread flour or all-purpose flour
- 1.25 teaspoons salt
- 2 tablespoons honey or agave
- 1.25 cups lukewarm water
Method
Mix your dough
Combine water, active starter, and honey in a large mixing bowl. Stir until mostly blended, about 1 minute. Add both flours and salt, then mix with a wooden spoon or dough whisk until all dry flour is incorporated and the dough looks shaggy. Cover and let rest 30 minutes at room temperature. This rest allows the flour to fully hydrate.
Perform stretch and folds
After the 30-minute rest, wet your hand and grab one side of the dough, stretch it up and fold it over the center. Rotate the bowl 90 degrees and repeat four times. This builds structure without aggressive kneading. Repeat this set of four folds every 30 minutes for 2 hours (four sets total). You’ll notice the dough becoming smoother and more elastic.
Begin bulk fermentation
After your last set of folds, cover the bowl and let it ferment at room temperature for 4-6 hours, or until the dough increases in volume by about 50-75% and jiggles slightly when you move the bowl. The dough should feel airy but still hold its shape. If your kitchen is cool (under 70F), this may take 6-8 hours.
Cold retard overnight
Turn the dough onto a lightly floured surface and gently pre-shape it into a round. Let it rest 20 minutes uncovered. Shape it into a boule or oval to fit your loaf pan, then place seam-side up into a proofing basket or bowl lined with a floured tea towel. Cover loosely and refrigerate for 12-18 hours. The cold fermentation develops tremendous flavor and makes scoring easier.
Preheat and score
Remove dough from refrigerator 30 minutes before baking. Preheat your oven to 450F with a loaf pan inside. Turn the cold dough onto parchment paper, seam-side down. Using a bread lame or sharp knife, make one long slash down the center of the loaf at a 30-degree angle, about 1/4-inch deep.
Bake with steam
Carefully transfer the loaf (on parchment) into the preheated loaf pan. Pour 1/2 cup boiling water into a second small pan placed on the oven floor beneath the loaf to create steam. Bake for 35-40 minutes until the crust is deep golden brown and the loaf sounds hollow when tapped on the bottom. Internal temperature should reach 205-210F.
Cool completely
Remove the loaf from the pan and place it on a wire rack. Let it cool for at least 1 hour before slicing. This cooling period allows the interior crumb to set properly. Cutting too early will result in a gummy center. Once completely cool, store in a paper bag or linen cloth for up to 3 days.
- Peak starter activity is crucial: your starter should double in volume 4-8 hours after feeding and have a dome shape with visible bubbles. If it’s sluggish, feed it and wait another 24 hours before baking.
- The cold retard is your best friend for flavor and ease: even if your room temperature fermentation is fast, the overnight chill in the fridge develops sourness and makes the dough easier to handle and shape.
- Don’t skip the steam: it keeps the crust flexible during the initial oven spring, allowing the loaf to expand fully before the crust sets. This creates that beautiful ear and prevents a flat, dense loaf.
What to Look For in Sourdough Baking Equipment
- Banneton Proofing Basket or Bowl: A bowl lined with well-floured cloth or a shaped banneton cradles your shaped dough during the final proof. Prevents the dough from sticking and helps it hold its shape. Essential for overnight cold ferments and prevents dense, flat loaves.
- Bread Lame or Scoring Knife: A sharp blade (either a dedicated bread lame or a new utility knife blade) makes clean, confident scores on the loaf surface. Poor scoring traps steam and prevents proper oven spring. A sharp tool is non-negotiable for professional-looking results.
- Dutch Oven or Heavy Covered Pan: Traps steam during baking to keep the crust flexible and glossy. While a loaf pan with a water bath works, a Dutch oven concentrates steam more efficiently and is preferred by many sourdough bakers. Look for heavy-bottomed versions that distribute heat evenly.
- Kitchen Scale: Sourdough baking is a science; measuring by weight rather than volume ensures consistency batch to batch. A simple digital scale accurate to 1 gram transforms your baking success rate and eliminates the guesswork of cup measurements.
Artisan Sourdough Banneton Proofing Basket (10-inch Round)
Best for: Home bakers making loaves regularly
A round banneton basket with rattan construction and natural floured linen liner is essential for shaping and proofing sourdough. The 10-inch size accommodates most sandwich loaf recipes. The raised spiral design prevents sticking while allowing air circulation, and the basket’s weight distributes pressure evenly. Hand-washable and lasts for years with minimal maintenance.
Check Current Price on Amazon →OXO Good Grips Digital Kitchen Scale
Best for: Bakers new to weight-based measurements
This compact digital scale reads in grams and ounces, with a 5-pound capacity and accuracy to 0.1 ounces. The large backlit display is easy to read, and the tare button lets you zero it between ingredients. Its slim profile fits easily on crowded counters. Perfect for sourdough recipes where precision matters most for consistent results.
Check Current Price on Amazon →Kussi Co. Bread Lame Set with Sourdough Scoring Knife
Best for: Budget-conscious home bakers
This affordable bread lame features a sharp, replaceable blade and ergonomic handle for confident scoring without damaging dough. The set includes extra blades and a durable plastic handle. Perfect for creating professional-looking slashes that control oven spring and expansion. Replaceable blades mean the tool lasts indefinitely at minimal cost.
Check Current Price on Amazon →Le Creuset Enameled Cast Iron Dutch Oven (5.5-Quart, Flame Orange)
Best for: Bakers seeking lifetime durability and heat retention
A 5.5-quart enameled cast iron Dutch oven with superior heat distribution and moisture retention for exceptional sourdough crust development. The vibrant enamel finish resists chipping and doesn’t require seasoning. Heavy-duty construction means it works equally well for braising and baking. Lifetime warranty and heirloom-quality durability justify the premium price.
Check Current Price on Amazon →Final Recommendation
Honey wheat sourdough sandwich bread is absolutely achievable for home bakers at any skill level. The long fermentation method does most of the work for you, and the honey adds subtle sweetness that makes the final loaf versatile for everything from turkey sandwiches to French toast. The key is respecting the cold ferment: those overnight hours in the fridge develop complexity that rushed room-temperature baking simply cannot achieve. Start with a simple banneton, a basic scoring knife, and a reliable kitchen scale, and you’ll have the foundation for consistent success.
Your first loaf might not be perfect, and that’s completely fine. Sourdough teaches you something with every bake: what your starter needs, how your kitchen’s temperature affects fermentation timing, how to read your dough’s readiness by feel rather than the clock. After two or three successful loaves, you’ll find yourself experimenting with timing, hydration, and fermentation temperatures. Homemade sourdough tastes incomparably better than store-bought bread and costs a fraction of the price, especially when amortized across dozens of loaves your equipment will help you create.
Frequently Asked Questions
How do I know if my sourdough starter is ready to use?
A ready starter should approximately double (or better) in volume within 4-8 hours of feeding. It should smell pleasantly sour and have visible bubbles throughout. If you drop a small spoonful into water and it floats, it’s at peak activity and ready to use immediately.
Can I skip the overnight cold ferment?
You can, though it’s not ideal. A room-temperature bulk ferment followed by direct baking will work but yields less flavor complexity. The cold retard develops sourness and allows enzymes to break down gluten more thoroughly, creating a more flavorful and tender crumb.
Why is my sourdough loaf dense and gummy inside?
This usually indicates underbaking or insufficient cooling time. Sourdough needs to reach an internal temperature of 205-210F. Additionally, slicing before the loaf cools completely (at least 1 hour) prevents the crumb structure from setting properly, resulting in a gummy texture.
What should I do if my dough is too sticky to handle?
Wet your hands instead of using flour; water reduces stickiness without developing extra gluten as flour does. If the dough is extremely sticky even with wet hands, your hydration may be too high. Try reducing water by 2-3 tablespoons in your next bake.
Can I use all whole wheat flour instead of the white and whole wheat blend?
Yes, but expect a denser crumb and stronger whole wheat flavor. Whole wheat absorbs more water, so increase water to 1.5 cups. Whole wheat also ferments faster, so reduce bulk fermentation time by 1-2 hours and monitor the dough closely to avoid over-proofing.
As an Amazon Associate, Build & Bloom earns from qualifying purchases. We only recommend products we genuinely think are useful. Prices and availability vary; check Amazon for the latest.
Leave a Reply