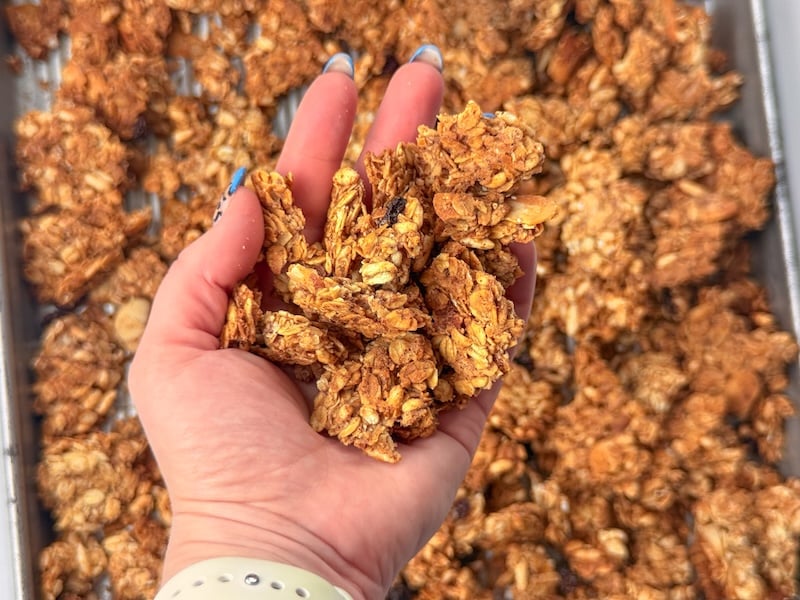

If you maintain a sourdough starter, you know the weekly struggle of discarding excess starter. Instead of tossing it out, you can redirect that discard into a delicious, naturally fermented granola that tastes complex and slightly tangy. This recipe transforms your starter waste into a shelf-stable breakfast that’s cheaper and more flavorful than store-bought versions, and it proves that sourdough baking doesn’t stop at bread.
How to Make Oats & Honey Sourdough Discard Granola
This recipe yields a batch of crunchy granola with a subtle sourdough tang and natural sweetness from honey. The fermentation process develops flavor while the oven crisps everything to perfection.
Ingredients
- 1 cup active sourdough discard (fed starter at peak rise)
- 3 cups rolled oats (old-fashioned or quick oats work)
- 1/2 cup honey or maple syrup
- 1/3 cup neutral oil (vegetable, coconut, or light olive oil)
- 1 teaspoon vanilla extract
- 1 teaspoon fine sea salt, plus 1/2 teaspoon cinnamon, 1/4 teaspoon nutmeg, and optional pinch of cardamom
Method
Prepare Your Sourdough Discard
Use discard that has been fed and is at or near peak rise (when it’s most active and bubbly). Measure out exactly one cup and pour into a large mixing bowl. If your discard is very thick, whisk gently to loosen it slightly so it combines evenly with the dry ingredients.
Combine Wet Ingredients
Add the honey or maple syrup, neutral oil, and vanilla extract directly to the bowl with your sourdough discard. Whisk together until the honey is fully dissolved and the mixture is uniform and glossy. This wet base will coat all the oats and help them crisp up in the oven.
Mix in Oats and Spices
Pour all three cups of rolled oats into the wet mixture. Add the salt, cinnamon, nutmeg, and any other warm spices you prefer. Using a sturdy spoon or your hands, mix thoroughly until every oat cluster is coated with the wet mixture. Break up any clumps as you go to ensure even baking.
Spread on Sheet Pans
Line two large sheet pans with parchment paper. Divide the granola mixture between them, spreading it into an even layer about half an inch thick. Don’t pack it down–you want it loose enough for air to circulate and create crispness rather than dense clumps.
Bake Low and Slow
Preheat your oven to 300 degrees Fahrenheit. Bake the granola for 25-35 minutes, stirring every 10 minutes with a wooden spoon. The granola should gradually turn golden brown and smell toasty. Stop when it feels completely dry to the touch but not burned–the oats will continue crisping slightly as they cool.
Cool Completely Before Storing
Spread the finished granola on clean, cool sheet pans and let it sit undisturbed for at least 30 minutes, preferably one hour. As it cools, it will harden further and develop its final crunch. Breaking it into clusters at this point creates a more pleasant texture than storing it warm.
Store in an Airtight Container
Once completely cool, transfer the granola to glass jars or airtight containers. It will keep for two to three weeks at room temperature, though the natural fermentation tang may gradually fade over time. If you notice any moisture buildup, pop the lid off for a few minutes to allow air circulation.
- Stir your granola every 10 minutes during baking to prevent the edges from burning while the center stays soft. This is the single most important step for achieving even, uniform crispness.
- The sourdough discard adds a subtle tangy flavor that develops more pronounced over the first few days of storage, so taste it on day two or three for the full effect.
- For clusters instead of granola crumbles, let the baked granola cool for 15 minutes on the pan before breaking it apart, then spread on a tray to finish cooling.
What to Look For in Granola-Making Equipment
- Sheet Pans: Heavy-duty, light-colored sheet pans distribute heat evenly and prevent burning. Look for aluminum or steel with a slightly raised lip to prevent granola from sliding off during stirring.
- Parchment Paper: Essential for easy cleanup and preventing sticking. Food-grade parchment handles oven temperatures up to 420 degrees without tearing or releasing unwanted chemicals.
- Mixing Bowls: A large stainless steel or glass bowl accommodates all ingredients and allows easy hand-mixing. Glass is easier to see through for checking if ingredients are fully combined.
- Wooden Spoon: Wooden spoons are gentle on non-stick surfaces and provide better control when stirring thick, clumpy granola every ten minutes during baking.
Rachael Ray Yum-o! Nonstick Cookie Sheet Set
Best for: Home bakers making granola regularly
This two-pack of heavy-gauge aluminum sheet pans delivers even heat distribution critical for uniform granola baking. The nonstick surface reduces cleanup time, and the reinforced rims prevent warping even after repeated high-heat use. Reviewers praise the durability and consistent browning results, making these pans a workhorse for any baking project beyond granola.
Check Current Price on Amazon →AmazonBasics Baking Sheet Set
Best for: Budget-conscious home bakers
Two sturdy steel baking sheets at an entry-level price point. While the surface is bare steel rather than nonstick, the construction is solid and they heat evenly. Parchment paper eliminates sticking concerns, and the savings let you invest in other quality tools. Perfect for occasional granola makers who want reliable performance without premium pricing.
Check Current Price on Amazon →Williams-Sonoma Goldtouch Nonstick Sheet Pan
Best for: Serious bakers who want professional results
Goldtouch coating resists scratching and maintains performance over hundreds of uses. The aluminum construction is thicker than standard pans, eliminating hot spots that cause uneven browning. These pans cost more upfront but last decades with proper care, making them a smart long-term investment for anyone who bakes regularly.
Check Current Price on Amazon →Glad Baking Parchment Paper Sheets
Best for: Granola bakers who value convenience
Pre-cut parchment sheets eliminate the need to cut and fit paper to your pans, saving time and reducing waste. The paper is FDA-approved and heat-resistant to 420 degrees, perfect for low-temperature granola baking. A single box contains 40 sheets, providing months of baking sessions without constantly buying new rolls.
Check Current Price on Amazon →Final Recommendation
Making granola from sourdough discard is one of the smartest ways to reduce starter waste while creating a pantry staple that tastes infinitely better than commercial versions. The recipe requires minimal equipment–essentially sheet pans, parchment, a mixing bowl, and a spoon–making it accessible to any home baker. The Rachael Ray Yum-o! sheet pans stand out as the best overall choice because they’re affordable, durable, and heat evenly, eliminating the common problem of brown edges with an underbaked center. If budget is your primary concern, the AmazonBasics pans perform reliably, and pairing them with quality parchment paper ensures equally good results.
The real magic of this recipe happens during those ten-minute stirring intervals when the honey caramelizes and the oats slowly turn from pale yellow to deep golden brown. That patience and attention transform simple ingredients into something special. Whether you choose budget-friendly basics or invest in premium pans, your homemade granola will outperform anything you can buy at a grocery store. Start with the recipe and equipment suggested here, and within weeks you’ll have perfected your own signature blend, potentially adding spices, nuts, or seeds as your taste preferences evolve.
Frequently Asked Questions
Can I use sourdough discard that hasn’t been fed yet?
Yes, unfed discard will work, but fed discard at peak rise produces more pronounced sourdough flavor in the finished granola. The fermentation and bubbles help develop complexity that makes the granola taste more interesting than with dormant starter.
What’s the difference between rolled oats and quick oats for this recipe?
Rolled oats create a chunkier, more textured granola that stays crispier longer. Quick oats bake faster and create a finer, more crumbly texture. Either works, but rolled oats are traditional for granola and provide better mouthfeel.
Why does my granola turn out chewy instead of crispy?
Chewy granola usually results from underbaking, too much honey, or inadequate cooling time. Ensure you bake for the full 25-35 minutes until the mixture feels completely dry, and let it cool fully (at least 30 minutes) on the pan before storing. If your discard was particularly wet, you may need to add an extra tablespoon of oil.
Can I add nuts, seeds, or dried fruit to this recipe?
Yes, you can add up to one cup of nuts, seeds, or dried fruit. Add nuts and seeds before baking so they toast with the oats. Add dried fruit after baking to prevent it from drying out further in the oven.
How long does homemade granola stay fresh?
Properly stored in an airtight container at room temperature, sourdough discard granola lasts two to three weeks. The natural fermentation actually develops more complex flavor over the first few days. If you notice moisture buildup, briefly ventilate the container to prevent mold.
As an Amazon Associate, Build & Bloom earns from qualifying purchases. We only recommend products we genuinely think are useful. Prices and availability vary; check Amazon for the latest.
Leave a Reply