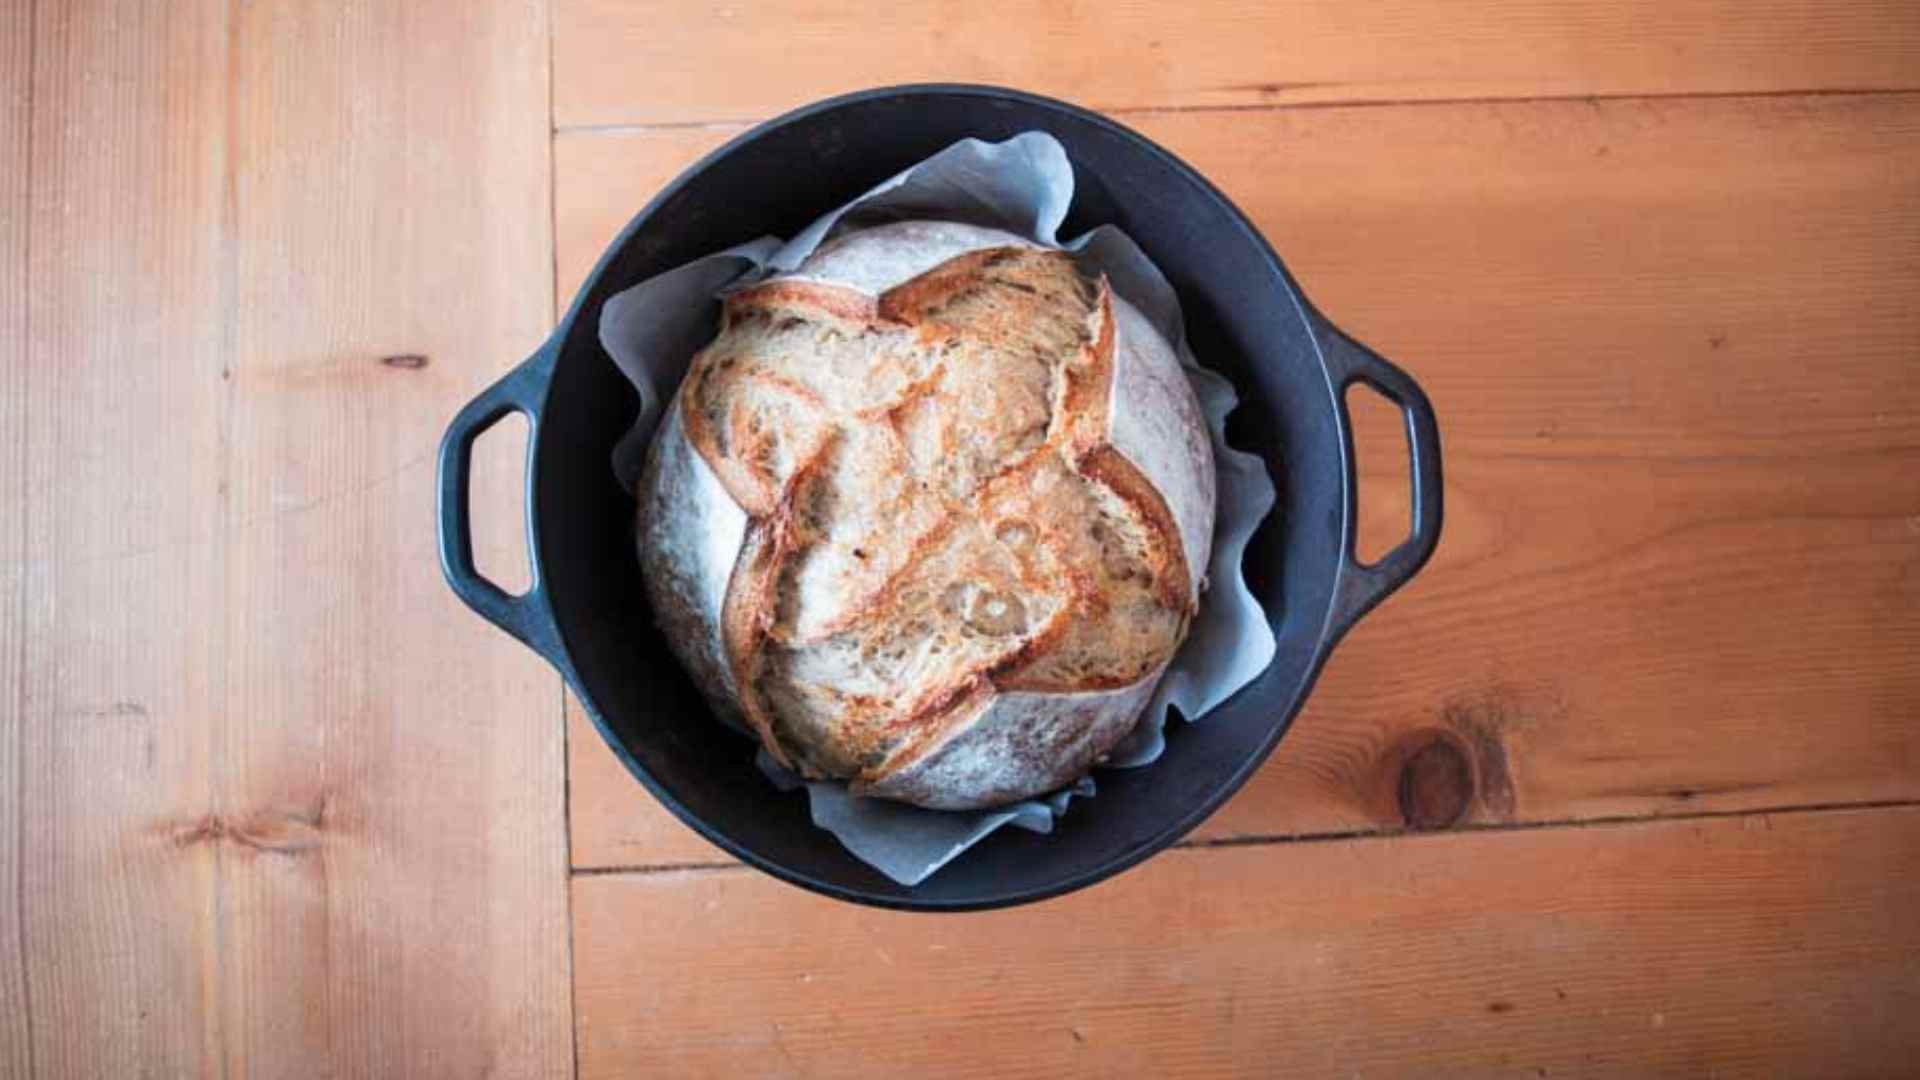

Making sourdough at home can feel intimidating, but with the right technique and a few quality tools, you’ll be pulling gorgeous, crusty loaves from your oven. This rosemary garlic variation transforms basic sourdough into restaurant-quality bread that’s perfect for serving alongside dinner or toasting for breakfast. The key is understanding your fermentation timeline and investing in proper baking equipment.
How to Make Rosemary Garlic Sourdough Bread
This recipe yields one large artisan loaf with a crispy crust and open crumb structure. Plan for a 3-4 day process from start to finish, though most of that time is passive fermentation.
Ingredients
- 1 cup active sourdough starter (fed 4-8 hours prior, bubbly and at peak)
- 1 1/2 cups warm water (around 75-80F)
- 3 1/2 cups bread flour
- 2 teaspoons fine sea salt
- 3-4 tablespoons fresh rosemary leaves, finely chopped
- 4-5 cloves roasted garlic, mashed into a paste
Method
Mix the dough
Combine your active sourdough starter with warm water in a large mixing bowl, stirring until mostly dissolved. Add bread flour and mix with your hands or a wooden spoon until all dry flour is incorporated. This rough dough is called the autolyase. Let it rest uncovered for 30-60 minutes at room temperature. This resting period allows the flour to fully hydrate and develops gluten naturally.
Incorporate salt, herbs, and garlic
After the rest, add salt, chopped rosemary, and roasted garlic paste to the dough. Mix thoroughly using a pinching and folding motion with wet hands, incorporating these ingredients evenly throughout. The dough will feel sticky and loose at this stage, which is correct.
Perform stretch and folds
Over the next 2-3 hours, perform 4-5 sets of stretch and folds at 30-minute intervals. Wet your hand, grab one side of the dough, stretch it up and fold it over the center. Rotate the bowl and repeat from each direction. This develops strength and gluten structure without aggressive kneading. Between sets, leave the dough to rest in a covered bowl.
Begin bulk fermentation
After your final stretch and fold, cover the dough and allow it to ferment at room temperature for 4-6 hours (or until it increases by 50-75 percent in volume). You’re looking for visible bubbles throughout and a slight dome on top. Timing depends on your kitchen temperature; warmer kitchens ferment faster.
Shape the dough
Turn the dough out onto a lightly floured surface. Shape it into a round boule by pulling the edges toward the center and rolling it toward you, creating tension on the surface. Place it seam-side up in a floured banneton basket or a bowl lined with a kitchen towel. If you don’t have a banneton, a colander lined with a clean kitchen towel works perfectly.
Cold proof overnight
Cover the shaped dough and refrigerate for 8-16 hours. This slow, cold fermentation develops flavor and makes scoring easier. The cold dough is less sticky and holds its shape better when baked. You can skip this step and do a 2-3 hour room-temperature proof instead, but overnight cold proofing yields superior flavor.
Preheat and score
Place a covered Dutch oven (or any heavy covered vessel) in your oven and preheat to 475F for at least 30 minutes. Carefully remove the hot Dutch oven, turn the dough out onto parchment paper, and use a sharp bread knife or lame to score the top with a single diagonal slash. This guides where the loaf will expand.
Bake covered and uncovered
Place the scored dough (on parchment) into the preheated Dutch oven and cover. Bake for 20 minutes covered (this traps steam for oven spring), then remove the lid and bake another 20-25 minutes until the crust is deep golden brown. The total bake time is around 40-45 minutes. Transfer to a cooling rack and wait at least 30 minutes before slicing, as the interior continues to set during cooling.
- Keep your kitchen between 70-75F during fermentation for predictable timing. Warmer kitchens speed fermentation, requiring earlier progression through stages.
- Use a bench scraper to handle sticky dough with confidence. Wet your bench scraper instead of your hands to prevent excessive sticking during shaping.
- If you don’t have roasted garlic on hand, roast fresh cloves by tossing them in olive oil and baking at 400F for 15 minutes until soft and golden, then mash.
Essential Sourdough Baking Equipment
- Dutch oven or covered baker: A heavy, oven-safe pot with a lid is crucial for trapping steam during the initial bake phase, which creates the characteristic crispy crust and proper oven spring. Cast iron and ceramic both work excellently and last decades.
- Banneton proofing basket: These round or oval baskets with floured surfaces support your shaped dough during cold proofing without sticking. They help maintain round shape and are far more convenient than improvising with kitchen towels.
- Sharp scoring tool or bread knife: A dedicated bread lame or extremely sharp serrated knife allows you to score the dough cleanly and deliberately. Clean, decisive scores guide the loaf’s expansion and create visual appeal.
- Food scale with gram measurement: Sourdough baking benefits from precision, especially when adjusting recipes. A digital scale measuring in grams removes guesswork and ensures consistent results batch after batch.
Le Creuset Signature 5.5-Quart Dutch Oven
Best for: Serious home bakers seeking heirloom-quality equipment
The gold standard for sourdough baking, Le Creuset’s enameled cast iron Dutch oven provides superior heat retention and distribution. Its tight-fitting lid traps steam perfectly during the critical first 20 minutes of baking. The enamel coating eliminates rust concerns and seasoning maintenance. Available in multiple colors to match any kitchen aesthetic. Lifetime durability means this single investment will produce hundreds of loaves.
Check Current Price on Amazon →Tramontina Enameled Cast Iron Dutch Oven 5.5-Quart
Best for: Budget-conscious bakers who want proven performance
Tramontina delivers exceptional value without sacrificing performance. This enameled cast iron Dutch oven performs identically to premium brands at a fraction of the cost. The heavy construction ensures even heat distribution, and the enamel is durable for daily use. Perfect for testing your sourdough technique before investing in luxury equipment. Backed by solid warranty and readily available on Amazon.
Check Current Price on Amazon →Banneton Proofing Basket Set by Homdox (10-Inch Round, 2-Pack)
Best for: First-time sourdough bakers needing reliable proofing baskets
This affordable two-pack of banneton baskets removes the guesswork from dough shaping and proofing. Each basket is 10 inches in diameter with a natural rattan construction that’s food-safe and durable. The starter set includes liners to prevent sticking and makes the transition from bowel proofing effortless. Having two baskets lets you proof multiple loaves simultaneously or have one drying while the other is in use.
Check Current Price on Amazon →Staub 5.5-Quart Round Cocotte Dutch Oven
Best for: Bakers who use their Dutch oven for both cooking and baking
Staub’s dark enamel cocotte is a French-made masterpiece that excels at sourdough baking and stovetop cooking. The black matte enamel interior hides stains and wear, and the self-basting lid design (with small spikes on the interior) creates even more steam distribution. The ergonomic handles and superior craftsmanship justify the premium price for those wanting kitchen artistry alongside functionality.
Check Current Price on Amazon →Start Your Sourdough Journey Today
Rosemary garlic sourdough represents the intersection of technique, patience, and ingredient quality. With a mature starter and a few essential tools, you’re equipped to produce bakery-caliber bread at home. The process requires minimal hands-on time despite spanning several days; most of the work happens during passive fermentation while you sleep or go about your day. Invest in a quality Dutch oven and banneton basket, and you’ll be making exceptional loaves for years.
The real magic happens when you taste your first homemade sourdough with a crackling crust that yields to a tender, open crumb infused with rosemary and roasted garlic. That moment validates every step of the process. Start with this recipe as written, take detailed notes on your fermentation timeline and room temperature, and adjust future batches based on what you observe. Each loaf teaches you something new about how your kitchen, starter, and flour interact. Welcome to the sourdough community.
Frequently Asked Questions
How do I know if my sourdough starter is ready to use?
A healthy, active starter should double or triple in size within 4-8 hours of feeding at room temperature. It should smell pleasantly sour and tangy, with visible bubbles throughout. You’ll see a dome on top that peaks just before it begins to recede. Use it at peak activity, just before it collapses.
Can I make this recipe without a Dutch oven?
Yes, but results won’t be identical. A Dutch oven traps steam, which creates the crispy crust. Alternatives include a covered baking stone with an upside-down bowl, or a cast iron skillet with a tent of aluminum foil. Steam quality and results will be reduced compared to a proper Dutch oven.
Why is my sourdough dense instead of open and airy?
Dense crumb usually results from under-fermentation (not enough bulk fermentation time), insufficient stretch-and-folds (weak gluten development), or using a weak starter. Ensure your starter is bubbly and active, perform all four stretch-and-fold sets, and extend fermentation time if your kitchen is cool.
Can I freeze shaped dough before baking?
Absolutely. After shaping, wrap the banneton tightly and freeze for up to 2 weeks. Bake directly from frozen, adding 5-10 minutes to bake time. This flexibility lets you bake fresh bread on your schedule without being tied to fermentation timelines.
How should I store baked sourdough to keep it fresh?
Cool completely on a rack, then store in a paper bag (not plastic) at room temperature for up to 3 days. The crust softens slightly but the bread stays fresh. For longer storage, slice and freeze. Toast frozen slices directly for crispy, fresh-tasting bread.
As an Amazon Associate, Build & Bloom earns from qualifying purchases. We only recommend products we genuinely think are useful. Prices and availability vary; check Amazon for the latest.
Leave a Reply