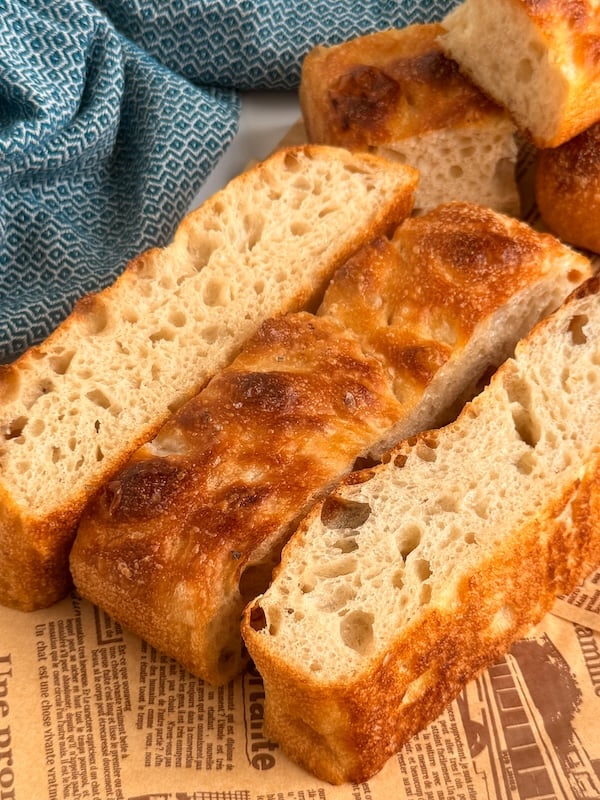

You have an active sourdough starter and a craving for focaccia, but no time for overnight fermentation. The good news: you can make restaurant-quality sourdough focaccia from start to fresh-from-the-oven in just 5-6 hours. This recipe skips the long cold ferment and instead relies on a vigorous starter, proper hydration, and two strategic rise periods to develop flavor and structure. You’ll end up with that signature dimpled, olive-oil-laden crust and an interior that’s tender and slightly tangy.
How to Make Same-Day Sourdough Focaccia
This recipe produces one 9×13 inch focaccia with a crispy exterior and open crumb. The entire process takes 5-6 hours from mixing to eating.
Ingredients
- 1 cup (240ml) active sourdough starter at peak rise, bubbly and doubled
- 1.5 cups (360ml) lukewarm water
- 3.5 cups (420g) all-purpose or bread flour
- 1.5 teaspoons (9g) salt
- 3-4 tablespoons (45-60ml) extra virgin olive oil, plus more for the pan and topping
- Coarse sea salt and fresh rosemary sprigs for topping
Method
Mix the dough
Combine active starter, warm water, and flour in a large mixing bowl. Stir until all flour is incorporated and you have a shaggy, wet dough. Let rest uncovered for 20-30 minutes (autolyse phase). This allows the flour to fully hydrate and develops gluten structure naturally.
Add salt and oil
Sprinkle salt over the dough, then drizzle with olive oil. Squeeze and fold the dough with your hand for 3-4 minutes until the salt and oil are fully integrated. The dough will begin to feel smoother and more cohesive. This wet mixing method builds strength without intensive kneading.
First rise with stretch-and-folds
Place dough in a lightly oiled bowl, cover loosely, and let rise at room temperature for 2-2.5 hours. Every 30 minutes, perform one set of stretch-and-folds: wet your hand, grab one side of the dough, pull it up and fold it over the center, rotate the bowl, and repeat 4 times. This develops structure and openness without vigorous kneading.
Transfer to the pan
After the first rise, generously oil a 9×13 inch baking pan. Transfer the dough to the pan and gently stretch it to fill the space. If it resists, let it relax for 5 minutes and stretch again. Don’t force it–you want an even, airy layer about 0.5 inches thick.
Second rise and dimpling
Cover the pan loosely and let the dough rise for 1-1.5 hours at room temperature until puffy and jiggly. About 15 minutes before baking, preheat your oven to 425°F. Wet your fingertips and firmly press dimples all over the surface, creating the signature focaccia texture while releasing some air.
Top with oil, salt, and herbs
Drizzle the entire surface generously with olive oil, making sure it pools slightly in the dimples. Sprinkle with coarse sea salt and scatter fresh rosemary sprigs across the top. The oil is essential–it creates the crispy, golden crust and adds rich flavor.
Bake until golden
Transfer to the preheated oven and bake for 18-24 minutes until the top is deep golden brown and the edges are crispy. The focaccia should sound hollow if you tap the bottom. Remove and cool on a wire rack for at least 10 minutes before slicing, though it’s best served still slightly warm.
- Use starter that’s at peak rise (doubled, bubbly, with a dome on top) for the strongest fermentation. If your starter is sluggish, feed it 4-6 hours before mixing the dough.
- Don’t skip the dimpling step–it prevents large air bubbles from forming on the surface and creates the classic focaccia appearance while allowing oil to pool and crisp the crust.
- If your kitchen is cold, place the rising dough in a turned-off oven with the light on, or on top of a warm (not hot) appliance. Consistent warmth around 75-78°F produces the best results.
What to Look For in Focaccia Baking Equipment
- Sturdy metal baking pan: A heavy-duty 9×13 inch steel pan distributes heat evenly and prevents warping. Dark or seasoned pans may brown the bottom faster, so adjust rack position if needed.
- Instant-read thermometer: Measures dough temperature (aim for 75-78°F during bulk fermentation) and internal bread temperature (200-205°F when done). Removes guesswork and prevents over- or under-proofing.
- Digital kitchen scale: Converts recipe weights to grams for precision. Sourdough responds better to weight measurements than cup volume, which varies by how you scoop flour.
- Bench scraper: A plastic or metal scraper helps you handle wet dough, perform stretch-and-folds without mess, and transfer dough to the baking pan cleanly.
Chicago Metallic Commercial-Grade 9×13 Inch Steel Baking Pan
Best for: Serious home bakers and focaccia makers
This heavy-gauge steel pan is the workhorse of professional bakeries and serious home bakers alike. It heats evenly, resists warping, and produces consistently golden-brown focaccia every time. The commercial construction means it will last decades. Slightly heavier than standard pans, which is a benefit for heat distribution. If you’re committing to regular sourdough focaccia, this is the single best investment you can make.
Check Current Price on Amazon →AmazonBasics Nonstick Baking Sheet Pan Set
Best for: Beginners on a tight budget
A reliable entry-level option that works well for focaccia without the premium price tag. The nonstick coating helps prevent sticking, though you’ll still want to oil generously. These won’t last as long as commercial pans, but they’re affordable enough to replace if needed. Great for testing recipes before investing in heavier equipment.
Check Current Price on Amazon →Pyrex Basics Glass Baking Dish 9×13 Inch
Best for: Home cooks who want transparency and ease of cleanup
Glass conducts heat differently than metal but offers the huge advantage of seeing your focaccia’s bottom browning in real time. Easy to clean, doesn’t react with acidic sourdough, and lasts forever. Glass heats slightly slower than metal, so you may need to add 1-2 minutes to baking time. Excellent for learning focaccia baking because you gain visual feedback throughout the process.
Check Current Price on Amazon →Nordic Ware Natural Aluminum Commercial 9×13 Cake Pan
Best for: Bakers who want professional results without steel weight
Nordic Ware’s lightweight aluminum pan offers commercial-grade performance without the hefty weight of steel. Aluminum heats quickly and evenly, producing beautiful, evenly browned focaccia. The naturally anodized surface is durable and doesn’t require seasoning. Professional bakeries choose aluminum for high-volume production. It’s an excellent middle ground between budget options and heavy steel.
Check Current Price on Amazon →Make Your First Same-Day Focaccia This Weekend
Same-day sourdough focaccia proves that you don’t need days of planning to make artisan bread at home. With an active starter, 5-6 hours of your day, and the right equipment, you’ll produce a focaccia that rivals bakery versions–with better flavor because it’s yours. The recipe works because you’re harnessing your starter’s natural strength and building structure through stretch-and-folds rather than relying on extended cold fermentation. Start with a heavy baking pan and a kitchen scale, practice once or twice, and you’ll develop the intuition to adjust for your specific kitchen conditions.
The beauty of focaccia is that it’s forgiving and rewarding. Even your first attempt will taste good, and your third or fourth will be genuinely excellent. Invest in the core equipment–a sturdy pan, a scale, and a thermometer–and you’ve set yourself up for years of consistent focaccia success. The herbs, the olive oil, the dimples, the warmth from the oven: these small details combine into something worth celebrating. Bake this weekend, share it warm, and join the hundreds of home bakers discovering that same-day sourdough focaccia is one of the quickest, most delicious ways to enjoy sourdough at home.
Frequently Asked Questions
Can I make this focaccia without a sourdough starter?
Not with this recipe–sourdough starter provides both the leavening (lift) and the distinctive tangy flavor that makes focaccia special. You could adapt this with commercial yeast, but you’d lose the sourdough character. If you don’t have a starter yet, plan to create one 5-7 days before baking.
What if my first rise happens faster or slower than expected?
Room temperature is the main variable. If your kitchen is 72°F, expect closer to 2.5-3 hours. If it’s 78°F, you might finish in 1.5 hours. Watch the dough, not the clock. It should increase by 50-75% in volume and jiggle when you gently shake the bowl. Use a thermometer to monitor dough temperature if timing is unpredictable.
Can I refrigerate the dough to slow fermentation?
Yes. After the first rise, you can refrigerate the dough in the oiled pan for 4-8 hours or overnight. This develops flavor further. Remove from the fridge, let it come to room temperature for 30-45 minutes, then perform the dimpling and second rise at room temperature before baking.
Why is my focaccia dense instead of airy?
Dense focaccia usually means your starter wasn’t active enough at mixing time, or the dough didn’t rise sufficiently before baking. Always use starter that’s at peak (doubled with bubbles). If rising is slow, your kitchen may be too cold. Aim for dough temperature around 76°F for predictable timing.
Can I freeze leftover focaccia?
Yes. Cool completely, wrap tightly in plastic wrap, and freeze for up to one month. Thaw at room temperature, then warm in a 350°F oven for 5-10 minutes to restore crispness. The crumb stays tender, though the crust won’t be quite as crispy as fresh-baked.
As an Amazon Associate, Build & Bloom earns from qualifying purchases. We only recommend products we genuinely think are useful. Prices and availability vary; check Amazon for the latest.
Leave a Reply