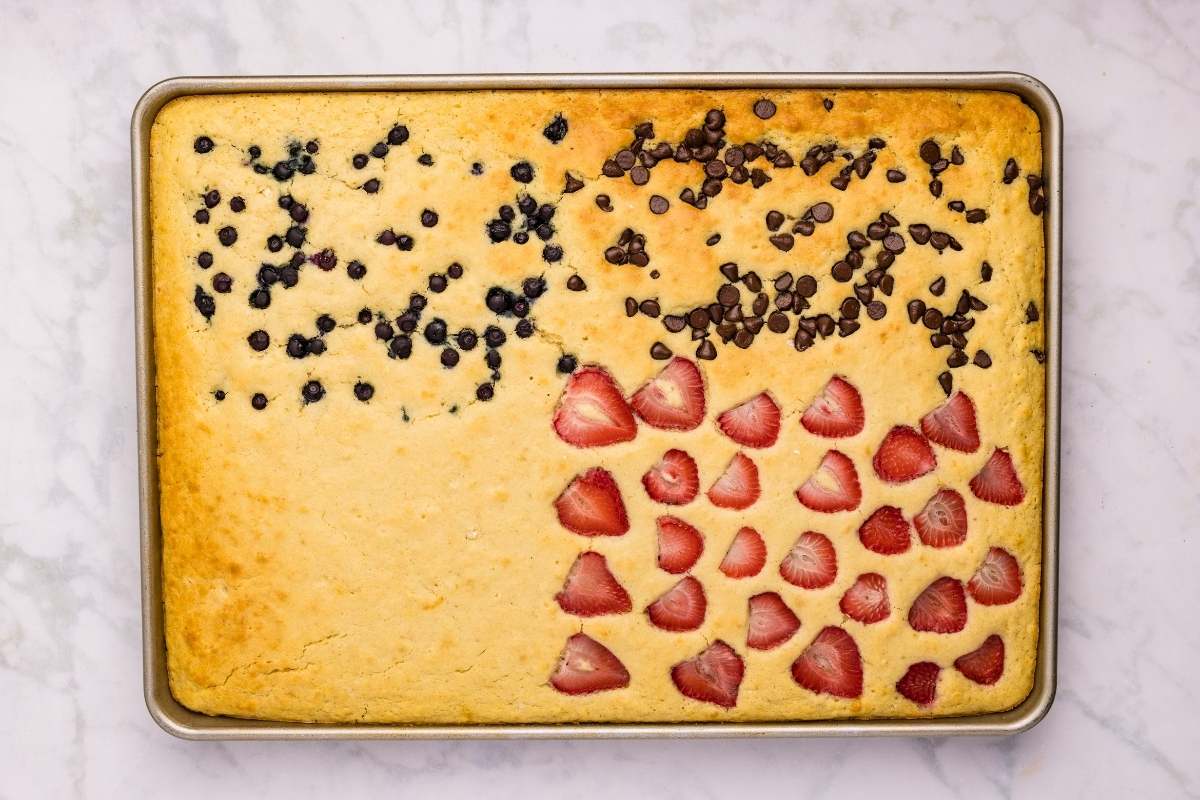

If you keep a sourdough starter, you know the struggle: regular feedings mean discarding cups of perfectly good starter. Instead of tossing it, transform that discard into puffy, tangy sheet pan pancakes that bake all at once. This one-pan method is perfect for feeding a family or meal-prepping breakfasts for the week ahead. No flipping required, no standing over a griddle, and the result tastes like traditional sourdough with a tender crumb.
How to Make Sheet Pan Sourdough Pancakes
This recipe creates a thick batter that bakes into a cohesive sheet you can cut into squares. The sourdough discard provides flavor and lift, while a touch of yeast ensures the pancakes rise fully in the oven.
Ingredients
- 1 cup sourdough discard (unfed, straight from the jar)
- 1 cup whole milk or buttermilk
- 2 large eggs
- 2 tablespoons melted butter or neutral oil
- 1 1/2 cups all-purpose flour
- 2 tablespoons sugar, 1 teaspoon salt, 1 teaspoon baking powder, and 1/2 teaspoon instant yeast
Method
Mix wet ingredients
In a large bowl, combine your sourdough discard, milk, eggs, and melted butter. Whisk until the mixture is smooth and well combined. Don’t overmix at this stage—gentle stirring is fine.
Combine dry ingredients separately
In a separate bowl, whisk together the flour, sugar, salt, baking powder, and instant yeast. Breaking the dry ingredients into their own bowl prevents lumps and ensures the yeast is evenly distributed.
Create the batter
Pour the dry mixture into the wet ingredients and fold them together with a spatula until just combined. The batter should be thick but pourable, with some small lumps visible. Overmixing develops gluten and makes pancakes tough.
Rest the batter
Let the batter sit at room temperature for 15-20 minutes. This allows the flour to fully hydrate and the yeast to begin its work, creating a lighter, airier pancake when baked.
Prepare and pour into pan
Preheat your oven to 425°F and grease a rimmed baking pan thoroughly with butter or cooking spray. Pour the batter into the pan and spread it evenly with a spatula to about 1/2-inch thickness. Make sure it reaches the corners.
Bake until golden
Place the pan in the preheated oven and bake for 18-22 minutes, until the top is golden brown and springs back lightly when touched. The edges will pull away slightly from the pan when done.
Cool and cut
Remove the pan from the oven and let cool for 5 minutes on a wire rack. Using a sharp knife, cut the pancake sheet into squares or rectangles. Serve warm with butter, maple syrup, fruit, or yogurt.
- Use unfed sourdough discard—fed starter that has just begun to rise creates too much volume and can cause overflow in the pan
- For thicker, fluffier pancakes, increase baking powder to 1 1/2 teaspoons and let the batter rest closer to 25 minutes
- Leftovers refrigerate well for 4 days and can be reheated gently in a 300°F oven for 8-10 minutes, or eaten cold as a snack
What to Look For in Sheet Pan Pancake Baking Equipment
- Pan material and weight: Heavy-gauge steel conducts heat evenly and prevents hot spots that cause uneven browning. Aluminum pans heat quickly but can warp; steel is more forgiving and produces consistent results across the entire pan.
- Size and rim height: A true half-sheet pan (13×18 inches) is standard and holds the batter at the right depth. Rims should be at least 1 inch tall to contain the batter as it rises and expands in the oven.
- Non-stick coating vs. bare metal: Non-stick surfaces make removal easier, but seasoned steel or aluminum lined with parchment also works well. Non-stick loses effectiveness over time and temperature; bare pans, while requiring more grease, last indefinitely.
- Oven-safe temperature rating: Ensure your pan is safe to 450°F or higher. Some non-stick coatings degrade at high heat; always check the manufacturer’s specifications before using at 425°F.
Nordic Ware Natural Aluminum Commercial Half Sheet Pan
Best for: Home bakers who want restaurant-quality results
This professional-grade aluminum half-sheet pan heats evenly and won’t warp, even with repeated use. The rolled rim prevents batter from sticking, and the lightweight construction makes handling easy. It’s oven-safe to 500°F, exceeding what you need for this recipe, and the natural aluminum develops a natural seasoning with use. Backed by Nordic Ware’s reputation for durability, this single pan will last decades.
Check Current Price on Amazon →Rachael Ray Nonstick Bakeware Half Sheet Cookie Pan
Best for: Budget-conscious home cooks
Rachael Ray’s non-stick half-sheet pan offers excellent value without sacrificing function. The durable non-stick surface reduces the need for heavy greasing, and the slightly raised edges keep batter contained. Oven-safe to 350°F, which is adequate for this recipe’s 425°F requirement when used carefully, and the pan is dishwasher-safe for easy cleanup. A solid entry-level choice for occasional bakers.
Check Current Price on Amazon →OXO Good Grips Non-Stick Pro Half Sheet
Best for: First-time sheet pan pancake makers
OXO’s beginner-friendly design features silicone handles that stay cool during baking, making it safer for less experienced cooks. The heavy-duty non-stick surface minimizes sticking, and the light-colored interior makes it easy to see when pancakes are browning underneath. Oven-safe to 400°F and dishwasher-safe, this pan combines safety features with reliable performance.
Check Current Price on Amazon →All-Clad Professional Nonstick Half Sheet Pan
Best for: Serious home bakers and meal-preppers
All-Clad’s premium non-stick pan features aerospace-grade non-stick technology that outlasts conventional coatings by years. The hardened aluminum core ensures even heating without hot spots, and the construction is reinforced to prevent warping. Oven-safe to 500°F with a lifetime warranty, this is an investment piece that justifies its price through durability and performance.
Check Current Price on Amazon →Final Recommendation
Sheet pan sourdough pancakes are an elegant solution to the sourdough discard dilemma, transforming a cooking necessity into a beloved breakfast tradition. The recipe is forgiving, scalable, and requires minimal equipment—just a reliable baking sheet, a mixing bowl, and a whisking tool. Whether you’re feeding a crowd on Sunday morning or prepping breakfasts for the week, this method delivers consistent results every time. The slight tang from the sourdough, combined with the tender crumb and golden exterior, creates pancakes that taste nothing like boxed mixes.
Investing in a quality half-sheet pan elevates not just this recipe, but your entire baking repertoire. The Nordic Ware aluminum pan represents the best balance of affordability, durability, and performance, making it our top recommendation. However, if non-stick is your priority, the OXO Good Grips or Calphalon Contemporary offer excellent value. Regardless of which pan you choose, you’ll find yourself reaching for it regularly—for sheet pan dinners, roasted vegetables, baking cookies, and so much more. Stock your kitchen with a reliable pan, pull out that sourdough discard, and start baking.
Frequently Asked Questions
Can I use fed sourdough starter instead of discard?
Fed starter works, but unfed discard is better because it’s thicker and won’t add excess liquid. If using fed starter, reduce the milk by 1/4 cup to maintain proper batter consistency.
How do I store leftover sheet pan pancakes?
Cool completely, then store in an airtight container in the refrigerator for up to 4 days. Reheat gently in a 300°F oven for 8-10 minutes, or eat cold with toppings for an easy grab-and-go breakfast.
What if my batter is too thick or too thin?
If too thick, add milk one tablespoon at a time until it reaches a pourable but not runny consistency. If too thin, sprinkle flour in and fold gently. The goal is a batter similar to traditional pancake batter.
Can I make this recipe ahead of time?
Yes, you can prepare the batter the night before and refrigerate it in a covered container. The next morning, give it a quick stir and proceed directly to the pan—the resting time has already occurred.
Why didn’t my pancakes rise as much as expected?
Common reasons include old baking powder or yeast, using fed starter instead of discard, or insufficient resting time. Always check that your leavening agents are fresh, and allow a full 20 minutes for the batter to rest before baking.
As an Amazon Associate, Build & Bloom earns from qualifying purchases. We only recommend products we genuinely think are useful. Prices and availability vary; check Amazon for the latest.
Leave a Reply