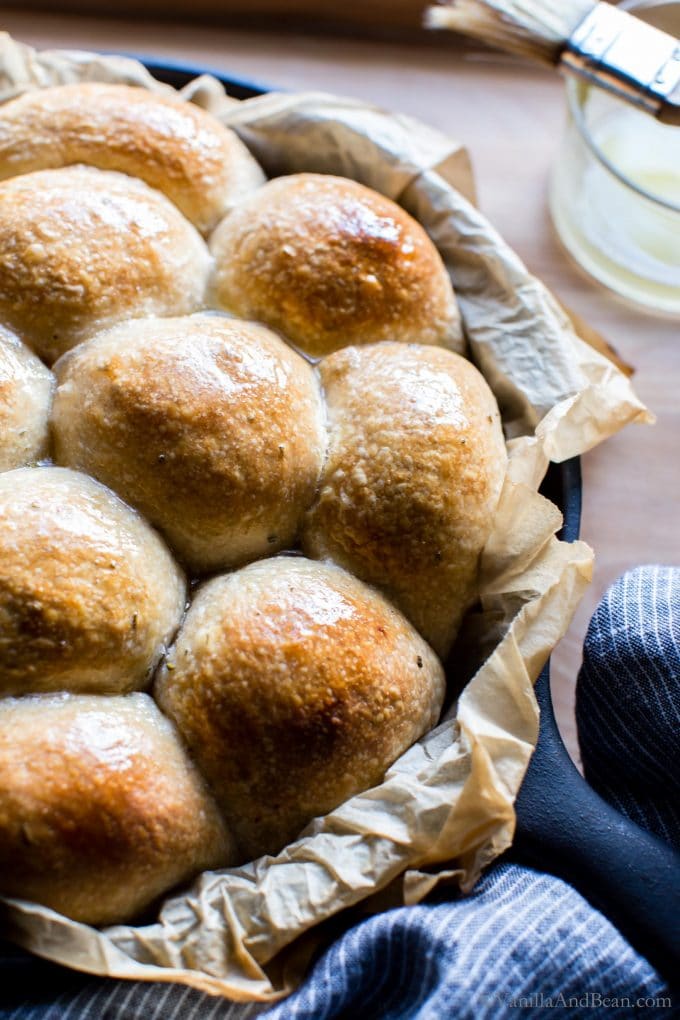

There’s something magical about waking up to the aroma of fresh sourdough rolls baking in your oven. Unlike commercial dinner rolls, homemade sourdough versions deliver complex, slightly tangy flavor that pairs beautifully with butter, soups, or holiday meals. The overnight fermentation method means you do minimal hands-on work — just mix the dough before bed, let it rise while you sleep, and pop it in the oven the next morning.
How to Make Soft Overnight Sourdough Dinner Rolls
This recipe yields 12 tender rolls with a subtle sour tang and a soft, pillowy crumb. The bulk of the work happens overnight, making this perfect for weekend entertaining or weekday dinner prep.
Ingredients
- 1 cup active sourdough starter (fed 4-8 hours prior, bubbly and at peak)
- 3/4 cup whole milk, warmed to 75-80 degrees F
- 3 tablespoons honey or sugar
- 4 tablespoons softened butter, plus extra for brushing
- 1 1/2 teaspoons sea salt
- 3 cups all-purpose flour or bread flour
Method
Combine wet ingredients
In a large mixing bowl, combine your active sourdough starter, warmed milk, and honey. Stir until the starter breaks down into the liquid. Add the softened butter and salt, stirring until the butter is mostly incorporated. This creates the flavor base and provides richness to the rolls.
Mix in flour gradually
Add the flour one cup at a time, mixing with a wooden spoon or dough hook until a shaggy, slightly sticky dough forms. All flour should be hydrated, but the dough will feel looser than a typical bread dough. Don’t overwork it at this stage.
First rise and fold
Cover the bowl with plastic wrap or a damp cloth and let it rest at room temperature for 30 minutes. After 30 minutes, perform a stretch-and-fold: wet your hand, grab one side of the dough, stretch it up and fold it over the center. Rotate the bowl 90 degrees and repeat four times total. This builds structure without intensive kneading.
Overnight bulk fermentation
Cover the bowl again and place it in the refrigerator for 8-16 hours. The cold temperature slows fermentation while allowing deep flavor development. You should see the dough roughly double in volume and smell pleasantly sour when ready.
Shape the rolls
Remove the dough from the fridge and turn it onto a lightly floured surface. Divide it into 12 equal pieces using a bench scraper or knife. Shape each piece into a tight ball by rolling it on the work surface, creating tension on the outside. Arrange the rolls seam-side up in a greased 9×13 inch baking dish, spacing them about an inch apart.
Second rise
Cover the pan with plastic wrap and let the rolls rise at room temperature for 2-4 hours until they’re puffy and soft. They should spring back quickly when poked but leave a slight indentation. Alternatively, cover and refrigerate overnight, then bring to room temperature before baking.
Preheat and bake
Preheat your oven to 375 degrees F about 20 minutes before baking. Brush the rolls lightly with additional melted butter. Bake for 20-28 minutes until they’re golden brown on top and a toothpick inserted into the center comes out clean.
Cool and serve
Remove the pan from the oven and brush the hot rolls again with melted butter. Let them cool in the pan for 5-10 minutes before serving. These rolls are best enjoyed warm and store well in an airtight container for up to three days.
- Use a sourdough starter that’s freshly fed and at peak activity (visibly bubbly with a domed top) for best rise and flavor. A sluggish or unfed starter will result in dense, underproofed rolls.
- If your kitchen is very cold, the overnight fermentation may take longer. Conversely, in warm kitchens, 8 hours may be sufficient. Watch the dough’s appearance rather than the clock.
- Shape the rolls with tension to help them rise upward in the pan rather than spreading outward, ensuring they stay soft and pillowy rather than dense.
Essential Equipment for Making Sourdough Rolls
- Large mixing bowl: A spacious, durable bowl allows room for dough expansion and comfortable mixing. Look for bowls with a smooth interior surface that won’t catch dough, and a capacity of at least 3-4 quarts for overnight fermentation.
- Baking dish: A 9×13 inch ceramic or metal baking dish provides the right size for 12 rolls with proper spacing. Ceramic retains heat better for even browning, while metal heats quickly. Both work equally well for this recipe.
- Dough thermometer: An instant-read thermometer ensures your milk is at the correct temperature for optimal yeast activity and prevents killing the starter with water that’s too hot. This small investment eliminates guesswork.
- Bench scraper or dough knife: A bench scraper makes dividing dough into equal portions much easier and cleaner than a knife. The flat edge also helps you perform stretch-and-folds more effectively without tearing the developing gluten structure.
OXO Good Grips 3-Quart Stainless Steel Mixing Bowl
Best for: Sourdough bakers of all levels
This professional-grade mixing bowl features a smooth, non-stick stainless steel interior that prevents dough from sticking and makes cleanup effortless. The 3-quart capacity provides ample room for dough to rise overnight without overflow, while the wide mouth accommodates both hands for stretch-and-fold techniques. The heavy-duty construction withstands years of active baking, and the ergonomic design makes it comfortable to mix and handle. Its versatility means you’ll use it for mixing, rising, and storage.
Check Current Price on Amazon →Pyrex Smart Essentials 9×13 Baking Dish
Best for: New bakers seeking reliable, affordable equipment
Pyrex’s tempered glass construction heats evenly and distributes warmth consistently, resulting in uniformly golden rolls. The clear glass lets you monitor browning from all angles without opening the oven door. Dishwasher-safe and incredibly durable, this dish is the workhorse of countless home kitchens. The 9×13 size is perfectly proportioned for 12 rolls, and the glass won’t react with acidic sourdough fermentation. At an affordable price point, this is an investment that lasts decades.
Check Current Price on Amazon →Le Creuset Stoneware 9×13 Baking Dish
Best for: Serious home bakers willing to invest in heirloom quality
Le Creuset’s ceramic baking dish combines superior heat distribution with beautiful design. The enameled stoneware retains heat exceptionally well, promoting even browning and a crispy exterior on your rolls. Its vibrant color options complement any kitchen aesthetic, and it moves seamlessly from oven to table for presentation. Built to last generations, this dish becomes a cherished kitchen tool. The premium construction justifies the investment for bakers who value durability and performance.
Check Current Price on Amazon →Linden Sweden Digital Instant-Read Thermometer
Best for: Bakers who want precision in every batch
This digital thermometer reads temperatures in 3-4 seconds with 1-degree accuracy, ensuring your milk reaches the perfect 75-80 degree range without harming the sourdough starter. The backlit LCD screen is easy to read, the probe is thin enough to insert without damage, and the waterproof design handles splashes and washing. Its compact size stores easily in a drawer, and the battery lasts for over a year of regular use. Temperature control is one of the most important variables in sourdough success.
Check Current Price on Amazon →Master Overnight Sourdough Rolls with the Right Tools
Soft overnight sourdough dinner rolls are within reach for any baker willing to embrace slow fermentation. The beauty of this recipe lies in its simplicity: good starter, basic ingredients, and time do most of the work. Your role is simply mixing, folding, and shaping — the sourdough culture handles flavor development and rise while you sleep. With a reliable mixing bowl, proper thermometer, and quality baking dish, you’ll produce bakery-worthy rolls that taste infinitely better than store-bought.
The equipment recommended here removes guesswork from the process and ensures consistent results batch after batch. Whether you choose a professional-grade approach with Staub ceramics or a practical beginning with Pyrex glass, the fundamentals remain the same: proper hydration temperature, active starter, and adequate fermentation time. Start baking these rolls this weekend, and you’ll quickly understand why sourdough bakers become so passionate about their craft. Your kitchen will fill with that intoxicating aroma, and your family will wonder how you suddenly became a professional baker.
Frequently Asked Questions
Can I use unfed or less active sourdough starter?
No, an active, recently fed starter is essential for proper rise and flavor development. Unfed or sluggish starter will result in dense, underproofed rolls and minimal sour flavor. Feed your starter 4-8 hours before mixing and use it at peak activity when it’s visibly bubbly with a domed top.
Why did my rolls turn out dense instead of soft and fluffy?
Dense rolls usually result from underproofing (insufficient rise time), using an inactive starter, or too much salt. Ensure your starter is active, give the dough adequate time to rise (both bulk and in the pan), and measure salt carefully. Cold kitchens may need extra rise time.
Can I freeze the dough and bake later?
Yes. After shaping, wrap the pan tightly with plastic wrap and freeze for up to 3 weeks. Thaw overnight in the refrigerator, then bring to room temperature and bake as usual. Alternatively, freeze after the second rise and bake from frozen, adding 5-10 minutes to baking time.
What’s the difference between overnight and same-day fermentation?
Overnight cold fermentation develops deeper sour flavor and improved structure. Same-day fermentation at room temperature yields milder flavor and requires more hands-on attention to prevent overproofing. Choose overnight for best flavor or same-day if timing demands it.
How do I know when the rolls are fully proofed and ready to bake?
The rolls should be visibly puffy and soft to the touch. Perform the poke test: gently press your finger into a roll. It should spring back slowly, leaving a slight indentation. If it springs back quickly, it needs more time; if it doesn’t spring back at all, it’s overproofed.
As an Amazon Associate, Build & Bloom earns from qualifying purchases. We only recommend products we genuinely think are useful. Prices and availability vary; check Amazon for the latest.
Leave a Reply