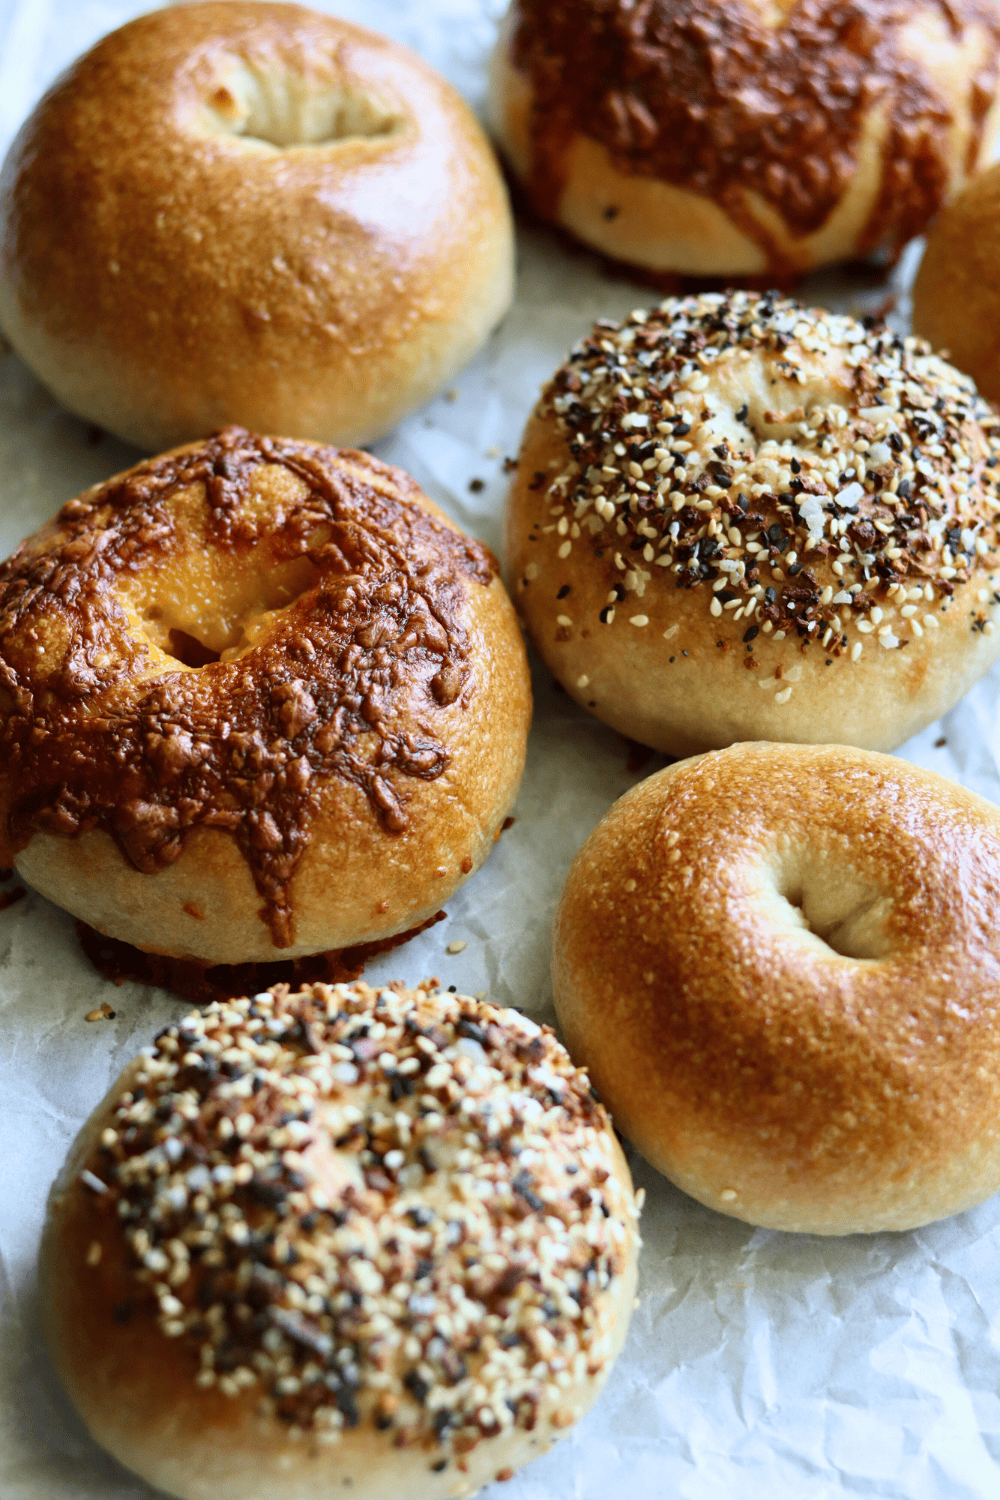

Making bagels at home seems intimidating, but with an active sourdough starter and the right technique, you can create authentic, chewy bagels with that distinctive sour flavor that bakery versions can’t match. The key is understanding the fermentation timeline, proper shaping, and the essential boiling step that gives bagels their signature dense, glossy crust. Whether you’re a sourdough enthusiast looking to expand beyond bread or a bagel lover wanting to control ingredients, this method delivers restaurant-quality results in your own kitchen.
How to Make Sourdough Bagels from Scratch
This recipe uses a fed sourdough starter to develop deep, complex flavor over a slow fermentation. The process takes 24-36 hours total, with most of that being hands-off time.
Ingredients
- 1 cup active sourdough starter, fed 4-6 hours prior
- 2 3/4 cups bread flour (13-14% protein)
- 1 teaspoon sea salt
- 1/2 teaspoon instant yeast (optional but recommended for reliability)
- 3/4 cup cool water, plus extra for boiling
- 1 tablespoon honey or malt barley powder for boiling water
Method
Mix the dough
Combine your active starter, water, and flour in a mixing bowl. Mix until all flour is hydrated and you have a shaggy dough with no dry bits. Let rest for 20 minutes uncovered. Add salt and instant yeast (if using), then mix thoroughly by hand or with a dough hook for 8-10 minutes until the dough is smooth and elastic.
Bulk ferment overnight
Transfer dough to a lightly oiled container and cover. Let ferment at room temperature (68-72°F) for 12-16 hours. You’re looking for the dough to increase in volume by about 50-75%, not doubling. It should feel airy but still hold its shape.
Pre-shape and rest
Turn dough onto a lightly floured surface and divide into 6-8 equal pieces (around 90-110g each). Shape each piece into a tight ball and let rest uncovered for 15-20 minutes. This intermediate rest makes final shaping easier.
Shape into bagel rings
Take one rested ball and poke a hole through the center with your thumb. Gently stretch and widen the hole by rotating the dough on your finger until you have a ring about 4 inches in diameter with walls that are even thickness. Repeat with remaining dough.
Cold proof overnight
Place shaped bagels on parchment paper, cover loosely with plastic wrap, and refrigerate for 8-12 hours or up to 24 hours. Cold proofing develops flavor and makes the dough easier to handle before boiling. The bagels should puff slightly but not double in size.
Prepare boiling water
About 30 minutes before baking, preheat your oven to 425°F. Fill a large pot with water and bring to a rolling boil. Add honey or malt barley powder to the water; this creates the characteristic shiny, dark bagel exterior.
Boil the bagels
Working with 2-3 bagels at a time, carefully place them into the boiling water. They should sink briefly then float. Boil for 1 minute on each side (2 minutes total). Use a slotted spoon to transfer boiled bagels to a cooling rack for 2-3 minutes before placing on a baking sheet.
Bake until golden
Place boiled bagels on a parchment-lined baking sheet and bake for 20-25 minutes until deep golden brown on top. The bagels should sound hollow when tapped on the bottom. Cool on a wire rack for at least 20 minutes before slicing.
- Keep your sourdough starter at peak activity (doubled in size, bubbles visible) when you feed it 4-6 hours before mixing. This ensures consistent fermentation.
- Don’t skip the boiling step or rush it. Even 30 seconds less per side results in a softer, more bread-like texture instead of the chewy bagel crumb.
- Cold overnight proofing is your secret weapon for flavor and handling ease. Bagels from cold dough are less likely to lose their hole during boiling.
Essential Equipment for Sourdough Bagel Making
- Large Mixing Bowl: A 3-4 quart bowl with high sides prevents splashing during the vigorous mixing phase and provides adequate space for bulk fermentation without overflow.
- Heavy Boiling Pot: A stainless steel or cast iron pot at least 5 quarts holds enough water for boiling multiple bagels at once while maintaining consistent temperature throughout the process.
- Slotted Spoon or Spider Skimmer: This tool safely removes hot bagels from boiling water while allowing excess water to drain back into the pot. Prevents burns and bagel damage.
- Digital Scale: Precise ingredient measurements (especially starter percentage) ensure consistent results batch to batch. Eliminates guesswork in dough hydration and portion sizes.
OXO Good Grips 5-Quart Mixing Bowl
Best for: Sourdough bagel makers of all levels
This stainless steel mixing bowl is precisely sized for bagel dough batches and features a non-slip base that stays put during vigorous mixing. The wide, sloped sides make it easy to shape and handle dough during bulk fermentation, and the measurement markings on the interior let you track fermentation progress visually. Its heavy-gauge construction withstands years of use, and it doubles as a proofing container when covered.
Check Current Price on Amazon →Tramontina Stainless Steel Stock Pot 6-Quart
Best for: Budget-conscious bakers
This heavy-duty stainless steel pot boils bagels evenly without hot spots and maintains water temperature when bagels are added. The flat bottom ensures stable placement on any cooktop, and the sturdy handles make it easy to manage even when full of water. Tramontina’s durable construction means this pot will handle decade after decade of boiling and stovetop use without warping.
Check Current Price on Amazon →Oxo Good Grips Stainless Steel Slotted Spoon
Best for: First-time bagel makers avoiding burns
The angled head and ergonomic handle of this slotted spoon make removing hot bagels from boiling water safe and intuitive. The slots drain water efficiently without requiring the twisting motion that can damage delicate dough. The long handle keeps hands well away from steam and splashing water, making it ideal for nervous bakers or families with children nearby.
Check Current Price on Amazon →Hario V60 Drip Scale (Digital Kitchen Scale)
Best for: Precision-focused bakers seeking consistency
This precise digital scale measures to 0.1 gram increments, essential for sourdough baking where starter ratios directly impact fermentation. The timer function helps you track boiling time accurately, and the compact design doesn’t clutter counter space. The one-touch tare button makes it simple to weigh ingredients sequentially in the same bowl.
Check Current Price on Amazon →Bringing Bakery-Quality Bagels to Your Kitchen
Sourdough bagels represent the pinnacle of home bread baking–they’re challenging enough to feel like an accomplishment but forgiving enough that beginners can succeed. The 24-36 hour timeline gives you flexibility in your schedule, and most of that time is passive fermentation. The heavy equipment investment is minimal compared to other sourdough pursuits, and your tools will last decades. Start with one batch and expect a learning curve on shaping and boiling technique, but by batch three or four, you’ll understand how your particular starter and kitchen temperature affect timing.
The real magic happens when you bite into a freshly toasted bagel you made yourself–the chewy, dense crumb with irregular structure, the subtle tanginess from the sourdough, and the slightly crispy exterior from proper boiling all combine into something commercial bagels simply cannot match. Once you’ve mastered the basic method, experiment with mix-ins like everything seasoning blended into the dough, or brush with egg wash and scatter seeds before baking. Your sourdough starter, which you’ve probably been using for daily bread, suddenly has a new purpose that feels special.
Frequently Asked Questions
How do I know when my sourdough starter is ready to use for bagels?
Your starter should be fed 4-6 hours before mixing and should have visibly doubled in size with plenty of bubbles throughout. It should smell pleasantly tangy and spongy to the touch. If it’s sluggish or hasn’t risen noticeably, feed it and wait another 4 hours.
Can I skip the cold overnight proof and make bagels the same day?
You can do a shorter cold proof of 2-4 hours in the refrigerator, though flavor development suffers. Overnight cold proofing (8-12 hours) develops the characteristic sour tang and makes dough easier to handle. If you’re in a rush, room temperature proofing works but requires careful watching to avoid over-fermentation.
Why did my bagels lose their holes during boiling?
This happens when bagels are under-proofed or over-proofed. Under-proofed dough springs up aggressively in boiling water and collapses inward; over-proofed dough is too weak to hold its shape. Aim for gentle puffing during cold proof, and poke the hole slightly larger during shaping to account for expansion.
What’s the difference between using honey and malt barley powder in boiling water?
Honey adds subtle sweetness and browning, while malt barley powder (or malt syrup) adds deeper, maltier flavor without extra sweetness. Either works; choose based on your flavor preference. The boiling liquid itself isn’t consumed, so the ingredient choice is purely about surface flavor and color development.
How should I store bagels and how long do they last?
Store cooled bagels in an airtight container at room temperature for up to 3 days, or freeze for up to 3 months. For longer storage, wrap individually in plastic wrap before freezing. Toast directly from frozen for the best texture, or thaw at room temperature before toasting.
As an Amazon Associate, Build & Bloom earns from qualifying purchases. We only recommend products we genuinely think are useful. Prices and availability vary; check Amazon for the latest.
Leave a Reply