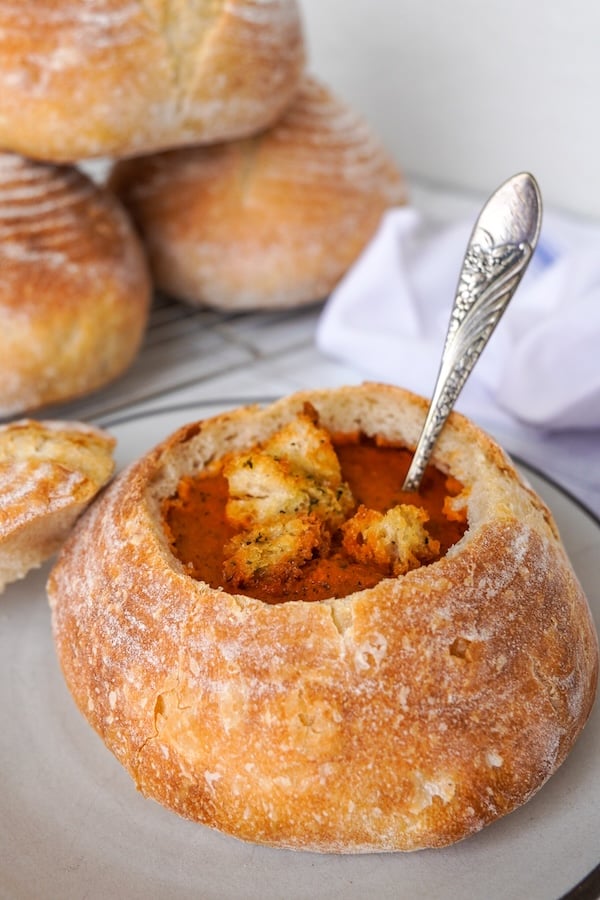

Sourdough bread bowls are the ultimate rustic touch to any meal—crispy on the outside, tender inside, and completely edible. Whether you want fresh bowls today or prefer the deeper flavor of a long overnight ferment, this recipe adapts to your schedule. The key is understanding how to shape your dough, manage fermentation time, and bake it to the perfect golden exterior before hollowing out the center.
How to Make Sourdough Bread Bowls
Both same-day and long-fermented versions follow the same basic process, with the main difference being fermentation duration. This recipe yields 4 large bowls and works with active sourdough starter.
Ingredients
- 500g bread flour or all-purpose flour
- 350ml water (approximately 70% hydration)
- 100g active sourdough starter (fed 4-8 hours prior)
- 10g salt
- Extra flour for dusting and shaping
Method
Mix your dough
Combine flour, water, and active starter in a large bowl. Mix until no dry flour remains, then let rest for 30 minutes (autolyse). Add salt and mix thoroughly until incorporated. The dough should be slightly sticky but manageable.
Bulk fermentation (choose your timeline)
For same-day bowls: perform 4-5 sets of stretch-and-folds over 2-3 hours at room temperature until the dough feels airy and increased in volume by about 50 percent. For long fermentation: do 2-3 stretch-and-folds in the first hour, then refrigerate for 8-16 hours. Cold fermentation develops deeper sourdough flavor.
Pre-shape and rest
Turn dough onto a lightly floured surface and divide into 4 equal portions. Gently pre-shape each piece into a round ball without overworking. Let rest for 20-30 minutes uncovered so the surface dries slightly.
Final shape into tight bowls
Reshape each round into a tight sphere by pulling the dough surface toward the bottom and rotating as you go. This tension creates structure for the bowl shape. Place seam-side up in a proofing basket or bowl lined with a floured towel.
Final proof (handles both schedules)
For same-day: proof at room temperature for 45 minutes to 1 hour until puffy and springs back slowly when poked. For refrigerated dough: remove from cold storage and proof at room temperature for 1-2 hours. Either way, you’re looking for visible expansion and slight spring-back.
Preheat and score
Place a covered baking vessel in your oven and preheat to 450°F for at least 30 minutes. Carefully turn out your shaped dough onto parchment paper and score the top with a sharp knife or blade in a simple cross or circular pattern. This guides where the bread will open.
Bake covered, then uncovered
Transfer the dough (on parchment) into your hot baking vessel and cover. Bake for 20 minutes to trap steam. Remove the cover and bake another 20-25 minutes until deep golden brown. The exterior should be crispy and caramelized.
Cool and hollow
Let bowls cool for at least 15 minutes on a wire rack. Once cool enough to handle, use a serrated knife to carefully cut a lid from the top of each bowl, then scoop out some of the soft interior crumb to create a cavity. Leave enough structure so the bowl doesn’t collapse when filled with soup.
- Use a Dutch oven or covered baking stone to trap steam during the first part of baking—this creates the signature crispy crust and open crumb structure.
- Cold fermentation overnight intensifies sourdough flavor and makes shaping easier because the dough is firmer. Same-day versions are milder but still delicious.
- Don’t hollow out the bowls until they’ve cooled completely, or the crumb will tear. A thin bread knife works better than a scoop for creating a clean interior cavity.
Essential Tools for Baking Sourdough Bread Bowls
- Covered Baking Vessel: A Dutch oven or covered baker traps steam during the critical first phase of baking, creating the crispy exterior and open crumb essential for bread bowls. The vessel retains even heat and allows steam to circulate.
- Proofing Basket: A banneton basket or cloth-lined bowl supports the shaped dough during final proof and prevents spreading. It helps maintain the round bowl shape and makes transferring to your hot baking vessel safer.
- Scoring Tool: A sharp bench scraper, lame blade, or even a clean razor blade lets you score the dough surface before baking. Clean scores guide the bread’s expansion and help define the bowl’s opening.
- Kitchen Scale: Sourdough relies on precise ratios of flour, water, and starter. A digital scale ensures consistent hydration and fermentation, making same-day and long-fermented batches predictable and successful.
Staub Enameled Cast Iron Round Dutch Oven (5.5-Quart)
Best for: Home bakers prioritizing heat retention and steam control
The Staub Dutch oven is the gold standard for artisan bread baking. Its heavy enameled cast iron construction distributes heat evenly, while the snug-fitting lid traps steam perfectly during the critical opening phase. The 5.5-quart capacity easily accommodates bread bowls, and the dark matte interior promotes deep browning. Made in France with lifetime durability, this is an investment that pays dividends across dozens of baking projects.
Check Current Price on Amazon →Lodge Enameled Cast Iron Dutch Oven (6-Quart)
Best for: Budget-conscious bakers who want reliable performance
Lodge offers American-made enameled cast iron at a fraction of premium prices. The 6-quart capacity suits bread bowl batches, heat retention is excellent, and the enamel coating is durable enough for years of baking. While slightly heavier than competitors and with a glossy interior that browns less dramatically, Lodge delivers real performance without the luxury price tag.
Check Current Price on Amazon →Le Creuset Enameled Cast Iron Round Dutch Oven (4.5-Quart)
Best for: First-time bread bakers seeking iconic quality
Le Creuset’s iconic flame-orange Dutch oven combines beauty with serious baking performance. The 4.5-quart size is perfect for 2-3 bread bowls per batch, and the lighter weight makes it easier to handle when transferring dough. The lid seals beautifully for steam trapping, and the included lifetime warranty removes any hesitation about investing in quality cookware.
Check Current Price on Amazon →Smithey Heirloom Cast Iron Covered Baking Vessel (5-Quart)
Best for: Artisan bakers who want handcrafted American quality
Smithey’s American-made cast iron baking vessel represents the pinnacle of artisan craftsmanship. Each piece is hand-finished with exceptional attention to detail, offering superior heat distribution and a smooth cooking surface. The 5-quart capacity handles multiple bread bowls, and the fitted lid design ensures superior steam retention. This is a heirloom-quality investment for serious bread bakers.
Check Current Price on Amazon →Final Recommendation
Sourdough bread bowls bridge the gap between showstopping presentation and genuine homemade flavor. Whether you choose the quick gratification of same-day baking or the deeper complexity of a cold overnight ferment, the process is straightforward once you understand the fundamentals of fermentation, shaping, and steam-based baking. Your single most important investment is a Dutch oven that traps steam reliably—this one piece of equipment elevates your results more than any other tool.
Start with whichever timeline fits your schedule, and don’t worry about perfection on your first batch. Sourdough teaches you through feedback: if your bowls didn’t puff enough, extend fermentation next time; if they spread too wide, reduce proofing time. Once you master the basic technique, you’ll have an elegant, impressive dish that tastes infinitely better than store-bought alternatives. Serve them warm with your favorite soup or chowder, and watch your guests react when they realize the bowl itself is the best part of the meal.
Frequently Asked Questions
Can I use a regular baking sheet instead of a Dutch oven?
Baking sheets don’t trap steam effectively, so your bowls won’t develop the crispy crust essential for bread bowls. You can use a covered baking stone or a roasting pan with foil, but a Dutch oven is strongly recommended for best results.
What’s the difference between same-day and long-fermented sourdough bowls?
Same-day bowls ferment 3-4 hours total and have a milder sourdough flavor with slightly tighter crumb. Long-fermented bowls cold-proof overnight, developing deeper, tangier flavor and a more open crumb structure. Both make delicious bread bowls—choose based on your schedule and flavor preference.
How do I know when my dough is ready to shape?
The dough should increase by about 50 percent in volume, feel airy and jiggly when you shake the bowl, and slowly spring back when poked gently. Overproofing causes slack dough that spreads instead of puffing up; underproofing yields tight, dense bread.
Can I freeze shaped dough and bake it later?
Yes. Shape your dough, place in proofing baskets, wrap well, and freeze for up to 2 weeks. Thaw in the refrigerator overnight, then proof at room temperature for 1-2 hours before baking. This flexibility is perfect for meal planning.
Why did my bread bowls have a dense crumb or not puff up?
Common causes are weak starter (use newly fed, active starter), underproofing, insufficient steam during baking, or oven temperature too low. Ensure your starter is bubbly and doubles in 4-8 hours, and verify your oven reaches 450°F before baking.
As an Amazon Associate, Build & Bloom earns from qualifying purchases. We only recommend products we genuinely think are useful. Prices and availability vary; check Amazon for the latest.
Leave a Reply