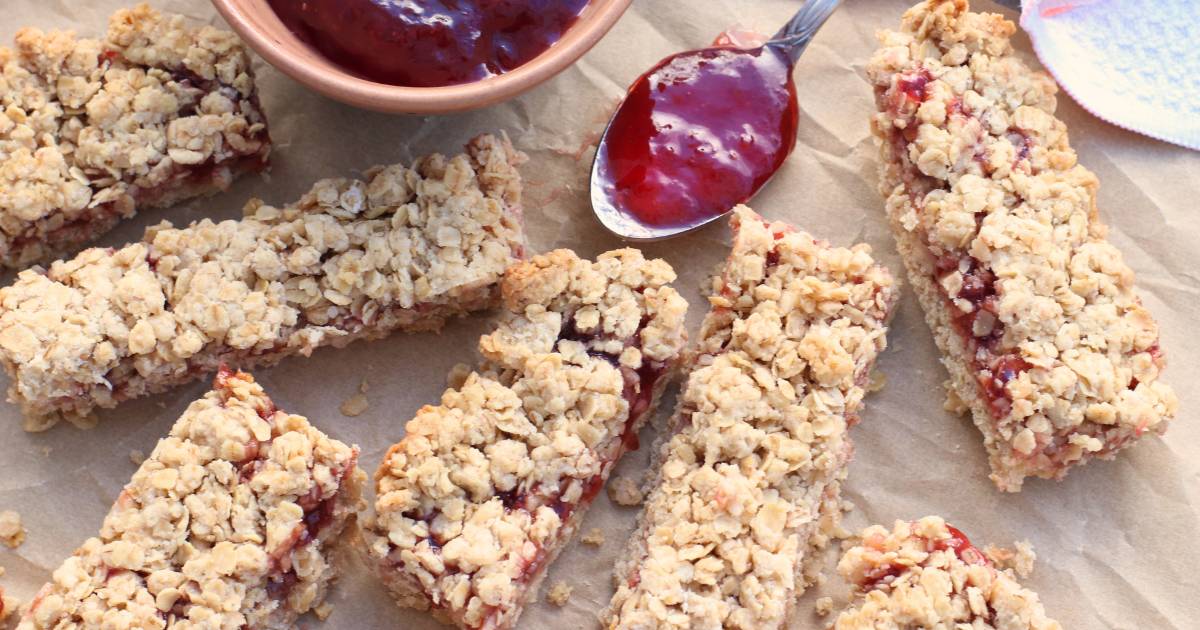

If you keep sourdough starter at home, you know the guilt of discarding perfectly good starter each week. Sourdough breakfast bars with jam transform that discard into something delicious–a cross between a coffee cake and a jam-filled bar cookie. They’re perfect for meal prep, and the natural tang of sourdough pairs beautifully with whatever jam you have on hand.
How to Make Sourdough Breakfast Bars with Jam
These bars come together quickly and require minimal mixing. The result is a cake-like texture with a fruity jam swirl throughout.
Ingredients
- 1 cup sourdough discard (unfed starter)
- 1/2 cup softened butter or coconut oil
- 3/4 cup sugar
- 1 large egg
- 1 1/2 cups all-purpose flour
- 3/4 cup jam (any flavor)
- 1 tsp vanilla extract
- 1/2 tsp baking soda
- 1/4 tsp salt
Method
Combine wet ingredients
In a large mixing bowl, cream together your softened butter and sugar until light and fluffy, about 2-3 minutes. Add your sourdough discard, egg, and vanilla extract, then mix until fully incorporated. The mixture should be smooth with no lumps of starter remaining.
Mix dry ingredients separately
In a separate bowl, whisk together flour, baking soda, and salt. This distributes the leavening agent evenly and prevents dense pockets in your finished bars.
Combine wet and dry
Fold the dry mixture into the wet ingredients using a spatula. Mix just until no streaks of flour remain–overmixing will lead to tough bars. The batter should be thick but spreadable.
Prepare your pan
Line an 8×8 or 9×9 inch baking pan with parchment paper, leaving slight overhang on two sides for easy removal. Press half the batter evenly across the bottom of the pan using a spatula or your fingertips.
Add jam and top layer
Spread your jam in a thin, even layer over the base batter. Drop spoonfuls of remaining batter over the jam, then gently spread to cover, leaving some jam visible for visual appeal. Don’t worry about complete coverage–some jam should peek through.
Bake until golden
Bake at 350°F for 25-35 minutes, until the top is golden brown and a toothpick inserted into the cake portion (not jam) comes out with just a few crumbs. The bars will continue to set slightly as they cool.
Cool and cut
Let the bars cool in the pan for at least 15 minutes before lifting out using the parchment paper overhang. Transfer to a wire rack to cool completely, then cut into 12-16 squares with a sharp knife.
- Use discard that’s been fed 4-8 hours prior for a milder flavor; aged discard will taste more tangy
- Jam varieties matter–chunky jams work better than smooth ones as they stay put during baking
- Store bars in an airtight container at room temperature for up to 3 days, or refrigerate for up to a week
What to Look For in Baking Equipment for Sourdough Bars
- Baking Pan Size and Material: Square pans conduct heat evenly and allow for uniform baking. Metal or ceramic works equally well; avoid dark non-stick coatings as they can over-brown the edges. An 8×8 or 9×9 inch pan is ideal for this recipe.
- Mixing Bowls and Whisks: Durable mixing bowls with non-slip bases prevent sliding during vigorous mixing. A quality whisk breaks up lumps in dry ingredients and prevents dense batter, improving final texture.
- Measuring Accuracy: Precise measurements ensure consistent results. A kitchen scale is more reliable than volume measurements for flour and ingredients, reducing variables in your baking.
- Cooling Infrastructure: A wire cooling rack allows air circulation under bars, preventing sogginess. This is crucial for proper texture development after removal from the hot pan.
OXO Good Grips Stainless Steel 9×9 Baking Pan
Best for: Home bakers seeking durability and even heat distribution
This reinforced steel pan heats evenly and prevents hot spots that can over-brown edges. The rolled rim is comfortable to grip, and the light color reflects heat appropriately for perfectly golden bars. OXO’s reputation for quality means this pan will last decades of weekly baking. It’s the single most important piece of equipment for this recipe.
Check Current Price on Amazon →Wilton Aluminum Square Cake Pan 9-Inch
Best for: Budget-conscious bakers just starting their sourdough journey
Wilton’s aluminum pan delivers solid performance at an affordable price point. It heats quickly and conducts evenly, though it’s lighter weight than reinforced steel. Perfect for someone testing recipes before investing in premium equipment. Works excellently for sourdough bars despite the lower price tag.
Check Current Price on Amazon →Williams Sonoma Goldtouch Pro 9×9 Baking Pan
Best for: Serious home bakers and small-batch enthusiasts
Goldtouch’s non-stick coating resists sticking while its ceramic-reinforced surface prevents food reactivity. The heavyweight construction ensures perfect, even browning every single time. Premium pricing reflects superior durability and performance that dedicated bakers appreciate.
Check Current Price on Amazon →Pyrex Originals 9×9 Glass Baking Dish
Best for: Bakers who want versatility beyond just sweet treats
Glass conducts heat differently than metal, resulting in slightly different browning that some bakers prefer. You can monitor bars from underneath, and glass is oven-safe to higher temperatures. Affordable and multi-purpose–use for casseroles, brownies, or bars.
Check Current Price on Amazon →Final Recommendation
Sourdough breakfast bars are one of the best uses for your weekly discard. They transform a ingredient destined for the drain into a delicious, wholesome breakfast treat. With proper equipment and these straightforward steps, you’ll achieve tender, jam-filled bars that taste like they came from a professional bakery.
Start with the OXO 9×9 baking pan as your foundation–it’s the single most important investment in this recipe. Pair it with quality mixing bowls, a reliable whisk, and a cooling rack, and you’ll have everything needed for consistent success. Your sourdough baker’s guilt will transform into pride when you pull your first batch of golden bars from the oven.
Frequently Asked Questions
Can I use fed sourdough starter instead of discard?
Yes, but fed starter will be more liquid and less thick than discard. Reduce other liquids slightly or add 2-3 extra tablespoons of flour to compensate. The taste will be milder since fed starter hasn’t developed as much tang.
What jam works best for this recipe?
Chunky or seeded jams work better than smooth varieties because they’re less likely to sink to the bottom during baking. Berry jams (strawberry, raspberry, blackberry) are classic, but apricot, peach, and marmalade also shine. Avoid very thin or runny jams.
How do I store these bars?
Keep bars in an airtight container at room temperature for up to 3 days. For longer storage, refrigerate up to one week in an airtight container, or freeze individually wrapped bars for up to 3 months. Thaw at room temperature before eating.
Can I double this recipe for a 9×13 pan?
Yes, double all ingredients and bake for 35-45 minutes instead of 25-35. Watch for browning–a larger pan may require 5-10 minutes longer. Check doneness with a toothpick inserted away from the jam layer.
Why are my bars dry or crumbly?
Overmixing the batter develops gluten and makes bars tough and dry. Mix only until flour disappears. Also, ensure you’re not overbaking–bars continue cooking slightly while cooling. Remove at the very first sign of golden color on top.
As an Amazon Associate, Build & Bloom earns from qualifying purchases. We only recommend products we genuinely think are useful. Prices and availability vary; check Amazon for the latest.
Leave a Reply