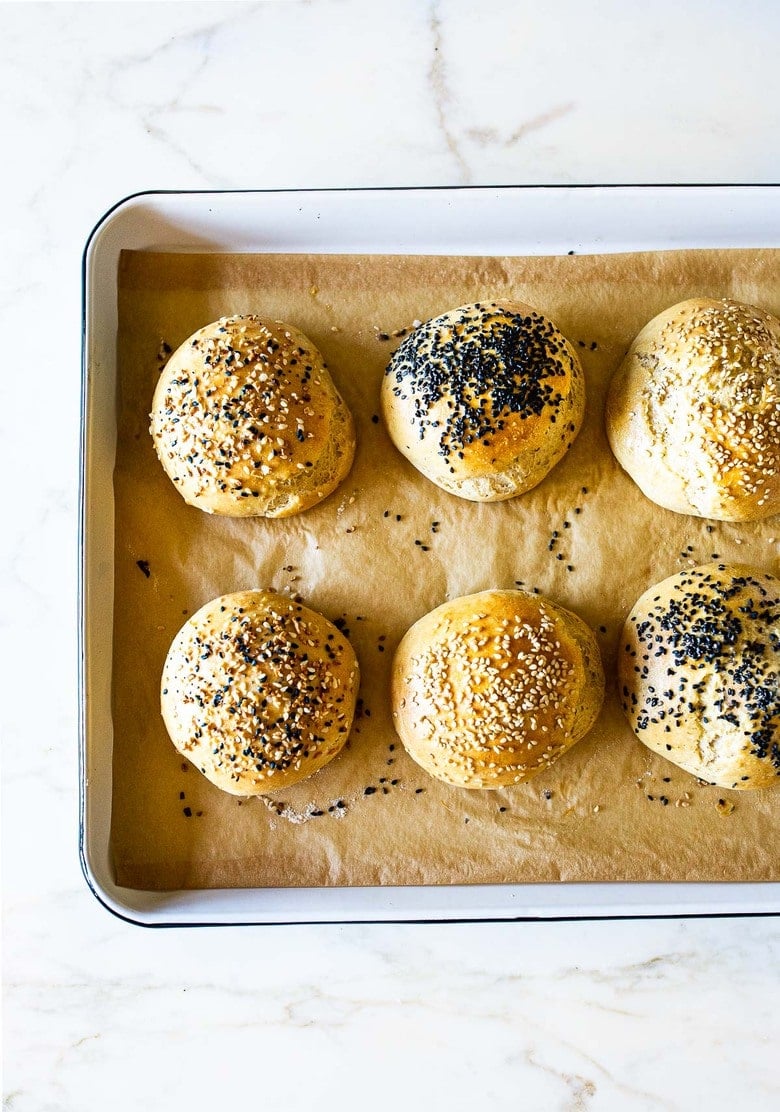

Most sourdough recipes demand patience–overnight proofs, multiple feedings, and careful timing. But if you’re craving fresh sourdough buns for dinner tonight, you don’t have to wait. Quick sourdough buns deliver that signature tangy flavor and open crumb in a single afternoon, making them perfect for weeknight baking or unexpected guests. This method uses a higher proportion of active starter and warm water to speed fermentation without sacrificing the taste and texture you expect from sourdough.
How to Make Quick Sourdough Buns
This recipe yields six tender buns with a slight tang and soft interior. The entire process takes 3.5 to 4 hours from mixing to pulling from the oven.
Ingredients
- 1.5 cups (350g) active sourdough starter, fed and bubbly
- 3/4 cup (180ml) warm water, around 75-80°F
- 2.5 cups (330g) bread flour
- 1.5 teaspoons (9g) salt
- 1 tablespoon (12g) sugar or honey
Method
Mix the dough
Combine active starter, warm water, and sugar in a large bowl. Stir until loosely combined. Add bread flour and mix until all flour is hydrated and you have a shaggy mass. Let rest for 20 minutes (autolyse). Add salt and mix thoroughly until fully incorporated, about 3-5 minutes by hand or 2 minutes on low speed.
Bulk ferment
Place dough in a lightly oiled bowl and cover. Let rest at room temperature (68-72°F) for 1 hour to 1.5 hours. Perform 3-4 sets of stretch and folds every 20 minutes during the first hour to build strength without aggressive kneading.
Pre-shape and rest
Turn dough out onto a lightly floured surface. Divide into six equal portions and gently shape each into a round without degassing completely. Cover loosely and rest for 15-20 minutes to relax the gluten.
Final shape
Working with one round at a time, gently pull the edges toward the center to create tension on the surface. Flip seam-side down and roll lightly into a smooth ball. Place each bun seam-side up in a floured banneton basket or bowl lined with a kitchen towel.
Final proof
Cover buns and let proof at room temperature for 45 minutes to 1 hour until visibly puffy but not over-proofed. They should hold a slight indent when poked gently. For a slower proof (optional), refrigerate up to 8 hours and bake directly from cold.
Preheat and score
Place a Dutch oven or covered baking vessel in a standard oven and preheat to 450°F for 30 minutes. Carefully turn buns seam-side down onto parchment paper or a baking sheet. Score the top of each bun with a sharp knife in a shallow X or cross pattern.
Bake covered
Transfer buns on parchment into the hot Dutch oven or covered baking vessel. Bake covered for 20 minutes to trap steam, which creates a better crust and open crumb structure.
Finish baking
Remove the cover and bake for an additional 12-15 minutes until deep golden brown. Internal temperature should reach 205-210°F. Cool on a wire rack for at least 10 minutes before serving to let the crumb set.
- Use starter that is at peak activity–bubbly, doubled in volume, and with a slightly domed or just-starting-to-recede top. Starter that is past peak will ferment too quickly and produce dense buns.
- If your kitchen is cool (below 68°F), increase bulk fermentation time by 20-30 minutes or use slightly warmer water to compensate for slower fermentation.
- Buns can be shaped, wrapped tightly, and frozen for up to 2 weeks. Thaw overnight in the refrigerator, then proceed with the final proof and bake step for convenience.
What to Look For in Sourdough Baking Equipment
- Dutch Oven or Covered Baker: A heavy, oven-safe vessel with a lid that traps steam during the first phase of baking. Look for 4-5 quart capacity and ratings for at least 450°F. Enameled cast iron and ceramic both work well for home baking.
- Kitchen Scale: Sourdough baking benefits enormously from weight measurements rather than cup volumes, ensuring consistency batch to batch. Choose a scale with 0.1 gram precision, a tare function, and a platform large enough to hold a mixing bowl.
- Banneton or Proofing Basket: A cloth-lined or woven basket supports the dough’s shape during final proof and prevents spreading. Sizes come in round and oval shapes; for six buns, choose 8-10 inch round baskets or use a bowl lined with a kitchen towel.
- Lame or Scoring Knife: A sharp, shallow blade creates controlled slashes in the dough surface, allowing controlled expansion in the oven. A lame (razor blade on a stick) offers precision; a sharp serrated bread knife is a budget-friendly alternative.
Staub Cast Iron Round Cocotte 3.75-Quart
Best for: Serious home bakers
This enameled cast iron Dutch oven is purpose-built for bread baking with its thick walls, tight-fitting lid, and superior heat retention. The 3.75-quart capacity is ideal for six buns, and the black matte interior won’t chip or crack. It distributes heat evenly, creating a perfectly crisp crust and open crumb. Staub’s construction ensures even browning and the heavy lid traps steam effectively for that bakery-quality result.
Check Current Price on Amazon →Lodge 4.5-Quart Enameled Cast Iron Dutch Oven
Best for: Budget-conscious beginners
Lodge offers exceptional value with this enameled cast iron Dutch oven that performs as well as premium brands at a fraction of the cost. The 4.5-quart size handles six buns comfortably, and the enamel coating is durable and easy to maintain. While slightly heavier than competitors, Lodge’s industrial-grade cast iron construction ensures it will last decades with proper care. Perfect for bakers who want to invest in one quality piece without breaking the bank.
Check Current Price on Amazon →Escali Primo Digital Kitchen Scale
Best for: New sourdough bakers
This slim, easy-to-read digital scale removes guesswork from recipe measurements with 0.1 gram precision up to 11 pounds. The large backlit display and simple one-button tare function make it intuitive for beginners, while the compact design saves counter space. The scale includes a removable bowl, though most users prefer to weigh directly into mixing bowls using the tare function. Its accuracy and affordability make it the starting point for serious sourdough work.
Check Current Price on Amazon →Hario V60 Weigh Brewing Scale
Best for: Precision-focused bakers
While marketed for coffee, this Japanese precision scale is beloved by serious bread bakers for its 0.1 gram accuracy and timer integration. The scale can measure up to 2 kg and connects via USB to recipe software, making it ideal for those who track and optimize their fermentation. The minimalist design and coffee-culture aesthetic appeal to bakers who view sourdough as craft. Its reliability justifies the premium price for those who bake frequently.
Check Current Price on Amazon →Make Quick Sourdough Buns Tonight
Quick sourdough buns prove that you don’t need to plan days ahead or master complex timings to enjoy homemade sourdough. This method delivers tangy, tender buns in an afternoon using straightforward techniques and ingredients you likely already have if you maintain a starter. The key is using active, bubbly starter, maintaining proper temperature, and trusting the poke test for proofing. Once you’ve made a batch, you’ll find yourself returning to this recipe regularly for weeknight dinners, picnics, or sandwiches.
Investing in a quality Dutch oven and kitchen scale transforms your baking from guesswork to reliable, repeatable results. These tools pay for themselves in the first season of baking, especially when compared to buying bakery sourdough buns at three to five dollars per serving. Start with the budget-friendly Lodge Dutch oven and Escali scale if you’re new to the craft, then upgrade to premium versions as your skills develop and your baking becomes part of your regular routine. The satisfaction of pulling perfect golden buns from your own oven makes the investment worthwhile.
Frequently Asked Questions
Can I make these buns without a Dutch oven?
Yes, you can bake them on a standard baking sheet in a regular oven, though the crust will be less dramatic. Place a shallow pan of boiling water on the bottom rack during the first 20 minutes to create steam. The result will be good, but using a covered vessel produces superior crust and crumb structure.
What if my sourdough starter is not active or bubbly?
Your starter needs to be fed 4-8 hours before mixing and should be visibly bubbly and nearly doubled when you use it. If it’s sluggish, feed it more frequently for 2-3 days, or try mixing at a warmer temperature. Inactive starter will not ferment the dough properly and will result in dense, flat buns.
How do I know when the buns are done proofing?
The poke test is most reliable: gently press your finger into the dough about half an inch deep. If the indent springs back slowly (taking 2-3 seconds), the proof is complete. If it springs back immediately, proof longer. If the indent doesn’t spring back at all, the dough is over-proofed and may spread too much in the oven.
Can I refrigerate the dough before the final proof?
Absolutely. After shaping, place buns in the banneton, cover tightly, and refrigerate for up to 16 hours. This slows fermentation and improves flavor development. Bake directly from the refrigerator without thawing, adding 5-10 minutes to the covered baking time.
Why are my buns dense instead of fluffy?
Dense crumb usually indicates under-fermentation, over-proofing, or weak starter. Ensure your starter is truly active and bubbly at mixing time. Use the poke test for proofing, and don’t let bulk fermentation extend much beyond 1.5 hours if your kitchen is warm. Underbaking will also produce a gummy, dense interior, so verify internal temperature reaches 205-210°F.
As an Amazon Associate, Build & Bloom earns from qualifying purchases. We only recommend products we genuinely think are useful. Prices and availability vary; check Amazon for the latest.
Leave a Reply