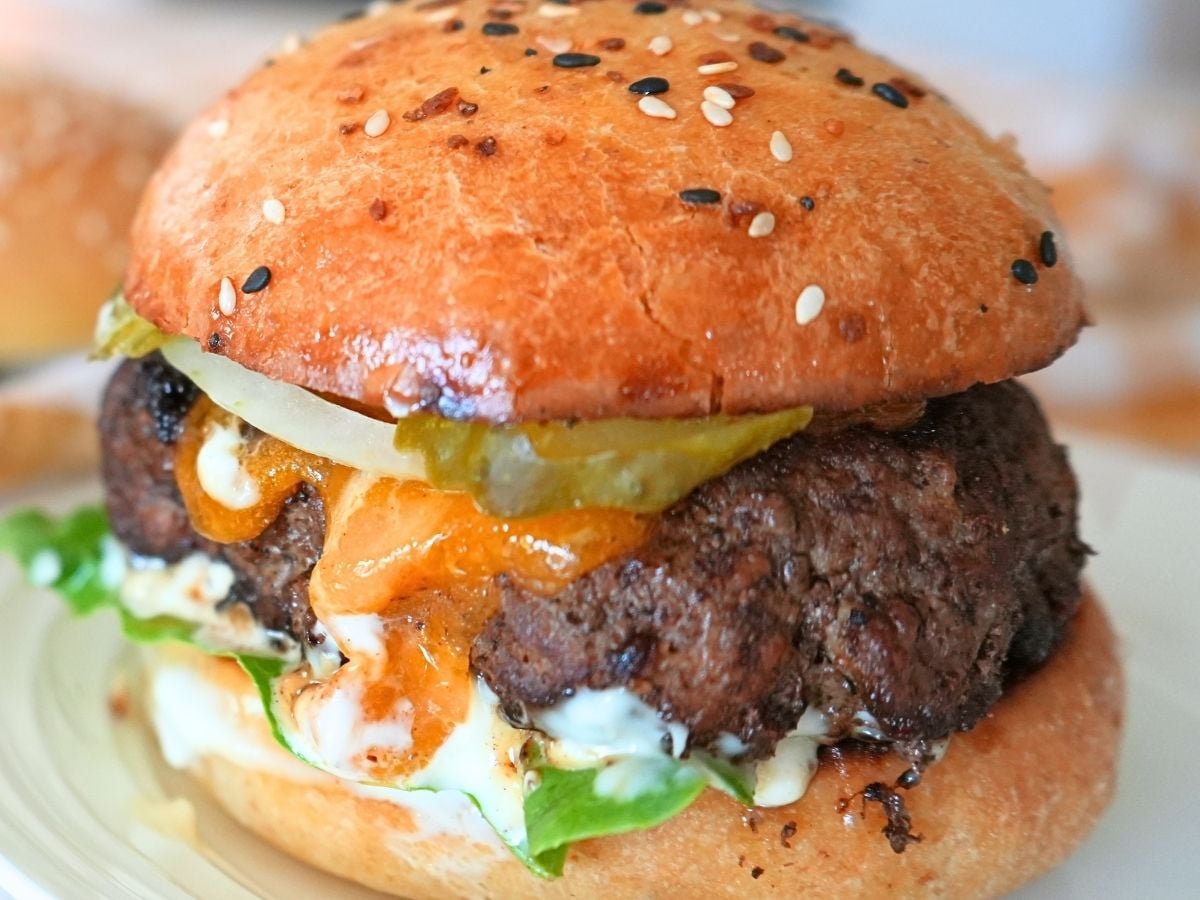

Homemade sourdough burger buns taste nothing like store-bought versions—they’re tender, slightly tangy, and hold up beautifully to toppings without falling apart. If you have sourdough starter on hand and want to elevate your summer burger game, you already have the hardest part done. This recipe walks you through a simple, slow fermentation method that develops incredible flavor while keeping the crumb soft and pillowy.
How to Make Sourdough Burger Buns
This recipe yields six large burger buns with a beautiful crust and an open, tender crumb. The bulk of the work is simply waiting while fermentation does the heavy lifting.
Ingredients
- 1 cup active sourdough starter (fed 4-8 hours prior)
- 1 1/2 cups warm water (around 80-90°F)
- 3 1/2 cups bread flour
- 2 teaspoons salt
- 1 teaspoon sugar
- Sesame seeds or poppy seeds for topping (optional)
Method
Mix the dough
Combine your active starter with warm water in a large bowl, stirring until mostly incorporated. Add bread flour, salt, and sugar, then mix with a wooden spoon or your hands until a shaggy dough forms with no dry flour remaining. Let this rest for 30 minutes at room temperature—this autolyse period helps the flour fully hydrate.
Knead and begin bulk fermentation
After resting, knead the dough for 8-10 minutes by hand (or 5-6 minutes in a stand mixer) until smooth and elastic. Transfer to a lightly oiled bowl, cover with a damp cloth, and let it rise at room temperature for 4-6 hours. The dough should increase in volume by about 50-75%.
Perform stretch and folds
Every 30 minutes during the first 2 hours of bulk fermentation, perform a stretch and fold: wet your hand, grab one side of the dough, stretch it up and fold it over itself. Rotate the bowl and repeat three more times. This builds structure without aggressive handling and develops a stronger gluten network.
Cold retard overnight
Once bulk fermentation is complete and the dough passes the poke test (an indentation slowly springs back halfway), transfer it to the refrigerator uncovered or under plastic wrap. Let it rest for 12-16 hours. This long, cool fermentation develops flavor and makes the dough easier to shape.
Shape the buns
Remove dough from the fridge and turn it out onto a lightly floured surface. Divide into six equal portions using a bench scraper or knife. Shape each piece into a tight round by pulling the edges underneath, creating surface tension. Place seam-side down on a lined baking sheet, leaving 3 inches between each bun.
Final proof
Cover the shaped buns with a damp cloth and let them rise at room temperature for 2-4 hours, depending on your kitchen’s warmth. They should increase noticeably in size and feel slightly puffy when gently pressed. If using seeds, brush the tops lightly with water and sprinkle before baking.
Score and bake
Preheat your oven to 450°F. Using a sharp blade, make a small slash across the top of each bun (optional but creates a professional appearance). Bake for 18-22 minutes until deep golden brown. The buns should sound hollow when tapped on the bottom.
Cool completely
Transfer the hot buns to a wire rack and let them cool for at least 30 minutes before slicing. This allows the interior crumb to set properly. Once cooled, store in an airtight container for up to three days, or freeze for later use.
- Ensure your starter is truly active and bubbly before mixing—feed it 4-8 hours prior and use it at peak activity when doubled and bubbly on top.
- The cold fermentation is where much of the flavor develops; don’t skip it or rush it. Even 8 hours in the fridge is better than none.
- If your kitchen is cold, wrap the buns in a towel during final proof or use your oven’s proof setting (usually 75-80°F) to prevent overproofing.
What to Look For in Sourdough Baking Equipment
- Stand mixer capability: A heavy-duty stand mixer with a dough hook attachment saves your arms during mixing and develops gluten more consistently. Look for at least 5-quart capacity to handle bread doughs without overflowing.
- Digital scale accuracy: Sourdough baking relies on precise hydration ratios. A scale accurate to 0.1 ounces (1 gram) helps you nail ingredient ratios every time, especially for smaller starter measurements.
- Bench scraper quality: A sturdy bench scraper with sharp edges makes shaping cleaner and faster, plus it’s essential for performing stretch-and-folds without damaging the dough structure.
- Proofing basket functionality: Banneton baskets cradle shaped doughs during final proof and prevent spreading. Choose one sized for 2-pound rounds to support your burger bun portions properly.
KitchenAid Artisan Series 5-Quart Stand Mixer
Best for: Home bakers making sourdough regularly
The KitchenAid Artisan mixer is the gold standard for sourdough work. Its powerful motor handles stiff doughs without strain, the dough hook attachment develops gluten evenly, and the 5-quart bowl accommodates most bread recipes. Thousands of home bakers trust this model for consistent, reproducible results. The tilt-head design makes dough removal easy, and it’s durable enough for weekly baking.
Check Current Price on Amazon →Etekcity Digital Kitchen Scale with Bowl
Best for: Budget-conscious bakers new to sourdough
This affordable digital scale offers 0.1-ounce precision up to 11 pounds, essential for sourdough’s ingredient ratios. The removable bowl makes measuring multiple ingredients simple, and it has a tare function for quick resets. At under $20, it delivers accuracy that rivals scales double its price, making it perfect for beginners unwilling to invest heavily upfront.
Check Current Price on Amazon →Rachael Ray Bench Scraper
Best for: First-time shaping and dough handlers
This sturdy stainless steel bench scraper has a comfortable handle and sharp, flat blade ideal for dividing dough and performing stretch-and-folds. Its lightweight design reduces hand fatigue during shaping, and the straight edge glides cleanly through dough without dragging. It’s an affordable, essential tool that makes handling sticky sourdough dramatically easier for newcomers.
Check Current Price on Amazon →Hario V60 Waterless Scale with Timer
Best for: Precision-focused bakers
This Japanese-made scale combines precision (0.1-gram accuracy) with an integrated timer, perfect for tracking fermentation stages while measuring ingredients. Its sleek design and whisper-quiet operation appeal to detail-oriented bakers. Waterless construction prevents electrical issues from splashing, and the rechargeable battery lasts weeks. A splurge that pays dividends for serious sourdough enthusiasts.
Check Current Price on Amazon →Final Recommendation
Making sourdough burger buns at home is entirely achievable with basic kitchen equipment and patience. The beauty of sourdough is that fermentation does most of the work—you simply need to understand timing, maintain proper hydration with a good scale, and shape with confidence using basic tools. A stand mixer eliminates arm fatigue and produces more consistent results, but it’s not mandatory. Start with a quality digital scale and a bench scraper, and you’ve already solved the two biggest variables in sourdough success.
These burger buns represent sourdough baking at its most approachable: no complicated lamination, no special techniques, and no equipment beyond what most home kitchens already contain. Once you master this recipe, you’ll have soft, tangy buns that transform summer barbecues. Store them well, slice carefully after full cooling, and watch how quickly they disappear from your table.
Frequently Asked Questions
Can I make these burger buns without a stand mixer?
Yes, absolutely. Hand-knead for 12-15 minutes instead of using a mixer. It takes more effort but produces identical results. The stretch-and-fold technique during bulk fermentation is especially helpful if mixing by hand, as it replaces some of the gluten development a mixer provides.
What if my sourdough starter isn’t very active?
An inactive or weak starter will result in slow, unpredictable fermentation. Always feed your starter 4-8 hours before baking and use it only when visibly bubbly and doubled in volume. If your starter is consistently sluggish, it may need more frequent feedings or warmer ambient temperature.
How do I know when the dough is perfectly proofed?
Perform the poke test: gently press your finger into the dough about 1/2 inch deep. If the indent springs back completely, it needs more time. If it springs back halfway, it’s perfectly proofed. If it doesn’t spring back at all, it’s overproofed and may collapse in the oven.
Can I freeze the shaped buns before the final proof?
Yes, this is called retarding. Shape the buns, place them on a baking sheet, cover loosely, and freeze for up to 2 weeks. Bake directly from frozen, adding 5-10 extra minutes to the bake time. No thawing needed.
Why are my burger buns dense or gummy inside?
This usually means underbaking or insufficient cooling time. Bake until deep golden brown (18-22 minutes) and always cool completely on a wire rack for at least 30 minutes before slicing. Slicing warm traps steam and creates a gummy texture.
As an Amazon Associate, Build & Bloom earns from qualifying purchases. We only recommend products we genuinely think are useful. Prices and availability vary; check Amazon for the latest.
Leave a Reply