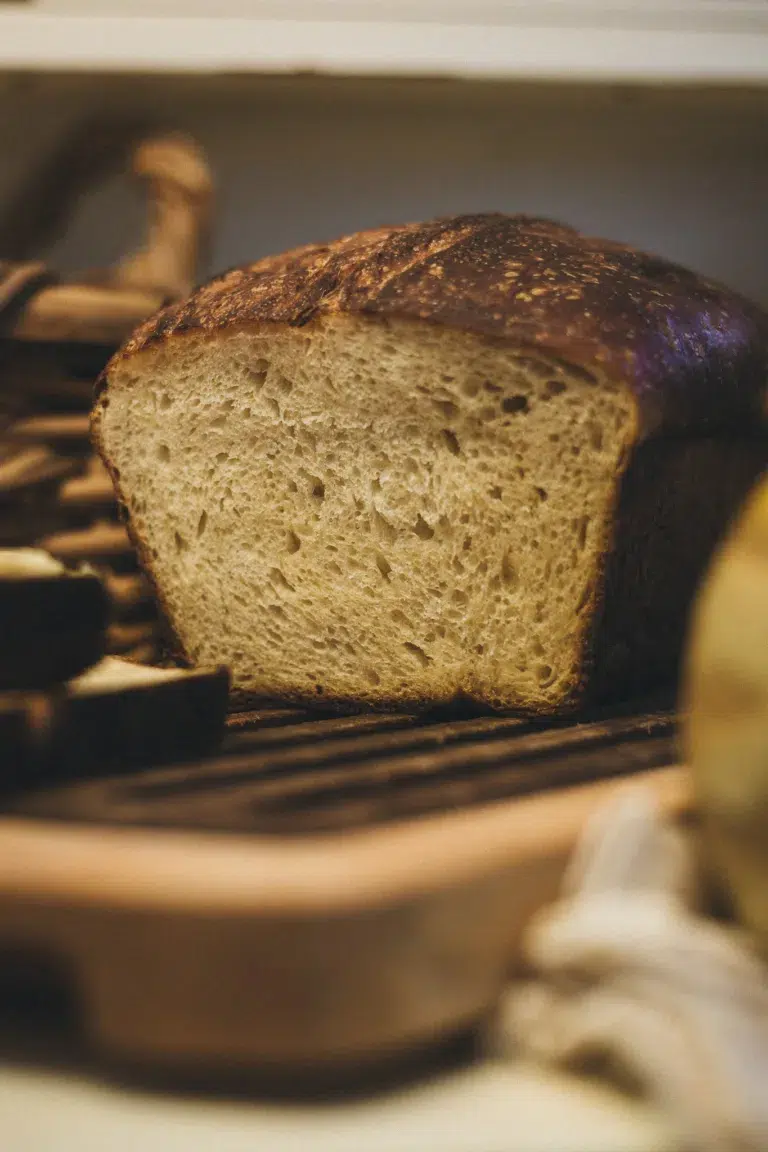

Making sourdough at home can feel intimidating, but buttermilk-enriched sourdough is actually more forgiving than traditional recipes. The buttermilk adds tenderness and subtle tang while reducing fermentation time, making this loaf perfect for weekend bakers who want impressive results without the long wait. If you’ve been curious about sourdough but worried about complexity, this recipe is your starting point.
How to Make Sourdough Buttermilk Bread
This recipe yields one beautiful, rustic loaf with a crispy crust and open crumb structure. The entire process takes about 24 hours including cold fermentation, but most of that is hands-off resting time.
Ingredients
- 1 cup active sourdough starter (fed 4-8 hours prior, bubbly and at peak)
- 1 1/4 cups buttermilk (room temperature preferred)
- 3 cups bread flour or all-purpose flour
- 1.5 teaspoons salt
- Water for steam and dough adjustments
Method
Mix your dough base
In a large mixing bowl, combine your active starter and buttermilk, stirring until loosely combined. Add the flour and mix until all dry ingredients are hydrated and no flour streaks remain. This is your autolyse mixture. Let it rest for 30-45 minutes to allow the flour to fully absorb the liquid. This rest improves gluten development and final texture.
Incorporate salt and build gluten
Sprinkle the salt over your rested dough and incorporate it with wet hands, squeezing the dough until salt is fully dissolved. Then perform 4-6 sets of stretch-and-fold movements over 30 minutes, resting 5 minutes between sets. Pull one section of dough up and fold it over itself, rotate the bowl, and repeat. This develops strength without aggressive kneading.
Bulk fermentation
Let the dough rest undisturbed for 4-6 hours at room temperature (68-75F is ideal). You should see noticeable bubbling and the dough should increase 50-75% in volume. The dough is ready when it jiggles slightly when the bowl is moved gently and shows visible fermentation activity throughout.
Pre-shape and bench rest
Turn the dough onto a lightly floured surface. Gently shape it into a round, being careful not to deflate all the gas bubbles. Let it rest seam-side up for 15-20 minutes. This rest relaxes the gluten and makes the final shaping easier.
Final shape for tension
Flip the dough seam-side down on your work surface. Create tension by pulling the edges toward you, rotating and repeating until you’ve worked your way around the entire loaf. You should feel resistance and see a taut surface. Place seam-side up in a floured proofing basket or a bowl lined with a floured kitchen towel.
Cold proof overnight
Cover your shaped dough and place it in the refrigerator for 12-16 hours. This slow, cold fermentation develops deeper flavor and makes scoring easier. The dough will be noticeably puffed but won’t be overproofed. This step is one of the most important for flavor development.
Preheat and score
Place a Dutch oven in your regular oven and preheat to 475F for 45 minutes minimum. Carefully invert your cold dough onto parchment paper. Using a very sharp blade held at a 45-degree angle, score the top with a single decisive slash about 1/4-inch deep. This controls where the loaf expands and creates the signature ear.
Bake with steam and finish
Carefully transfer the parchment with dough into the preheated Dutch oven. Cover with the lid and bake for 20 minutes. Remove the lid and bake for 25-30 minutes more, until the loaf is deep golden brown on all sides. Transfer to a cooling rack and wait at least 1 hour before slicing to allow crumb structure to set.
- If your kitchen is cold (under 68F), bulk fermentation will take longer; check dough volume rather than timing. Conversely, warm kitchens may require shorter fermentation to avoid over-proofing.
- Keep a simple fermentation log noting your starter strength, room temperature, and timing. After 2-3 bakes, you’ll understand how your specific environment affects the dough and can adjust accordingly.
- A cold loaf scores much cleaner than a room-temperature one. If you skip cold proofing, chill your shaped dough in the freezer for 15 minutes before scoring to get cleaner cuts.
What to Look For in Sourdough Baking Equipment
- Dutch oven material and capacity: A 5-7 quart enameled cast iron Dutch oven is the standard for sourdough because it traps steam during the critical first 20 minutes of baking, creating the signature crispy crust. Look for a heavy lid that seals well and a temperature rating of at least 500F to handle oven heat safely.
- Proofing basket design: A banneton proofing basket (also called a brotform) should have good depth, sturdy construction, and a floured linen or cane surface that prevents sticking without excessive flour transfer. A 10-inch basket is standard for a single loaf, and most serious bakers prefer the oval shape for longer boules.
- Scoring tool sharpness and control: A dedicated bread lame (scoring tool) or very sharp serrated knife keeps you safe and creates clean, controlled slashes. Dull blades drag through dough and create tears rather than clean cuts, ruining the aesthetic and affecting how the loaf expands. Look for tools with secure handles and replaceable blades for consistency.
- Mixing bowl size and material: A 4-6 quart mixing bowl with a wide mouth allows easy access for stretch-and-folds and makes monitoring fermentation progress simple. Glass or clear plastic lets you see dough activity; stainless steel is durable but less transparent. Avoid bowls with narrow necks that trap dough.
Staub Enameled Cast Iron Round Cocotte (5.5 Qt)
Best for: Serious home bakers wanting professional results
The Staub cocotte is the gold standard for sourdough baking. Its heavy cast iron construction distributes heat evenly, the dark enamel interior doesn’t chip like lighter enamels, and the tight-fitting lid traps steam perfectly for those first critical minutes of baking. The 5.5-quart capacity handles loaves up to 2 pounds comfortably. This is a lifetime investment that professional bakers actually use at home.
Check Current Price on Amazon →Lodge Enameled Cast Iron Dutch Oven (6 Qt)
Best for: Budget-conscious bakers starting their sourdough journey
Lodge offers excellent value without sacrificing performance. This 6-quart Dutch oven performs nearly identically to premium brands at roughly half the price. The enamel is durable, the lid seals well, and cast iron’s thermal properties remain the same regardless of brand. Some bakers report the cream interior shows staining over time, but this doesn’t affect functionality. Perfect for testing whether sourdough baking is right for you.
Check Current Price on Amazon →BANNETON Proofing Basket Set with Cloth Liner (10 inch)
Best for: First-time sourdough bakers who want foolproof setup
This set includes the banneton basket plus a removable cloth liner that can be washed and reused. The liner eliminates guesswork about flours and sticking; you can use less flour while preventing dough adhesion. The 10-inch oval shape is ideal for single loaves. Includes a detailed care guide and proofing tips, making it genuinely beginner-friendly. Great for those nervous about their first score and bake.
Check Current Price on Amazon →Le Creuset Round Enameled Cast Iron Dutch Oven (7.25 Qt)
Best for: Collectors and bakers wanting iconic design plus performance
Le Creuset represents the pinnacle of enameled cast iron craftsmanship. The 7.25-quart capacity handles larger loaves, the enamel colors are vibrant and designed to last decades, and the heat distribution is flawless. It’s more expensive than alternatives, but each piece is warranted and Le Creuset handles chip repairs professionally. This is as much kitchen art as functional tool.
Check Current Price on Amazon →Your First Sourdough Buttermilk Loaf Awaits
Sourdough buttermilk bread sits at the perfect intersection of tradition and forgiveness. You get the complex, tangy flavor that makes sourdough legendary, plus the tenderness that buttermilk brings, all wrapped in a timeline that respects your weekend schedule. The overnight cold ferment isn’t just a baking technique; it’s actually the hardest working part of your job, quietly developing flavor while you sleep. When you pull that golden loaf from your Dutch oven and hear it crackle as it cools, you’ll understand why bakers become obsessed with their craft.
The equipment matters, but it matters less than your attention and willingness to adjust based on what you observe. A $30 proofing basket and a $70 Lodge Dutch oven will produce results nearly identical to premium versions if you understand the fundamentals. What makes the difference is watching your dough, taking notes, and understanding that every kitchen has its own personality. Start with this recipe, bake it 3-4 times, and by your fourth loaf you’ll already be adjusting hydration or fermentation timing based on your space and starter. That’s when sourdough stops being intimidating and becomes meditation.
Frequently Asked Questions
Can I use all-purpose flour instead of bread flour for sourdough buttermilk bread?
Yes, absolutely. All-purpose flour works well and produces a softer crumb structure. Bread flour contains slightly more protein, which creates a chewier texture and more open crumb, but all-purpose still develops excellent gluten structure through stretch-and-fold. Adjust your water slightly if switching (bread flour typically absorbs slightly more water than all-purpose).
What if my sourdough starter isn’t bubbly or at peak when I want to bake?
Your starter should be fed 4-8 hours before mixing so it’s actively rising and showing bubbles throughout. If it’s sluggish, feed it and wait another 4-8 hours. You can also extend bulk fermentation by 1-2 hours to compensate for a slower starter, or warm your dough to room temperature for a few hours before baking to speed fermentation.
How do I know when bulk fermentation is complete?
The dough should increase 50-75% in volume and show noticeable bubbles when you gently shake the bowl. A toothpick or wooden skewer inserted and removed should show bubbles clinging to it. If your kitchen is warm, this might be 4 hours; if cool, it could be 8 hours. Always judge by appearance, not time alone.
Can I bake this bread without a Dutch oven?
It’s possible but not ideal. A Dutch oven traps steam, which is crucial for crust development. Alternatives include: placing a baking stone on the lowest oven rack and pouring boiling water into a roasting pan below it, or baking in a clay baker designed for bread. Standard baking sheets won’t produce the same crust quality, but the bread will still be edible.
How long does this bread stay fresh, and how should I store it?
Stored in a paper bag or linen towel at room temperature, it stays fresh for 3-4 days. Paper allows the crust to breathe; plastic bags make the crust soggy. Freeze whole loaves wrapped in plastic then in foil for up to 3 months. Toast frozen slices directly from the freezer, or thaw the whole loaf at room temperature for 4 hours before serving.
As an Amazon Associate, Build & Bloom earns from qualifying purchases. We only recommend products we genuinely think are useful. Prices and availability vary; check Amazon for the latest.
Leave a Reply