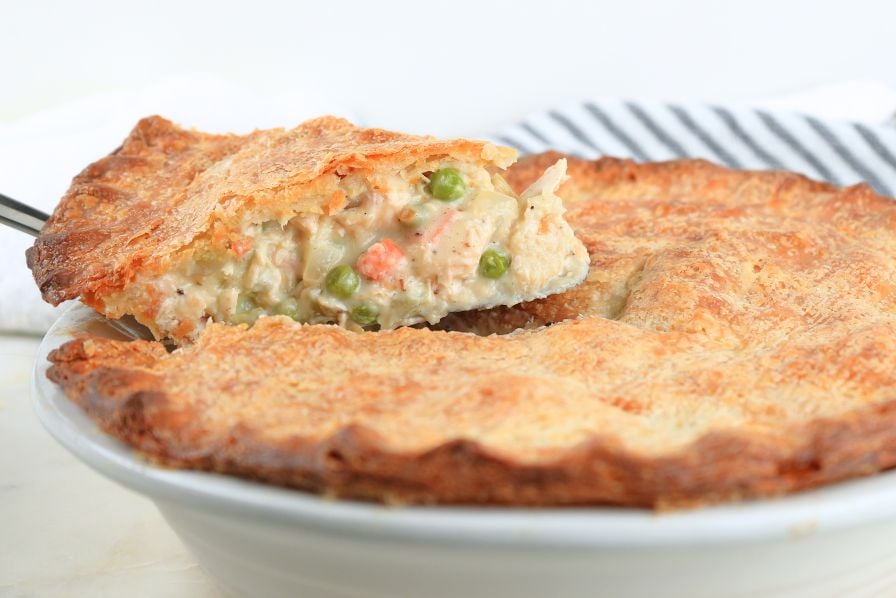

Sourdough chicken pot pie is the ultimate comfort food that combines the complex flavor of fermented dough with a rich, savory filling. If you’ve been intimidated by sourdough baking or want to elevate your pot pie game, this recipe proves that homemade sourdough crust is entirely achievable and worth every minute. The result is a golden, crackling crust that tastes infinitely better than store-bought versions, and your family will think you’ve been secretly trained as a pastry chef.
How to Make Sourdough Chicken Pot Pie
This recipe builds on active sourdough starter and creates both a bottom crust and lattice or full top. Plan for proofing time alongside your cooking.
Ingredients
- 1.5 cups active sourdough starter (fed 4-8 hours prior)
- 3 cups all-purpose flour, divided
- 1 teaspoon salt
- 6 tablespoons cold butter, cubed
- 2-3 tablespoons ice water
- 3 cups cooked shredded chicken
- 2 cups mixed vegetables (carrots, celery, peas, potatoes)
- 4 tablespoons butter
- 1/4 cup flour (for roux)
- 2 cups chicken broth
- 1 cup heavy cream
- Salt, pepper, and fresh thyme to taste
- 1 egg (for egg wash)
Method
Make the sourdough crust dough
In a large mixing bowl, combine your fed sourdough starter with 2.5 cups flour and 1 teaspoon salt. Mix until shaggy, then knead by hand or with a dough hook for 8-10 minutes until smooth and elastic. Cover and let rest for 2 hours at room temperature. The dough should nearly double in size and smell pleasantly tangy.
Laminate the dough with butter
Gently flatten your dough on a clean surface. Dot with cold cubed butter across the surface, then fold the dough in thirds like a letter, rotate 90 degrees, and fold again. Repeat this folding process 3-4 times with 15-minute rests between folds. This creates the flaky layers in your crust. Wrap and refrigerate for at least 1 hour.
Prepare the filling
Melt 4 tablespoons butter in a heavy pan over medium heat. Whisk in 1/4 cup flour to create a roux, stirring constantly for 2-3 minutes until golden. Slowly add chicken broth and cream while whisking to prevent lumps. Add your cooked chicken and vegetables, then season with salt, pepper, and thyme. Simmer for 5 minutes until thickened, then set aside to cool.
Assemble the pie
Roll out two-thirds of your chilled dough to fit a 9-inch pie dish. Press gently into the bottom and sides. Pour your cooled filling into the crust. Roll out the remaining dough and either cut into strips for a lattice top or place as a full top crust. Seal edges by pressing with a fork, then brush with beaten egg.
Final proof before baking
Cover your assembled pie loosely with a kitchen towel and let it proof for 1-2 hours at room temperature until the crust rises slightly and feels pillowy. The sourdough will continue developing flavor during this time.
Bake until golden
Preheat your oven to 425 degrees Fahrenheit. Place the pie on a baking sheet to catch drips, then bake for 25-30 minutes until the crust is deep golden brown. If edges brown too quickly, tent loosely with foil. The filling should bubble slightly at the edges.
Rest before serving
Remove from the oven and let cool for 10-15 minutes before slicing. This allows the filling to set slightly so it won’t run all over the plate. Serve warm with a simple green salad or crusty bread on the side.
- Feed your sourdough starter 4-8 hours before making dough so it’s at peak activity with lots of bubbles on top
- Use ice water and keep all butter cold during lamination to maximize flaky layers in your crust
- Pre-cook your chicken and vegetables rather than adding raw; this prevents the filling from being watery and ensures everything is tender when you slice into the pie
What to Look For in Sourdough Baking Equipment
- Dough mixing capacity: Your mixing bowl or stand mixer needs to handle at least 3-4 cups of dough comfortably without overflow. A stand mixer with dough hook attachment saves significant arm strain during the kneading phase.
- Dough thermometer accuracy: Sourdough relies on temperature control for proper fermentation timing. An accurate thermometer helps you know when your dough has reached the right proofing temperature and prevents overproofing.
- Rolling surface and pin quality: A smooth rolling surface (marble or silicone) and a quality rolling pin prevent sticking and ensure even dough thickness. Uneven thickness causes some parts to burn while others underbake.
- Pie dish material and depth: A standard 9-inch pie dish with at least 1.5-inch depth accommodates the filling properly. Glass heats evenly and lets you see browning on the bottom crust, while ceramic holds heat longer.
KitchenAid Artisan Stand Mixer
Best for: Serious bakers making sourdough regularly
The gold standard for sourdough mixing and dough development. The powerful motor and flat beater handle thick sourdough dough without strain, while the stainless steel bowl is large enough for multiple batches. With a dough hook attachment, you can develop gluten structure efficiently in 8-10 minutes rather than hand-kneading. Dozens of attachment options mean this mixer serves dozens of baking projects beyond sourdough.
Check Current Price on Amazon →Pyrex 9-Inch Glass Pie Dish
Best for: First-time pie makers who want reliable results
Simple, affordable, and incredibly functional for pot pie baking. The clear glass lets you monitor bottom crust browning, preventing the frustration of undercooked crusts. The 1.5-inch depth is ideal for sourdough chicken pot pie with generous filling. Pyrex’s even heat distribution ensures uniform baking, and it’s dishwasher safe for easy cleanup after your meal.
Check Current Price on Amazon →OXO Good Grips Dough Scraper
Best for: Bakers on a budget who need reliable dough handling
An essential tool that costs under ten dollars but transforms your dough handling. The flexible edge cleanly cuts and portions dough without sticking, while the handle ergonomics prevent hand fatigue during lamination. The measurement markings help you divide dough evenly for top and bottom crusts, ensuring balanced pie proportions.
Check Current Price on Amazon →Marble Pastry Board with Wooden Stand
Best for: Dedicated bakers who want a permanent baking station
A marble surface stays naturally cool, preventing butter in your dough from softening during lamination and rolling. The heavy construction prevents shifting while you work, and the neutral appearance makes it attractive enough to leave on your counter permanently. The wooden stand elevates it to comfortable working height and adds rustic farmhouse style to your kitchen.
Check Current Price on Amazon →Final Recommendation
Sourdough chicken pot pie represents the best of homestead cooking: it uses fermented starter you’ve been maintaining, combines humble pantry ingredients, and delivers restaurant-quality results that impress every single time. The tangy crust contrasts beautifully with creamy filling, and the aroma during baking fills your entire home with comfort. This isn’t a recipe you make once; it becomes a seasonal staple that guests specifically request.
Start with a reliable stand mixer to remove the physical demands of dough kneading, invest in a good thermometer to nail your proofing timing, and grab quality pie dishes in glass so you can see that beautiful golden bottom. The equipment suggestions above will serve you for decades of sourdough projects, and the techniques you master here transfer directly to sourdough bread, focaccia, and pastries. Your first pot pie might take the full 3-4 hours, but by your third or fourth, you’ll move through the process with quiet confidence.
Frequently Asked Questions
Can I make this sourdough pot pie a day ahead?
Yes. Assemble the pie through the egg wash step, then cover tightly with plastic wrap and refrigerate overnight. Bake from cold, adding 5-10 minutes to the baking time. This actually improves flavor as the sourdough continues fermenting slowly in the fridge.
What if my sourdough starter isn’t active or bubbly?
Feed your starter and wait 4-8 hours until it doubles in size with lots of visible bubbles throughout. An inactive starter won’t rise your dough properly. If your starter is consistently sluggish, it may need warmer temperatures or more frequent feeding.
Can I freeze the unbaked sourdough pot pie?
Absolutely. Assemble the pie, wrap well in plastic wrap and foil, then freeze for up to 2 months. Bake from frozen, adding 15-20 minutes to the baking time and covering loosely with foil if browning too quickly.
How do I know when the filling is done cooking without overbaking the crust?
The filling bubbles at the edges when done, which you can see if using a glass pie dish. If your crust is browning too fast before the filling is ready, tent it loosely with foil for the remaining time.
What type of sourdough starter works best for pot pie crust?
Any active sourdough starter at its peak (doubled, bubbly) works well. A slightly more sour starter (7-10 days old since last feeding) adds deeper flavor, while a fresher starter (4-5 days old) produces milder tang. Both create excellent results.
As an Amazon Associate, Build & Bloom earns from qualifying purchases. We only recommend products we genuinely think are useful. Prices and availability vary; check Amazon for the latest.
Leave a Reply