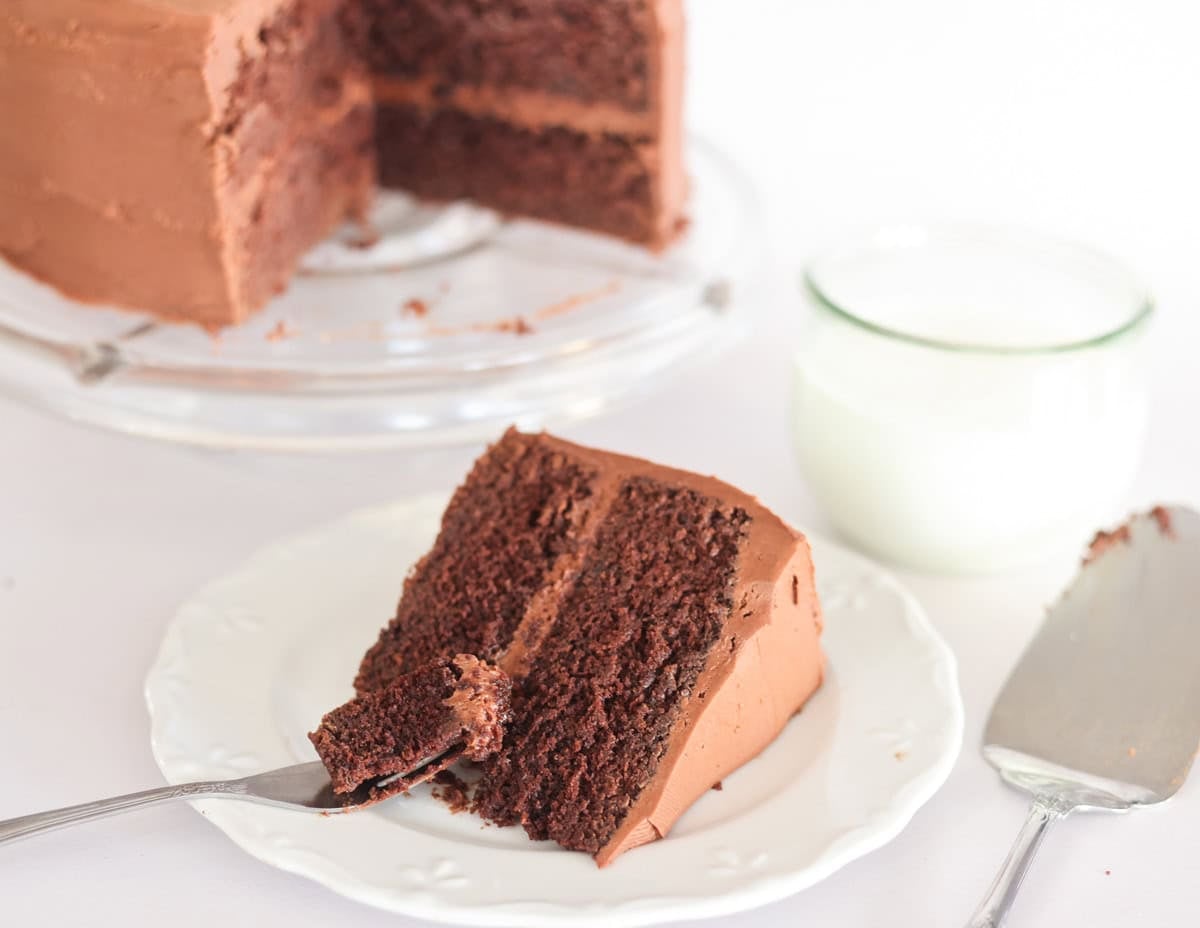

Sourdough chocolate cake is a revelation for home bakers tired of flat, one-dimensional desserts. By using your active sourdough starter instead of commercial yeast and baking powder alone, you get a cake that’s more complex—the fermentation adds a faint tang that amplifies chocolate flavor and keeps the crumb moist for days. This isn’t a difficult bake; it’s a clever way to use your starter while creating something genuinely special.
How to Make Sourdough Chocolate Cake
This recipe yields one 9-inch round cake with a tender crumb and deep chocolate flavor. Active sourdough starter does double duty as both leavening agent and flavor builder, so make sure yours is bubbly and fed 4-8 hours before you start.
Ingredients
- 1 cup active sourdough starter, room temperature
- 1 1/2 cups all-purpose flour
- 3/4 cup unsweetened cocoa powder
- 1 cup granulated sugar
- 1/2 cup neutral oil (vegetable, canola, or light olive)
- 2 large eggs
- 1/2 cup whole milk
- 1 teaspoon vanilla extract
- 1/2 teaspoon baking soda
- 1/2 teaspoon salt
- 1/2 teaspoon instant espresso powder (optional but recommended)
Method
Prep and combine wet ingredients
In a large mixing bowl, whisk together your active sourdough starter, oil, eggs, milk, and vanilla until fully combined. The mixture should look smooth and slightly frothy. This blending action aerates the batter and distributes the starter evenly, which helps with even rise.
Sift dry ingredients together
In a separate bowl, sift together flour, cocoa powder, sugar, baking soda, salt, and espresso powder if using. Sifting breaks up clumps in cocoa and distributes the baking soda evenly so you won’t get any alkaline pockets. This step takes 2 minutes and makes a visible difference in texture.
Fold wet and dry components
Pour the dry mixture into the wet ingredients and fold gently with a spatula until just combined. Stop mixing as soon as no dry flour streaks remain; overmixing develops gluten and toughens the cake. The batter should look thick, chocolatey, and slightly lumpy.
Prepare your pan and pour batter
Grease a 9-inch round cake pan and line the bottom with parchment paper for easy removal. Pour the batter into the pan and smooth the top gently. The batter will be thick, so use an offset spatula or the back of a spoon to spread it evenly.
Bake low and slow
Place in a preheated 350°F oven for 32-38 minutes, until a toothpick inserted in the center comes out with a few moist crumbs attached. The top should look set and spring back gently when lightly pressed. Sourdough cakes can look slightly underbaked because the crumb stays tender; resist the urge to overbake.
Cool before turning out
Let the cake rest in its pan for 15 minutes on a wire rack. This allows the structure to set slightly so it won’t crack when you turn it out. After 15 minutes, invert the pan onto the rack and remove the parchment, then let it cool completely.
- Make sure your sourdough starter is at peak activity—bubbly, doubled, with a pleasantly sour smell. If it’s sluggish, feed it and wait another 4 hours before baking.
- Room temperature ingredients mix more smoothly and incorporate air better. Remove eggs and milk from the fridge 30 minutes before baking.
- This cake actually improves after a day; the crumb becomes even more moist and the sourdough tang develops further. Store it covered at room temperature for up to 3 days.
What to Look For in Baking Equipment
- Mixing bowls: You need at least two bowls—one large enough to hold 3 cups of batter, one for dry ingredients. Glass or stainless steel works best; avoid reactive metals like aluminum that can discolor with cocoa.
- Cake pan: A 9-inch round pan with at least 1.5-inch sides ensures even baking. Light-colored metal pans heat more gently than dark ones; dark pans can overbake the edges before the center is done.
- Measuring tools: A digital kitchen scale gives the most accurate measurements, but measuring cups work if you spoon flour into them and level with a knife. Never scoop directly from the bag, which compacts the flour.
- Cooling rack: Essential for letting air circulate around the hot cake so it cools evenly and doesn’t steam itself into a dense texture. Wire racks are inexpensive and work for both cooling and wire-whisking.
OXO Good Grips 3-Piece Mixing Bowl Set
Best for: Home bakers needing reliable, heatproof bowls
This set includes three nesting glass bowls with silicone bases that grip your counter, preventing sliding while you whisk or fold. The glass is heatproof to 350°F, marking-free, and won’t absorb odors. The bowls range from 1-quart to 5-quart capacity, giving you options for wet and dry ingredients. At a mid-range price, this set delivers years of reliable baking performance without the fussiness of stainless steel.
Check Current Price on Amazon →Pyrex Smart Essentials 6-Piece Glass Mixing Bowl Set
Best for: Budget-conscious bakers
Pyrex glass mixing bowls are dishwasher-safe, oven-safe, and microwave-safe, making them endlessly versatile. This six-piece set includes bowls ranging from small prep bowls to a large 8-cup vessel. The borosilicate glass is durable and won’t stain or retain flavors. These bowls are heirloom-quality—many bakers use the same set for decades—and cost under $20 for the entire set.
Check Current Price on Amazon →All-Clad Essentials Stainless Steel Mixing Bowl Set
Best for: Serious bakers and kitchens requiring heirloom cookware
All-Clad’s stainless steel bowls are professional-grade, dishwasher-safe, and built to last. The polished interior resists staining and the weighted base prevents tipping during vigorous mixing. These bowls conduct heat efficiently, which can be an advantage when tempering chocolate or warming ingredients. Premium pricing reflects the durability and the All-Clad reputation for American-made quality.
Check Current Price on Amazon →Rubbermaid Brilliance 4-Piece Mixing Bowl Container Set
Best for: Bakers who want storage and mixing in one product
This set combines mixing bowls with locking lids, so you can mix your dry ingredients and store them until you’re ready to fold them into the wet mixture. The plastic is BPA-free, durable, and won’t shatter if dropped. The bowls nest for easy storage, and the lids prevent spills if you need to refrigerate anything mid-bake.
Check Current Price on Amazon →Final Recommendation
Sourdough chocolate cake transforms your starter into a deeply flavored dessert that tastes better than it looks. The fermentation brings out subtle complexity in the cocoa, and the tender crumb improves over days of storage—a significant advantage over conventional chocolate cakes that can dry out quickly. This recipe works whether you’re an experienced sourdough baker or new to fermentation; the process is straightforward enough for beginners yet sophisticated enough to impress.
Invest in essential tools that last: a reliable mixing bowl set (glass or stainless steel), a light-colored 9-inch cake pan, and a sturdy cooling rack. These three items form the backbone of any serious baking practice and will serve you for decades. Measure carefully, fold gently, and resist overbaking—the cake should look slightly underbaked when you remove it from the oven. Your sourdough starter has been waiting for this moment: a dessert that showcases its distinctive tang and makes chocolate taste extraordinary.
Frequently Asked Questions
Can I use unfed or discard sourdough starter?
No—you need active, bubbly starter at its peak for the cake to rise properly. Unfed or discard starter won’t leaven the cake. If your starter is sluggish, feed it, wait 4-8 hours, and check that it’s doubled before baking.
Why is my sourdough chocolate cake dense in the middle?
Overmixing the batter develops gluten and collapses air bubbles. Fold the dry ingredients gently, stopping as soon as flour streaks vanish. Also verify your starter was truly active; a sluggish starter won’t produce enough lift.
How long does this cake stay fresh?
Covered at room temperature, it stays moist and tender for 3-4 days. The sourdough fermentation actually improves the texture after a day, making it slightly moister. Refrigeration can dry it out; freezing works well for longer storage.
Can I use whole wheat or rye flour instead of all-purpose?
Partially, yes. You can replace up to 25% of the all-purpose flour with whole wheat or rye, which adds nutty complexity. Beyond 25%, the cake becomes denser and the chocolate flavor becomes muddled. Start with 10% substitution to see how you like it.
What’s the espresso powder for?
It’s optional but strongly recommended. Espresso powder amplifies chocolate flavor without making the cake taste like coffee; it creates depth and prevents the chocolate from tasting one-dimensional or overly sweet.
As an Amazon Associate, Build & Bloom earns from qualifying purchases. We only recommend products we genuinely think are useful. Prices and availability vary; check Amazon for the latest.
Leave a Reply