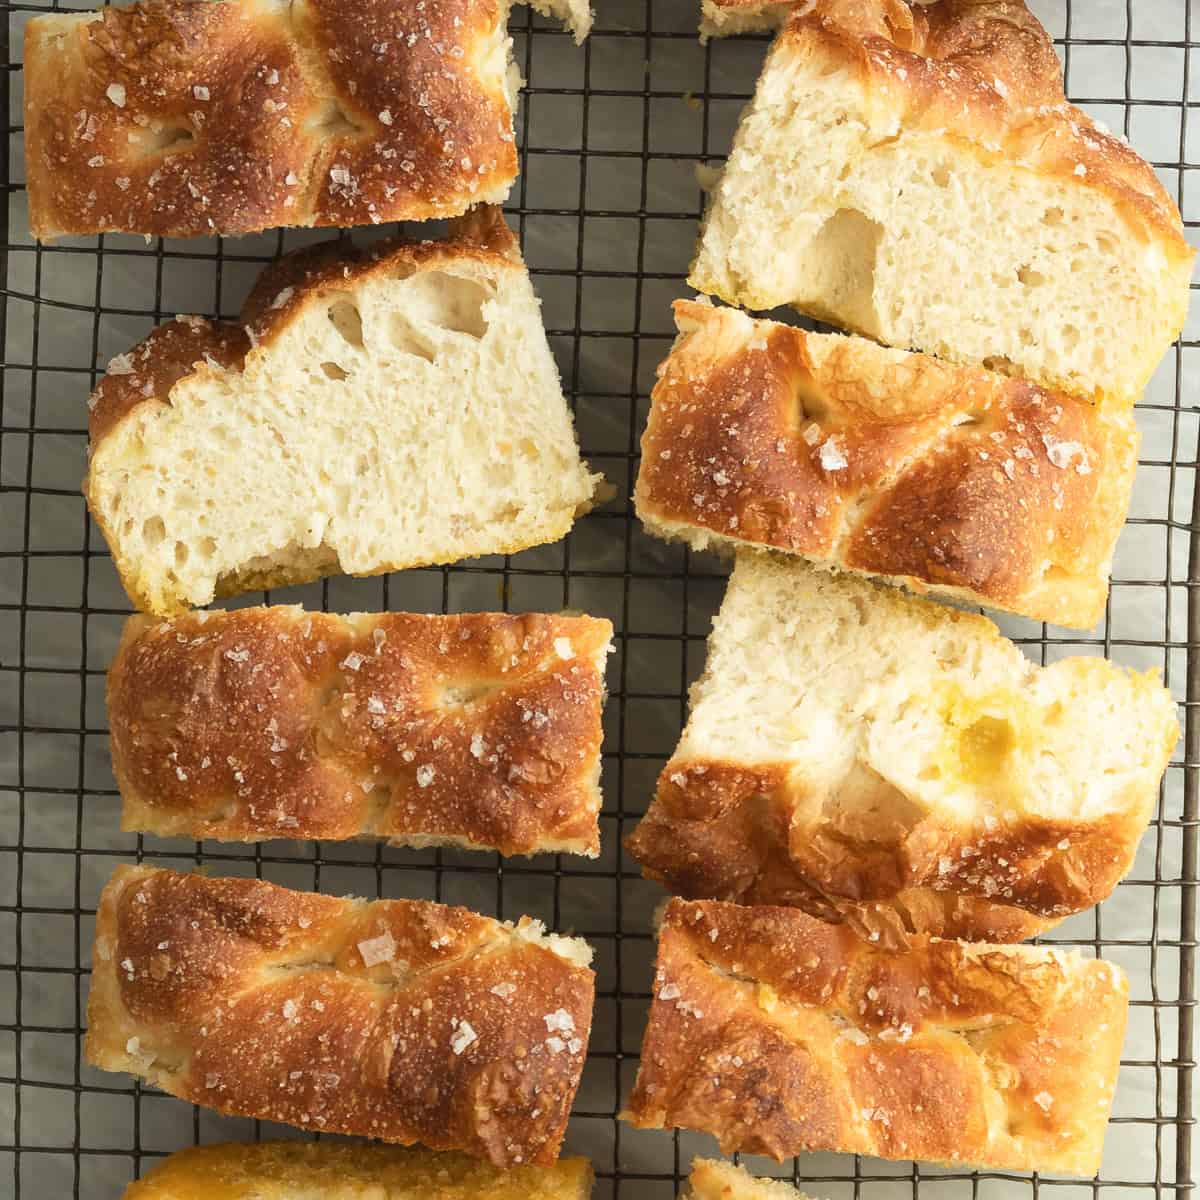

If you maintain a sourdough starter, you know the guilt of pouring discard down the sink. Focaccia is the perfect solution—it transforms that discarded starter into a showstopping bread with a crispy crust, tender crumb, and golden-brown dimples. Unlike other discard recipes, focaccia actually tastes like a real bread, not a salvage project. You’ll need just a handful of basic ingredients and a baking vessel, with most time spent resting rather than working.
How to Make Sourdough Discard Focaccia
This recipe creates a rustic, restaurant-quality focaccia that’s perfect for sandwiches or dipping in olive oil. The process relies on long fermentation for flavor development rather than kneading for strength.
Ingredients
- 1 cup (240ml) active sourdough discard (fed 4-8 hours prior)
- 1.5 cups (360ml) lukewarm water
- 3.5 cups (420g) bread flour or all-purpose flour
- 1.5 teaspoons (10g) salt
- 3 tablespoons (45ml) olive oil, divided
- Coarse sea salt and fresh rosemary for topping
Method
Mix the dough
Combine active sourdough discard and lukewarm water in a large bowl, stirring until mostly combined. Add flour and salt, mixing until all dry flour is incorporated and you have a shaggy, wet dough. Don’t knead—just ensure there are no dry pockets. The dough will be sticky and loose.
Bulk ferment with stretch-and-folds
Cover the bowl loosely with plastic wrap or a towel. Over the next 4-5 hours, perform stretch-and-fold sequences every 30 minutes (perform 4-5 total). Wet your hand, grab one side of the dough, stretch it up and fold it over the center, rotating the bowl 90 degrees each time. This builds strength without kneading.
Oil and rest overnight
After the bulk fermentation is complete, drizzle 1.5 tablespoons of olive oil onto the dough and gently fold it in. Transfer to an oiled baking pan (9×13 inch works well), cover tightly, and refrigerate for 12-18 hours. Cold fermentation develops flavor and makes the dough easier to shape.
Final proof at room temperature
Remove the pan from the refrigerator 1-2 hours before baking, allowing it to come to room temperature. The dough should rise noticeably but not double completely. This step is crucial—the cold fermentation needs time to warm up.
Create the dimples
Preheat your oven to 450F (230C). Wet your fingertips with water and gently press dimples all over the dough surface, spacing them about 1.5 inches apart. Don’t deflate the dough completely—these dimples should be deep but not punching all the way to the bottom.
Season generously
Drizzle the remaining 1.5 tablespoons of olive oil over the dimpled surface, allowing it to pool slightly in the dimples. Sprinkle coarse sea salt evenly across the top, and scatter fresh rosemary (or dried herbs of choice) over the surface. The salt and oil should be visible and distributed.
Bake until golden
Transfer the pan to the preheated oven and bake for 20-25 minutes, until the focaccia is deep golden brown and the edges are crispy. The bottom should sound hollow when tapped. Remove from the oven and let cool on the pan for 5 minutes before transferring to a wire rack.
- Use discard that has been fed 4-8 hours prior—it should be bubbly and at peak activity. Discard that’s past its peak or barely fed will result in slow, weak fermentation.
- Temperature matters: in winter, your bulk fermentation may take 6-8 hours; in summer, it could be complete in 3-4 hours. Use visual cues (dough should look pillowy and slightly increased in volume) rather than strict timing.
- Don’t skip the cold fermentation step. This is where the focaccia develops its signature sour flavor and the dough becomes easier to handle. Room-temperature fermentation alone produces decent bread but misses the depth.
What to Look For in Focaccia Baking Equipment
- Baking Pan Material: Choose between ceramic, stoneware, or high-quality steel. Ceramic and stoneware distribute heat evenly and brown the bottom beautifully; steel is lighter and heats up faster. Avoid thin, flimsy pans that warp easily.
- Pan Size and Depth: A 9×13-inch rectangular pan with at least 2-inch sides is ideal for focaccia. The extra depth contains rising dough and allows for generous olive oil pooling in the dimples. Too-shallow pans may overflow during the final proof.
- Oven Thermometer Accuracy: Home ovens often run 25-50 degrees off their dial temperature. An accurate thermometer ensures your oven really reaches 450F, preventing under-baking or a crust that browns before the interior cooks through.
- Cooling Rack Design: A sturdy wire cooling rack prevents the bottom from steaming and becoming soggy. Look for rust-resistant stainless steel with crosswires spaced closely enough to support the focaccia without sagging.
Le Creuset Stoneware Rectangular Baking Dish 9×13
Best for: Serious home bakers who want even browning and heirloom quality
Le Creuset’s ceramic baking dish is the gold standard for focaccia. The thick stoneware heats evenly, producing a perfectly crispy bottom and light-golden top. Its 2-inch sides contain oil and rising dough without overflow. Available in multiple colors, it transitions seamlessly from oven to table. While premium-priced, this dish will outlast dozens of focaccia loaves and handle everything from bread to lasagna.
Check Current Price on Amazon →OXO Good Grips Rectangular Baking Pan 9×13
Best for: Budget-conscious bakers making weekly focaccia
OXO’s carbon steel pan is lightweight, heats quickly, and costs a fraction of premium alternatives. The non-stick surface requires minimal greasing and makes cleanup effortless. While it won’t last 20 years like stoneware, it performs exceptionally well for daily baking and browning is consistent. Includes sturdy silicone handles that stay cool.
Check Current Price on Amazon →All-Clad Ha1 Hard Anodized 9×13 Baking Pan
Best for: Professional-level home bakers investing in lifetime cookware
All-Clad’s hard-anodized aluminum pan rivals stoneware for even heat distribution. The reinforced corners and rolled edges prevent warping even after years of 500F+ use. Exceptional browning and the dark surface helps judge crust color accurately. Backed by a lifetime warranty and made in the USA, this is an investment piece for serious bakers.
Check Current Price on Amazon →Pyrex Basics Rectangular Glass Baking Dish 9×13
Best for: Beginners and casual bakers wanting affordability and visibility
Pyrex glass pans heat reliably and let you monitor browning without opening the oven. The weight is moderate and they’re virtually indestructible if handled gently. While glass heats slightly slower than metal or ceramic, it produces consistent results. The transparent sides let you verify bottom crust development easily, making it ideal for learning proper focaccia technique.
Check Current Price on Amazon →Final Recommendation
Sourdough discard focaccia is one of the most forgiving bread recipes—and one of the most rewarding. Unlike other discard recipes that feel like salvage projects, focaccia tastes genuinely delicious and transforms a starter maintenance byproduct into something you’ll want to make weekly. The long fermentation means minimal hands-on time; you’re letting yeast and bacteria do the work over 2-3 days. Your biggest investment is a good baking pan that distributes heat evenly and doesn’t warp.
Start with a budget or mid-range pan from OXO or Pyrex if you’re testing the recipe, then upgrade to ceramic or hard-anodized aluminum once you’re confident in your technique. Even with an entry-level pan, your focaccia will taste spectacular. Master this recipe and you’ll never pour discard down the sink again—instead, you’ll be timing your starter feedings to coincide with focaccia bakes.
Frequently Asked Questions
What if my sourdough discard isn’t bubbly or active?
Feed your discard and wait 4-8 hours until it’s visibly bubbling and has risen noticeably in the jar. Inactive discard won’t ferment the focaccia properly, resulting in dense, bland bread. If you forget to feed it ahead, plan an extra day for the bulk fermentation to compensate for slower yeast activity.
Can I make this without cold fermentation overnight?
You can shorten cold time to 2-3 hours, but flavor and texture will suffer. The cold fermentation allows acids to develop, creating that signature sourdough tang and improving extensibility. For best results, refrigerate at least 8 hours, ideally 12-18.
How much olive oil should pool in the dimples?
You want enough olive oil to coat the surface and collect in each dimple, creating little pockets of richness. Roughly 1.5 tablespoons spread over 9×13 inches is standard—you should see visible oil but not a puddle that sloshes when you move the pan.
Why is my focaccia dense and gummy inside?
This usually means under-baking or insufficient final proof. Ensure your oven reaches 450F (verify with a thermometer), and allow the dough 1-2 hours at room temperature after cold fermentation. Also check that your discard was active—weak starter produces weak fermentation and dense crumb.
Can I freeze focaccia dough after the bulk fermentation?
Yes. After bulk fermentation, oil the dough, transfer to your baking pan, wrap tightly in plastic, and freeze for up to 2 weeks. Thaw overnight in the refrigerator, then proceed with the final proof and baking. This makes it convenient to bake fresh focaccia throughout the week.
As an Amazon Associate, Build & Bloom earns from qualifying purchases. We only recommend products we genuinely think are useful. Prices and availability vary; check Amazon for the latest.
Leave a Reply