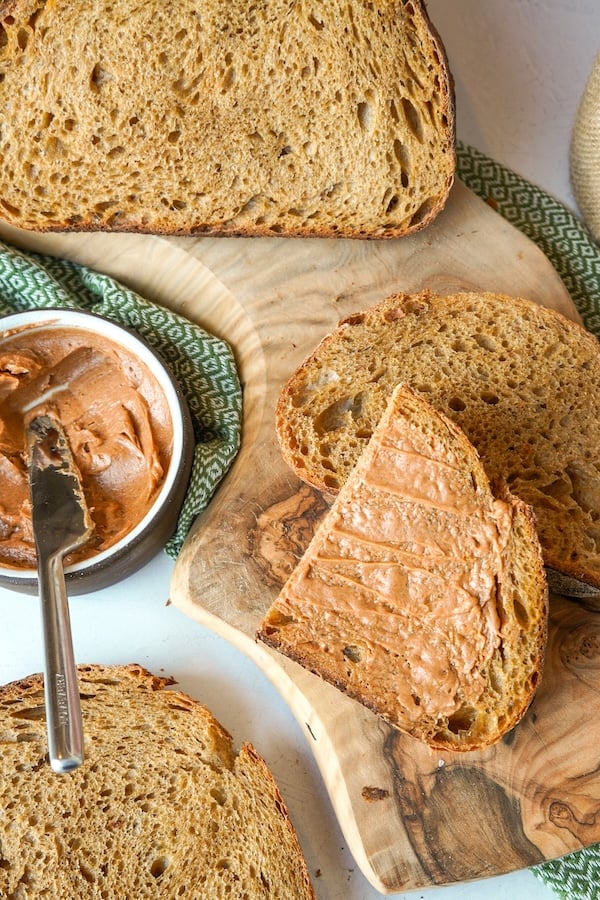

You’ve been scrolling through sourdough bread photos and spotted this stunning golden loaf studded with warm spice flavors. Unlike standard sandwich bread, sourdough gingerbread bread transforms your starter into something unexpected–combining the tangy complexity of fermentation with the cozy aromatics of holiday baking. Whether you’re a seasoned sourdough baker looking for a seasonal variation or someone curious about moving beyond basic loaves, this recipe delivers impressive results without requiring new skills.
How to Make Sourdough Gingerbread Bread
This recipe takes about 24-30 hours from start to finish, including fermentation time. The spices create a beautiful crumb structure while the sourdough starter provides natural leavening and deep flavor.
Ingredients
- 1 cup active sourdough starter (fed 4-8 hours prior, bubbly and at peak)
- 1.5 cups warm water (around 85-90F)
- 3.5 cups bread flour or all-purpose flour
- 2 teaspoons salt
- 2 tablespoons molasses or honey
- 2 tablespoons ground ginger, 1 tablespoon ground cinnamon, 1 teaspoon ground cloves, and 1/2 teaspoon nutmeg
Method
Mix the dough
Combine your active starter, warm water, and all spices in a large mixing bowl. Let sit for 10 minutes to allow the spices to hydrate. Add flour and salt, then mix with a wooden spoon or your hands until no dry flour remains. The dough will be shaggy and sticky–this is correct.
Autolyse and rest
Cover the bowl and let the dough rest for 30-60 minutes. This resting period allows the flour to fully absorb water and develops gluten structure naturally. You don’t need to knead this dough.
Perform stretch and folds
Wet your hand and grab one side of the dough, stretch it up and fold it over the center. Rotate the bowl 90 degrees and repeat this motion four times total (each complete rotation = one set). Do this every 30 minutes for the next 2-3 hours. This builds strength without aggressive kneading.
Bulk fermentation
After your final stretch and fold, cover the bowl and let it ferment at room temperature (68-75F) for 4-6 hours. The dough should increase in volume by about 50-75% and show visible bubbles when you gently press the surface. If your kitchen is cool, fermentation may take 8-12 hours.
Shape the loaf
Turn dough onto a lightly floured surface. Gently pre-shape into a round, let rest for 20 minutes, then perform your final shape using the letter-fold technique: fold top third down, fold sides inward, roll tightly toward you. Place seam-side up in a floured banneton or bowl lined with a kitchen towel.
Cold proof overnight
Cover your shaped loaf and refrigerate for 12-24 hours. This extended cold fermentation develops flavor and makes scoring easier. You can bake directly from the fridge without bringing it to room temperature.
Preheat and score
Preheat your oven with a covered Dutch oven inside to 500F for 45 minutes. Carefully turn your cold dough onto parchment paper, score the top with a sharp blade in a cross or decorative pattern, then transfer into the hot Dutch oven. Reduce heat to 450F.
Bake and cool
Bake covered for 25 minutes to trap steam, then remove the lid and bake 20-25 minutes more until deep golden brown. The internal temperature should reach 205-210F. Cool completely on a wire rack for at least 2 hours before slicing to set the crumb structure.
- Use molasses instead of honey for deeper spice complexity–it adds subtle bitterness that balances the warming spices
- Toast your whole spices and grind them fresh if possible; pre-ground spices lose potency and make the bread taste flat
- A bench scraper is essential for this sticky dough–it makes shaping and handling dramatically easier than fingers alone
What to Look For in Sourdough Baking Equipment
- Dutch Oven Material and Size: You need a 4-6 quart enameled cast iron Dutch oven that can withstand 500F temperatures. The heavy lid traps steam during the critical first phase of baking, creating the signature crispy crust. Avoid thin-walled pots or silicone-lined lids that may fail at high heat.
- Banneton or Proofing Basket Shape: Choose a round or oval banneton depending on your scoring preference. Natural cane is preferred over synthetic materials because it breathes better and prevents excess moisture accumulation. Look for baskets sized to your typical loaf weight (750-1000g dough).
- Flour Quality and Protein Content: Bread flour (12-14% protein) produces better rise and structure than all-purpose flour (10-12%). For sourdough specifically, look for unbleached varieties–the natural fermentation benefits from slower, more controlled gluten development that bleached flours interfere with.
- Thermometer Accuracy and Probe Length: An instant-read thermometer with a 4-5 inch probe lets you check doneness from the center without cutting. Digital thermometers are more reliable than dial types. Accuracy within 1-2 degrees matters when targeting the 205-210F window for optimal crumb.
Lodge Enameled Cast Iron Dutch Oven, 5.5 Quart
Best for: Sourdough bakers of all levels
Lodge’s enameled cast iron Dutch oven is the gold standard for sourdough baking. The 5.5-quart capacity perfectly fits a standard boule, while the heavy cast iron distributes heat evenly and retains it for the entire 45+ minute bake. The enamel coating (available in multiple colors) resists rust and requires no seasoning. This workhorse oven will outlast decades of weekly baking and costs a fraction of premium European brands while delivering identical results.
Check Current Price on Amazon →Tramontina Enameled Cast Iron Dutch Oven, 6 Quart
Best for: Budget-conscious beginners
Tramontina delivers surprising quality at a significantly lower price point than Lodge or Le Creuset. The 6-quart capacity is actually slightly more forgiving for sourdough, and the enamel coating is durable enough for years of regular baking. While it may not match the prestige of premium brands, performance in the oven is nearly identical. This is an excellent choice if you’re testing the sourdough hobby before committing premium dollars.
Check Current Price on Amazon →Le Creuset Enameled Cast Iron Dutch Oven, 5.5 Quart
Best for: Committed bakers who value heirlooms
Le Creuset represents the premium tier of Dutch ovens, with exceptional enamel durability and a storied reputation. The sand-cast iron (not spin-cast like most competitors) creates slightly better heat distribution, and the lifetime warranty reflects manufacturing confidence. If sourdough is becoming a permanent kitchen practice and you appreciate beautiful cookware that doubles as tableware, Le Creuset justifies the premium investment.
Check Current Price on Amazon →Staub Enameled Cast Iron Cocotte, 5.5 Quart
Best for: Mid-range buyers wanting European quality
Staub (owned by Zwilling) offers a middle path between budget and premium. The dark matte enamel interior hides staining better than lighter enamels, and the lid has a distinctive black knob that stays cooler. Performance for sourdough is excellent, and prices sit comfortably between Tramontina and Le Creuset. This is ideal for bakers who plan long-term commitment without splurging on luxury brands.
Check Current Price on Amazon →Making Sourdough Gingerbread Your Signature Loaf
Sourdough gingerbread bread sits at the intersection of traditional fermentation and seasonal baking. It’s accessible enough for intermediate sourdough bakers yet sophisticated enough to impress seasoned bread lovers. The molasses and spices transform your daily starter into something distinctly different, proving that sourdough baking isn’t limited to plain rustic loaves. Once you master the basic technique here, you’ll discover endless variations–add candied ginger pieces, substitute honey for molasses, or reduce spices for a subtler approach.
The equipment matters more than the recipe itself. A quality Dutch oven and banneton basket are the two non-negotiable investments; everything else (thermometers, fancy flour, bench scrapers) optimizes the process but isn’t essential. Start with a Lodge Dutch oven and natural cane banneton, focus on understanding your starter’s behavior in your specific kitchen, and don’t skip the cold fermentation step. Return to this recipe once per season, and within a year you’ll have developed the intuition to troubleshoot variations and develop your own spiced sourdough creations.
Frequently Asked Questions
Can I use whole wheat or rye flour instead of bread flour?
Yes, but adjust your hydration downward by 5-10% since whole grains absorb more water. Start with 10-20% substitution of whole wheat or rye, as these flours ferment faster and can collapse the dough if used exclusively. The spice flavors actually pair beautifully with whole grain earthiness.
What if my starter isn’t doubling in 4-8 hours?
Your starter may need more feedings to achieve consistent doubling. Feed it once daily for 5-7 days before attempting this recipe. Alternatively, use a slightly larger percentage of starter (increase to 1.25 cups) to ensure adequate leavening even with a slower starter.
Can I skip the cold proof and bake the same day?
You can, but the flavor will be noticeably less complex. If you must bake same-day, extend bulk fermentation to 8-10 hours instead, then shape and bake after a 2-3 hour room-temperature final proof. Cold fermentation (12+ hours) is what transforms this from good bread to exceptional bread.
How do I know when the bulk fermentation is done?
Look for 50-75% volume increase, visible bubbles throughout the dough (especially along the sides of the bowl), and slight doming on the surface. Poke gently–it should slowly spring back halfway instead of fully bouncing back or collapsing completely.
Why is my crust not crispy or my loaf didn’t rise much?
Two main culprits: your starter wasn’t active enough (should be bubbly and expanded, not just fed), or your Dutch oven wasn’t preheated long enough (45+ minutes ensures proper temperature). Also verify your oven thermostat is accurate with an oven thermometer, as underheating prevents proper oven spring.
As an Amazon Associate, Build & Bloom earns from qualifying purchases. We only recommend products we genuinely think are useful. Prices and availability vary; check Amazon for the latest.
Leave a Reply