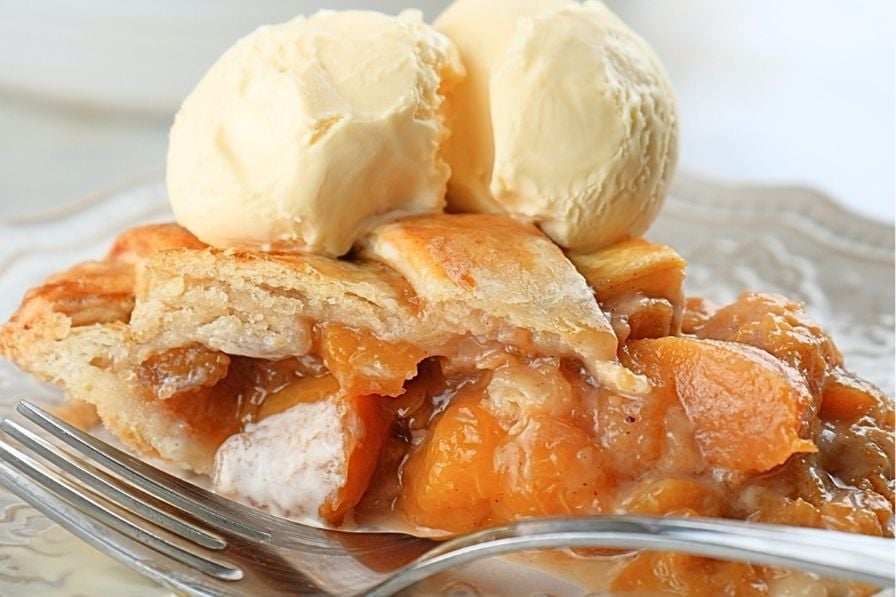

You’ve got sourdough starter on the counter and a can of peaches in the pantry, but you’re not sure how to transform them into an impressive homemade pie. The good news: sourdough peach pie with canned peaches is entirely doable, even for beginners. The sourdough crust adds subtle tang and complexity that cuts through the sweetness of the fruit, while canned peaches deliver consistent flavor without seasonal limitations. This guide walks you through every step to create a pie that looks and tastes like you spent all day in the kitchen.
How to Make Sourdough Peach Pie with Canned Peaches
This recipe yields one 9-inch pie with a flaky, tangy sourdough crust and a juicy, spiced peach filling. Plan for about 3 hours of active and passive time.
Ingredients
- 1 cup active sourdough starter (fed 4-6 hours prior)
- 2 1/2 cups all-purpose flour, divided
- 1 teaspoon salt
- 6 tablespoons cold butter, cubed
- 4-5 tablespoons ice water
- Two 29-ounce cans peaches in light syrup, drained and halved
- 1/2 cup granulated sugar
- 1/4 cup brown sugar
- 1 teaspoon vanilla extract
- 1/2 teaspoon ground cinnamon
- 1/4 teaspoon ground nutmeg
- 2 tablespoons cornstarch
- 1 egg, beaten (for egg wash)
- 1 tablespoon coarse sugar (optional, for topping)
Method
Prepare the sourdough crust
In a large mixing bowl, combine 2 cups flour, salt, and cold butter cubes. Cut the butter into the flour using a pastry cutter or your fingertips until the mixture resembles coarse breadcrumbs. Add the sourdough starter and begin mixing gently, then add ice water one tablespoon at a time until the dough just comes together. Do not overwork the dough. Divide into two disks, wrap in plastic, and refrigerate for at least 45 minutes.
Prepare the peach filling
Drain the canned peaches thoroughly, reserving 1/4 cup of the syrup. In a large bowl, combine granulated sugar, brown sugar, cinnamon, nutmeg, and cornstarch. Add the drained peaches and vanilla extract, then gently fold everything together until the peaches are evenly coated. Let the filling sit for 15 minutes to allow the juices to begin releasing.
Roll out the bottom crust
Preheat your oven to 375 degrees Fahrenheit. Remove one dough disk from the refrigerator and let it sit at room temperature for 5 minutes. On a lightly floured surface, roll the dough into a circle approximately 11 inches in diameter. Transfer it to a 9-inch pie dish, letting the excess hang over the edges.
Add the filling
Pour the peach mixture and any accumulated juices into the prepared crust, mounding it slightly toward the center. Scatter any remaining peach pieces evenly across the top.
Apply and crimp the top crust
Roll out the second dough disk to approximately 10 inches in diameter. Lay it over the filling. Trim both crusts to a 1-inch overhang, then fold the edges under and crimp decoratively using your fingers or a fork. Cut 4-5 small vents into the top crust to allow steam to escape during baking.
Brush and chill before baking
Brush the entire surface of the pie with beaten egg wash, and sprinkle with coarse sugar if desired. Place the assembled pie in the refrigerator for 15-20 minutes while the oven reaches temperature. This resting period helps prevent crust shrinkage.
Bake the pie
Transfer the chilled pie to the preheated oven and bake for 45-55 minutes, until the crust is golden brown and the filling begins bubbling through the vents. If the crust edges brown too quickly, cover them loosely with foil after 25 minutes. The pie is done when the internal temperature reaches 190 degrees Fahrenheit at the center.
Cool and serve
Remove the pie from the oven and place it on a cooling rack. Allow it to cool for at least 3-4 hours before slicing. This resting time lets the filling set so slices hold together cleanly. Serve at room temperature or slightly warm with vanilla ice cream or whipped cream.
- Use peaches canned in light syrup rather than heavy syrup to avoid an overly sweet pie; the sourdough crust provides pleasant tartness that balances canned fruit naturally.
- Keep all pie ingredients cold before mixing to achieve a flaky crust; warm butter produces dense, tough pastry rather than the desired tender layers.
- If your sourdough starter is very active, you can skip the final chill step and bake immediately, as the starter adds fermentation flavor even with minimal rising time.
What to Look For in Pie-Making Equipment
- Pie Dish Material and Size: Glass and ceramic pie dishes conduct heat evenly and allow you to monitor crust browning from underneath. A standard 9-inch dish is essential for most recipes. Avoid dark metal pans, which can over-brown crusts.
- Pastry Tools Quality: A quality pastry cutter or bench scraper makes dough preparation significantly easier and more forgiving. Cheap tools bend under pressure, making it difficult to incorporate cold butter evenly.
- Cooling Rack Elevation: Elevated cooling racks with sturdy feet allow air circulation underneath your pie, preventing the bottom crust from becoming soggy. Look for racks at least 1 inch tall.
- Rolling Surface Options: A marble or granite pastry board stays naturally cool and prevents dough from warming too quickly. If unavailable, chill a regular work surface or use parchment paper to reduce friction without adding flour.
Pyrex 9-Inch Glass Pie Dish
Best for: Home bakers seeking reliable, even heat distribution
The Pyrex 9-inch glass pie dish is a kitchen essential for sourdough peach pie and countless other recipes. Clear glass construction lets you monitor crust browning from all angles, preventing guesswork. The dish conducts heat evenly for consistent baking results, and the slightly textured rim prevents dough from sliding during assembly. Pyrex glass withstands thermal shock and lasts for decades with proper care. Oven-safe to 425 degrees Fahrenheit, dishwasher-safe, and available in single or multi-packs.
Check Current Price on Amazon →OXO Good Grips Pastry Cutter
Best for: First-time pie makers and those with limited hand strength
The OXO Good Grips pastry cutter combines functionality with ergonomic design. Its soft-grip handle reduces hand fatigue during the important task of cutting cold butter into flour. The curved wires cut smoothly without requiring excessive pressure, making it ideal for beginners who might otherwise compress the butter and ruin the crust texture. The cutter cleans easily and stores in any kitchen drawer. Its affordable price point makes it an excellent entry-level tool for learning proper pie technique.
Check Current Price on Amazon →Marble Pastry Board by Rsvp
Best for: Serious home bakers and pie enthusiasts
This natural marble pastry board maintains cool temperatures throughout extended dough work, directly supporting the flaky crust goal. Marble’s smooth, non-porous surface requires less flour for rolling, and its substantial weight prevents sliding during use. The board measures 16 by 16 inches, providing ample space for rolling a 10-inch pie crust. Natural color variations in each board make them kitchen-worthy display pieces. Marble requires gentle hand-washing but rewards you with years of reliable use and improved baking results.
Check Current Price on Amazon →Winco Stainless Steel Cooling Rack
Best for: Budget-conscious bakers needing reliable pie cooling
The Winco stainless steel cooling rack provides sturdy elevation for pie cooling at an economical price point. Tight wire spacing prevents pie edges from sagging through gaps, and the 16-inch length accommodates standard 9-inch pies with room to spare. Stainless steel construction resists rust and handles frequent washing. The rack’s open design allows air circulation beneath your cooling pie, preventing condensation and soggy crusts. Professional kitchens rely on Winco products for durability, so home bakers benefit from commercial-grade reliability at retail prices.
Check Current Price on Amazon →Final Recommendation
Sourdough peach pie with canned peaches bridges the gap between seasonality and homemade quality. The sourdough crust’s subtle tang and complex flavor elevate what could be an ordinary canned-fruit dessert into something genuinely impressive. Canned peaches, often overlooked in favor of fresh fruit, actually deliver superior consistency and require zero prep work beyond draining. This combination makes the recipe accessible year-round and genuinely foolproof for sourdough bakers seeking to expand beyond loaves.
To ensure success, invest in a quality glass pie dish for even heat distribution and visibility, a reliable cooling rack to prevent soggy bottoms, and either a marble pastry board or quality dough scrapers to maintain cold temperatures and simplify handling. These modest equipment investments transform pie-baking from frustrating guesswork into predictable success. Your first sourdough peach pie will surprise you with its restaurant-quality appearance and sophisticated flavor profile. Make it once, and you’ll find yourself making it monthly during canning season and whenever canned peaches go on sale.
Frequently Asked Questions
Can I use fresh peaches instead of canned?
Yes, absolutely. Use 5-6 medium fresh peaches, peeled, pitted, and halved. Fresh peaches release more liquid, so increase the cornstarch to 3 tablespoons. Some bakers prefer reducing the sugar slightly since fresh peaches taste more vibrant than canned.
What if my sourdough starter is not very active?
A less active starter still imparts tangy flavor, though the crust won’t rise as much during baking. You can compensate by adding 1/4 teaspoon of instant yeast to the dough, though this slightly reduces the sourdough character. Alternatively, increase the resting time in the refrigerator to 12-18 hours for slow fermentation flavor development.
Why is my pie crust shrinking away from the pan edges?
Dough shrinkage usually results from insufficient chilling or overworking the gluten. Always chill dough disks for at least 45 minutes before rolling, chill the assembled pie for 15-20 minutes before baking, and handle the dough gently. Sourdough dough is naturally more extensible, so it’s less prone to shrinkage than regular pie dough.
How do I prevent a soggy bottom crust?
Place a baking sheet on the oven rack below the pie to catch dripping filling. Let the pie cool completely before slicing, as slicing warm pie releases steam that softens the crust. Some bakers brush the raw bottom crust with a thin layer of egg white, which creates a moisture barrier.
Can I make this pie ahead of time?
Yes. Prepare and refrigerate the assembled pie up to 12 hours before baking. Alternatively, bake the pie completely and store it covered at room temperature for up to 3 days, or freeze it for up to 3 months. Thaw frozen pie in the refrigerator overnight before serving.
As an Amazon Associate, Build & Bloom earns from qualifying purchases. We only recommend products we genuinely think are useful. Prices and availability vary; check Amazon for the latest.
Leave a Reply