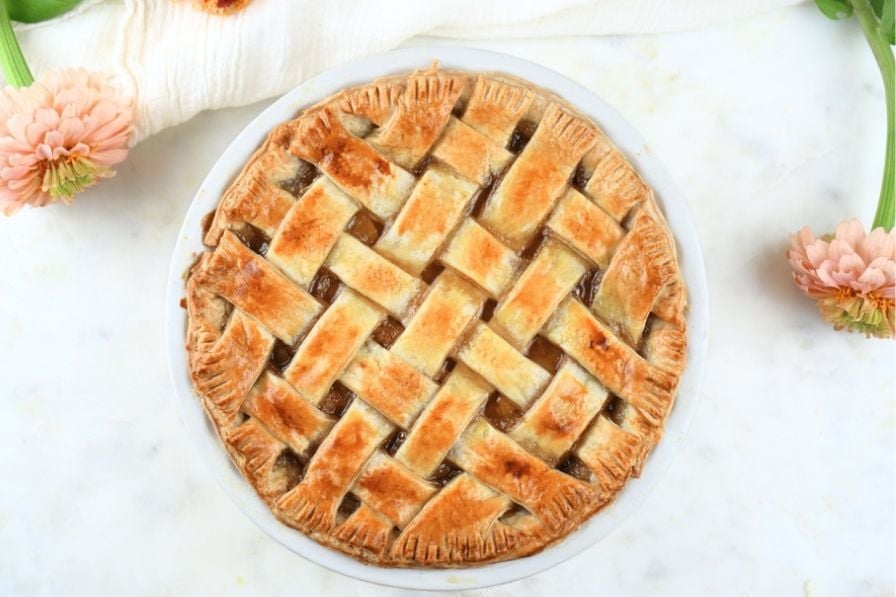

If you’ve mastered sourdough bread but haven’t explored sourdough pie crust, you’re missing out on one of the most rewarding applications for your starter. Unlike traditional pie crusts that rely on commercial yeast or chemical leaveners, sourdough pie crust harnesses the natural fermentation of your starter to develop complex flavor and a wonderfully tender crumb. The result is a crust that tastes as good as it looks, with a subtle tang that complements both sweet and savory fillings.
How to Make Sourdough Pie Crust
This recipe creates one 9-inch pie crust with a distinctive sourdough flavor and flaky texture. The key is proper lamination and adequate chilling between steps.
Ingredients
- 1 cup active sourdough starter (fed 4-8 hours prior, bubbly and at peak)
- 1 3/4 cups all-purpose flour
- 1/2 teaspoon salt
- 6 tablespoons cold butter, cubed
- 2-3 tablespoons ice water (as needed)
- Optional: 1 tablespoon sugar for sweet pies
Method
Combine Dry Ingredients
In a mixing bowl, whisk together your flour and salt until evenly distributed. This ensures the salt disperses throughout the dough rather than creating concentrated pockets. If making a sweet pie, add sugar at this stage.
Cut in the Butter
Add your cold cubed butter to the flour mixture. Using a pastry cutter or your fingertips, work the butter into the flour until the mixture resembles coarse breadcrumbs with pea-sized butter pieces still visible. This step is crucial for flakiness—the butter creates layers in the dough during baking.
Add the Starter and Mix
Pour your active sourdough starter into the mixture and gently fold everything together with a spatula until a shaggy dough forms. Add ice water one tablespoon at a time only if the dough isn’t holding together. Avoid overworking, as this develops gluten too much and toughens the crust.
First Chill and Rest
Form the dough into a disk, wrap it in plastic wrap, and refrigerate for at least 30 minutes. This rest allows the gluten to relax and helps the butter remain distinct and cold, which aids flakiness during baking.
Laminate the Dough (Optional but Recommended)
Remove the dough and roll it into a thin rectangle on a floured surface. Fold it into thirds like a letter, rotate 90 degrees, and repeat the roll-and-fold twice more. This lamination technique mimics the butter layering process, creating an exceptionally flaky crust. Chill for 15 minutes between folds.
Roll Out and Transfer
On a floured surface or parchment paper, roll the dough to about 1/8-inch thickness, large enough to fit your pie dish with slight overhang. Transfer carefully to your dish by rolling it onto your rolling pin or folding gently.
Trim and Crimp Edges
Trim excess dough to about 1 inch beyond the dish rim. Fold the overhang under itself and crimp with your fingers or a fork to seal and decorate the edge.
Chill and Pre-Bake
Chill the assembled crust for at least 30 minutes. For a fully blind-baked crust, line with parchment and fill with pie weights or dried beans, then bake at 375°F for 15 minutes. Remove weights, prick the bottom with a fork, and bake another 5-10 minutes until lightly golden before adding your filling.
- Feed your sourdough starter 4-8 hours before making the crust and use it at peak rise (bubbly and at maximum height) for best flavor and rise.
- Keep all ingredients and tools cold throughout the process—work quickly and return the dough to the fridge if it becomes warm or sticky.
- Don’t skip the lamination step if you want the flakiest possible crust; the extra folds create distinct butter layers that separate during baking.
What to Look For in Pie-Making Equipment
- Pie Dish Material and Size: Choose between ceramic, glass, or metal dishes. Glass and ceramic distribute heat evenly and let you see browning on the bottom crust. Standard 9-inch dishes are most common. Metal conducts heat faster, which can help crisp the edges but risks over-browning.
- Rolling Pin Type: French-style tapered pins offer better control for even thickness, while roller pins with handles provide leverage. Marble or wooden pins stay cooler and prevent sticking better than plastic. A 12-16 inch pin is ideal for pie dough.
- Pastry Cutter or Fork: A pastry cutter (blender) with multiple wires cuts butter into flour faster and more evenly than fingers, reducing heat transfer and improving flakiness. A fork works in a pinch but is slower and more labor-intensive.
- Pie Weights and Blind-Baking Tools: Ceramic or stainless steel pie weights keep crusts flat during pre-baking. Dried beans work but absorb moisture. Perforated parchment prevents sticking while allowing air circulation. Some prefer pie chains for reusable, even weight distribution.
OXO Good Grips Pastry Cutter
Best for: Home bakers wanting precise butter incorporation
The OXO Good Grips Pastry Cutter features multiple stainless steel wires and an ergonomic handle that reduces hand fatigue. Its design cuts cold butter into flour evenly and quickly, preventing the butter from warming and ensuring flaky results. The wires are spaced perfectly for creating pea-sized pieces essential to pie crust texture. Easy to clean and dishwasher safe.
Check Current Price on Amazon →Pyrex 9-Inch Glass Pie Dish
Best for: First-time pie makers and home bakers
Pyrex’s clear glass construction lets you monitor the bottom crust browning, eliminating guesswork during baking. The 9-inch standard size fits most recipes and pie servers. Durable borosilicate glass withstands temperature swings without cracking. Non-reactive surface won’t interact with acidic fillings, and it’s oven-safe to 425°F. Affordable and reliable for decades of use.
Check Current Price on Amazon →J.K. Adams Hardwood Rolling Pin
Best for: Budget-conscious bakers seeking durability
This solid maple rolling pin from J.K. Adams provides a comfortable grip and even rolling action without handles. The hardwood naturally resists sticking and stays relatively cool during use. Its 15-inch length is versatile for pie and pasta doughs. Built to last decades with proper care, making it an exceptional value investment. Vermont-made craftsmanship at an accessible price point.
Check Current Price on Amazon →Le Creuset Stoneware Pie Dish
Best for: Serious home bakers and food presentation enthusiasts
Le Creuset’s enameled stoneware pie dish combines superior heat distribution with French kitchen aesthetics. Available in signature colors, it transitions beautifully from oven to table. The glazed interior prevents sticking and absorbs less moisture than unglazed ceramics. Oven-safe to 500°F and built to last a lifetime with heirloom-quality construction.
Check Current Price on Amazon →Making Sourdough Pie Crust Your New Go-To
Sourdough pie crust represents a natural evolution for anyone already invested in starter maintenance. Unlike traditional pie crusts that rely on commercial yeast or baking powder, sourdough crusts build flavor organically through fermentation while developing a tender, flaky structure through proper lamination and cold butter technique. The slight tang pairs beautifully with both classic fruit fillings and savory applications, elevating your pie game beyond what standard recipes can achieve.
The key to success lies in treating sourdough pie crust like the project it is—respecting chill times, keeping everything cold, and using your starter at peak activity. Invest in quality tools like a good pastry cutter and pie weights to remove guesswork and ensure consistent results. Once you’ve mastered one sourdough pie, you’ll find yourself making them regularly, whether for seasonal fruit pies, meat pies, or simply because your sourdough starter is always ready for a new adventure beyond bread.
Frequently Asked Questions
Why does my sourdough pie crust turn out tough instead of flaky?
Overworking the dough develops excessive gluten, resulting in toughness. Mix gently, avoid kneading, and prioritize chilling time. Cold butter pieces should remain visible before rolling—if they’re fully incorporated, the crust won’t layer properly during baking. Keep all ingredients and tools cold throughout the process.
Can I make sourdough pie crust ahead and freeze it?
Yes, sourdough pie crust freezes beautifully for up to three months. Wrap the dough disk tightly in plastic wrap and foil before freezing. Thaw in the refrigerator overnight before rolling and shaping. You can also freeze the finished crust in the pie dish for up to two months, then bake directly from frozen, adding 5-10 minutes to baking time.
What’s the difference between using active sourdough starter versus dried starter?
Active starter adds live cultures and fermentation activity that develops flavor during crust resting and baking. Dried starter lacks living organisms and won’t provide the same tangy depth or rise. Always use freshly fed, bubbly starter at peak activity for best results. The fermentation process is what distinguishes sourdough crust from traditional butter pie crust.
Do I need to blind-bake a sourdough pie crust before adding a wet filling?
For wet fillings like fruit pies or custard, partial or full blind-baking prevents a soggy bottom crust. Blind-bake for 15-20 minutes until set but not fully browned, then add your filling. For cream or baked fillings, blind-baking is optional. Sourdough crusts are somewhat more resilient to moisture than standard crusts due to the fermentation, but protection doesn’t hurt.
How do I know when my sourdough starter is ready to use for pie crust?
Your starter should be fed 4-8 hours before use and at peak rise—bubbly throughout, doubled in volume, and showing doming at the top. If using a cold starter, feed it and let it reach room temperature before mixing. An underactive starter won’t provide enough lift or flavor; using starter at peak ensures the best crust texture and sourdough tang.
As an Amazon Associate, Build & Bloom earns from qualifying purchases. We only recommend products we genuinely think are useful. Prices and availability vary; check Amazon for the latest.
Leave a Reply