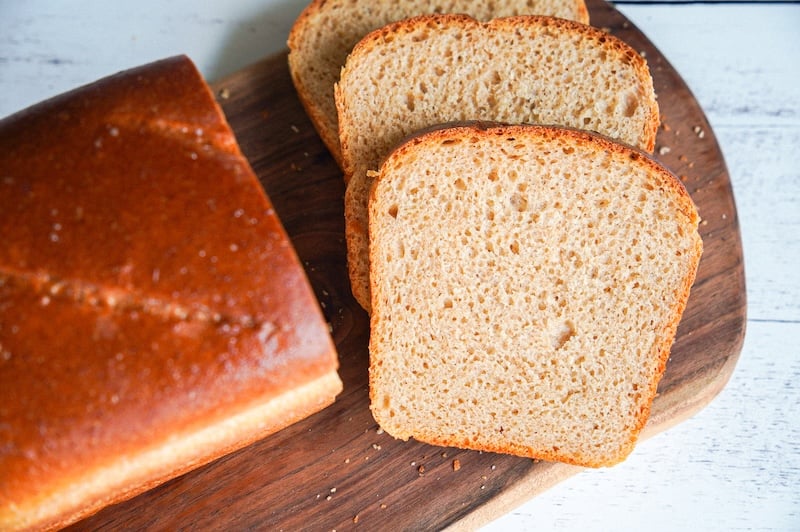

Making your own sourdough bread at home transforms a simple list of ingredients into a bakery-quality loaf that’s perfect for sandwiches or toast. Honey whole wheat sourdough delivers soft, fluffy crumb structure while the tanginess of sourdough fermentation balances the sweetness. If you’ve been intimidated by sourdough baking, this recipe proves you don’t need professional equipment or years of experience to create a stunning loaf from your own kitchen.
How to Make Honey Whole Wheat Sourdough Bread
This recipe takes advantage of natural fermentation to develop flavor and texture over time. Plan for a total time of 18-30 hours from mixing through cooling.
Ingredients
- 1 cup active sourdough starter (fed 4-8 hours prior, bubbly and peaked)
- 1.5 cups bread flour or all-purpose flour
- 1.5 cups whole wheat flour
- 1.25 cups lukewarm water
- 2 tablespoons honey
- 2 teaspoons salt
Method
Mix your dough base
Combine the active starter, water, and honey in a large mixing bowl, stirring until the starter breaks down and distributes evenly through the liquid. Add both flours and mix thoroughly with your hands or a wooden spoon until no dry flour remains and you have a shaggy, sticky mass. Let this rest for 30 minutes to an hour—this autolyse period allows the flour to fully hydrate.
Incorporate salt and develop strength
Sprinkle the salt over the dough and wet your hands before incorporating it. Use a pinching and folding motion, grabbing the dough from the bottom and folding it over itself repeatedly until the salt is fully integrated and the dough begins to feel more cohesive. This should take 5-10 minutes of active work.
Build strength with stretch and fold
Over the next 2-3 hours, perform four sets of stretch and folds at 30-minute intervals. Wet your hand, grab one side of the dough, stretch it upward and fold it over the top, rotating the bowl a quarter turn and repeating until you’ve gone around the entire bowl four times per set. This builds gluten network without intensive kneading.
Allow bulk fermentation
After your final set of stretches and folds, allow the dough to rest undisturbed for 4-6 hours at room temperature. The dough should increase by 50-75% in volume and show visible bubbles on the surface when it’s ready. If your kitchen is cool, this may take closer to 8 hours.
Pre-shape and rest
Lightly flour your work surface and gently turn the dough out onto it. Using a bench scraper, pull the edges toward the center and flip the dough seam-side down. Let it rest for 20-30 minutes to allow the surface to set slightly before final shaping.
Shape your loaf
Flip the dough seam-side up and fold the edges toward the center in a series of overlapping folds, working from one end toward the other. Roll the dough toward you, creating tension on the surface as you go. Place it seam-side up in a banneton basket or a bowl lined with a well-floured towel.
Cold ferment overnight
Cover the shaped dough loosely and place it in the refrigerator for 8-16 hours. This cold fermentation develops deeper flavor and makes scoring easier. You can also let it proof at room temperature for 2-4 hours if you prefer to bake the same day.
Score and bake
Preheat your oven to 450°F with a Dutch oven inside for at least 45 minutes. Turn the cold dough onto parchment paper and score the top with a sharp blade in your desired pattern. Carefully place the parchment and dough into the hot Dutch oven, cover, and bake for 20 minutes. Remove the lid and bake for an additional 25-30 minutes until deep golden brown. Cool on a wire rack for at least one hour before slicing.
- Keep a simple timeline written down: note the time you mixed your dough, when you started bulk fermentation, and when you shaped it. This removes guesswork and helps you dial in the method for your specific kitchen temperature on future bakes.
- If your dough is too sticky to handle comfortably, work with wet hands instead of flouring them—this prevents adding extra flour that can make the final loaf dense and dry.
- For maximum oven spring and a beautiful open crumb, ensure your Dutch oven is genuinely preheated by leaving it in the oven for a full 45 minutes before baking, and don’t skip the covered portion of baking.
Essential Equipment for Baking Sourdough at Home
- Dutch oven: A heavy, lidded pot that traps steam during baking, creating the pressure necessary for dramatic oven spring and a crispy crust. Essential for home sourdough baking.
- Banneton proofing basket: A specialized basket that supports shaped dough during final fermentation and prevents it from spreading. Helps achieve better structure and ease of handling before baking.
- Digital kitchen scale: Sourdough baking benefits from precision; a scale removes guesswork from measuring flour, water, and starter, resulting in more consistent results than volume measurements.
- Bench scraper: A flat tool that makes it easier to handle sticky dough, perform stretch and folds, and transfer shaped loaves. Indispensable for developing good technique.
Le Creuset Enameled Cast Iron Dutch Oven
Best for: Serious home bakers seeking durability and consistent results
The gold standard for sourdough baking, this enameled cast iron Dutch oven distributes heat evenly and retains it for the full baking cycle. The tight-fitting lid creates perfect steam conditions for crispy crusts and excellent oven spring. Available in multiple colors and sizes, with a lifetime warranty backing the investment. Works equally well for bread, roasted vegetables, and braises.
Check Current Price on Amazon →Tramontina Enameled Cast Iron Dutch Oven
Best for: Budget-conscious bakers new to sourdough
This enamel-coated cast iron Dutch oven performs nearly identically to premium brands at a fraction of the price. It heats evenly, maintains temperature throughout baking, and produces beautiful crusts and rise. The quality is solid for home use, though it may show wear with decades of heavy use. A smart entry point if you’re testing whether sourdough baking fits your routine.
Check Current Price on Amazon →Proofing Basket Set – AIBOO Banneton
Best for: Home bakers learning shaping and fermentation techniques
This affordable banneton set includes two round proofing baskets in different sizes, plus cloth liners to prevent sticking. The natural rattan construction breathes properly and supports dough shape excellently. Comes with helpful instruction guides for first-time users. Perfect for practicing shaping without the intimidation factor of expensive equipment.
Check Current Price on Amazon →Anolon Advanced Hard-Anodized Dutch Oven
Best for: Bakers wanting high-end performance without cast iron weight
This hard-anodized aluminum Dutch oven offers excellent heat distribution and is significantly lighter than cast iron, reducing strain during handling. The nonstick interior makes cleanup effortless while maintaining excellent baking performance. Temperature-safe to 500°F and dishwasher safe. Ideal for bakers who want restaurant-quality results with easier maintenance.
Check Current Price on Amazon →Start Your Sourdough Journey Today
Baking honey whole wheat sourdough at home is entirely achievable with patience, basic equipment, and a reliable sourdough starter. The transformation from simple ingredients to a beautiful, complex loaf is deeply satisfying and will convince you that homemade bread tastes incomparably better than commercial versions. This recipe works brilliantly as a foundation; once you’ve baked it several times, you’ll naturally adjust timings and fermentation to suit your kitchen’s unique conditions.
Investing in a quality Dutch oven, banneton basket, and kitchen scale will serve you for decades of baking. Start with the equipment basics, perfect your technique through repeated bakes, and don’t hesitate to take notes on what worked in your specific kitchen. Within a few loaves, you’ll develop the intuition that makes sourdough baking feel less like following instructions and more like creating something genuinely special.
Frequently Asked Questions
What if my sourdough starter isn’t ready or I don’t have one?
If you don’t have an active starter, begin feeding a starter 5-7 days before you plan to bake. Feed it equal parts flour and water daily until it doubles predictably between feedings. If time is short, you can purchase a prepared starter from online baking suppliers and use it immediately after activating per their instructions.
Can I bake this loaf without a Dutch oven?
While a Dutch oven creates superior results by trapping steam, you can bake in a covered baking vessel or even under an inverted roasting pan on a preheated baking sheet. Results may be slightly less dramatic in terms of oven spring and crust crispiness, but the bread will still taste delicious. Just ensure whatever you use can withstand oven temperatures of 450°F.
How long does this sourdough stay fresh?
Properly cooled sourdough keeps well for 3-4 days at room temperature in a paper bag or bread box. After that, it’s excellent sliced and toasted. You can also freeze the baked loaf for up to three months; thaw at room temperature before slicing.
What does it mean when my dough tears during shaping?
Tearing usually indicates the dough is over-fermented (too much volume built up) or you’re shaping too aggressively. For next time, reduce bulk fermentation time by 30 minutes or use gentler shaping pressure. If it happens occasionally, it won’t significantly impact the final loaf—just patch the tear as best you can and continue.
Why is my crust not crispy after baking?
Crispness comes from steam released during the covered portion of baking. Ensure your Dutch oven is fully preheated for 45 minutes, and don’t skip the first 20 minutes of covered baking. If your kitchen is very humid, extending the uncovered baking time by 5-10 minutes may help. Store-bought loaves often soften the crust for shelf stability, so home bread naturally softens faster once cooled.
As an Amazon Associate, Build & Bloom earns from qualifying purchases. We only recommend products we genuinely think are useful. Prices and availability vary; check Amazon for the latest.
Leave a Reply