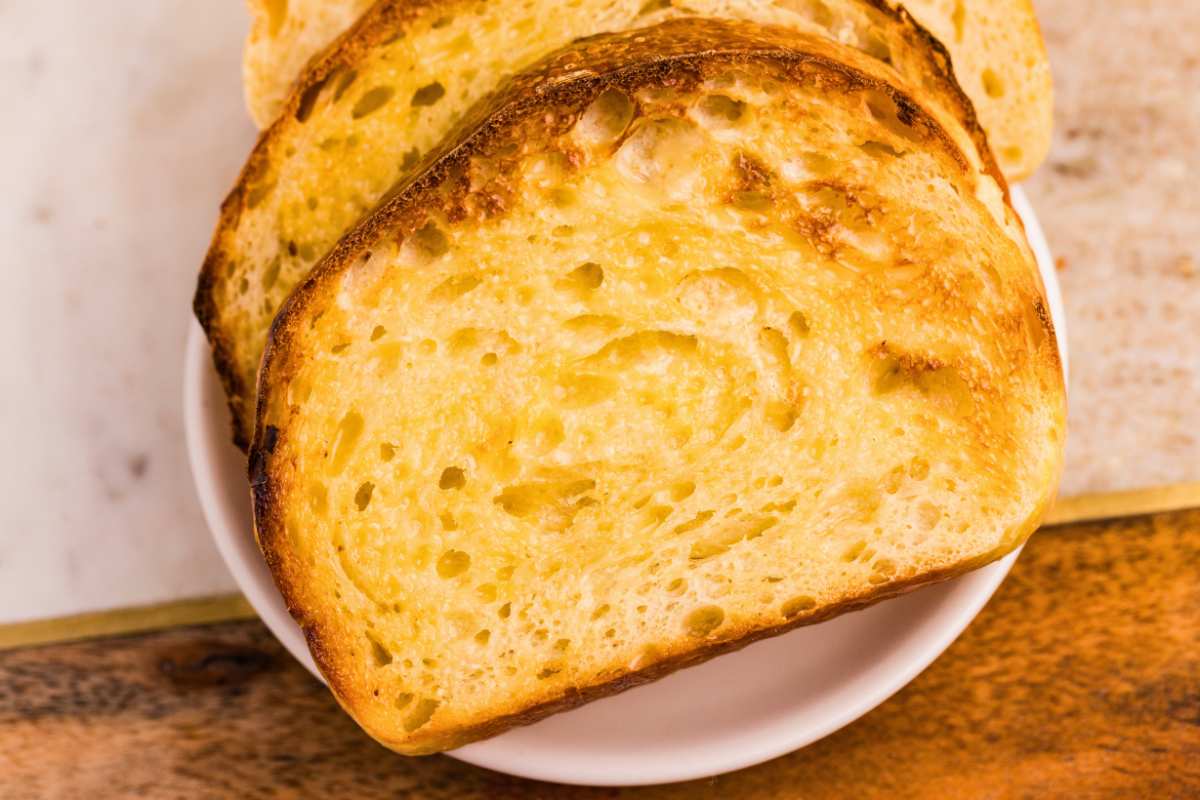

You love the complex flavor of sourdough, but those dense, chewy loaves don’t match what you crave: a tender crumb that practically melts on your tongue. Sourdough milk bread solves this by blending active sourdough starter with milk and butter, creating a loaf that’s both tangy and impossibly soft. This isn’t a quick bread, but the time investment is mostly passive fermentation while you go about your homestead life.
How to Make Super Soft Sourdough Milk Bread
This recipe yields one large loaf with a golden crust and feather-light interior. The long fermentation develops flavor while the milk and butter ensure tenderness.
Ingredients
- 1 cup active sourdough starter (fed and bubbly)
- 3/4 cup whole milk, warmed
- 2 tablespoons butter, melted
- 2 1/2 cups bread flour or all-purpose flour
- 1 1/2 teaspoons salt
- 1 tablespoon sugar or honey
Method
Mix the dough
Combine your fed starter, warmed milk, and melted butter in a large bowl. Add the flour, salt, and sugar. Stir with a wooden spoon until no dry flour remains and a shaggy dough forms. Let this rest uncovered for 30 minutes to allow the flour to fully hydrate.
Knead briefly
After the rest period, knead the dough by hand for 5-8 minutes until it becomes smooth and elastic. You can also use a mixer on medium speed for 4 minutes. The dough should be slightly tacky but hold its shape without sticking excessively to your hands.
Begin bulk fermentation
Place the dough in a lightly oiled bowl, cover with a damp cloth, and let it rise at room temperature (68-72F is ideal) for 4-6 hours. The dough should roughly double in volume. This long fermentation develops the sourdough flavor while the milk keeps the crumb soft.
Perform stretches and folds
Every 30 minutes during the first 2 hours of bulk fermentation, perform one set of stretches and folds. Wet your hand, grab one side of the dough, stretch it up and fold it over itself. Rotate the bowl and repeat 4 times. This builds strength without aggressive kneading.
Shape and proof overnight
Turn the dough onto a lightly floured surface and gently pre-shape into a round. Let it rest for 20 minutes, then shape into a tight boule by pulling the sides toward the center. Place it seam-side up in a banneton or bowl lined with a floured cloth. Cover and refrigerate for 8-16 hours. Cold overnight proofing develops flavor and makes scoring easier.
Preheat and score
Remove the dough from the refrigerator 30 minutes before baking. Preheat your oven with a Dutch oven inside to 450F for 45 minutes. Turn the dough onto parchment paper, then use a sharp blade to score a deep line or cross pattern on top.
Bake with steam
Carefully transfer the dough on parchment into the preheated Dutch oven. Cover with the lid and bake for 20 minutes to trap steam. Remove the lid and bake for another 25-30 minutes until the crust is deep golden brown.
Cool completely
Remove the bread from the oven and let it cool on a wire rack for at least 1 hour before slicing. This allows the interior structure to set. Slicing too early causes the crumb to appear gummy, even though it’s fully cooked.
- Use a kitchen scale to weigh your ingredients instead of measuring by volume. Sourdough is sensitive to hydration ratios, and scales eliminate guesswork.
- Feed your starter 4-8 hours before mixing the dough. Active, bubbly starter with clear rise and fall produces the best flavor and lift.
- If your kitchen is cold, place the dough in an oven with the light on, or use a proofing box to maintain consistent temperature. Fermentation slows dramatically below 65F.
Essential Tools for Sourdough Milk Bread Success
- Dutch oven or covered baker: Traps steam during the first phase of baking, creating that beautiful crust and oven spring. Essential for sourdough; cast iron or ceramic both work equally well.
- Banneton proofing basket: Supports the dough during overnight cold proofing and prevents spreading. Prevents your dough from slipping into odd shapes while flavor develops in the fridge.
- Kitchen scale: Sourdough recipes rely on precise ingredient ratios for consistent results. Digital scales are affordable and eliminate the guesswork of volume measurements.
- Bread lame or scoring tool: Creates controlled slashes on the dough surface before baking, allowing controlled expansion and better oven spring. A sharp blade is non-negotiable for clean scoring.
Lodge Enameled Cast Iron Dutch Oven 5.5-Quart
Best for: Home bakers who want reliable heat retention
The Lodge 5.5-quart Dutch oven is the workhorse of sourdough baking. Its heavy cast iron construction maintains even heat throughout baking, while the enameled coating prevents rust and eliminates seasoning maintenance. The tight-fitting dome traps steam perfectly during the critical first 20 minutes of baking, producing that coveted crackling crust. Seasoned bakers and beginners alike trust Lodge for consistent, beautiful results loaf after loaf.
Check Current Price on Amazon →Amazon Basics Banneton Proofing Basket 10 Inch
Best for: Budget-conscious bakers starting their sourdough journey
This affordable banneton provides excellent support for round loaves during cold proofing. The natural rattan construction lets dough breathe while the linen liner prevents sticking. At a fraction of the cost of premium brands, it delivers the same functionality for shaping and overnight proofing. Includes a removable linen cloth that’s easy to clean and maintain.
Check Current Price on Amazon →Etekcity Digital Kitchen Scale with Bowl
Best for: New bakers who want accuracy without complexity
This simple, reliable digital scale features a large LCD display and a removable stainless steel bowl for easy weighing. It measures in grams and ounces, perfect for sourdough recipes that require precise ingredient ratios. The tare function lets you zero the scale between ingredients, streamlining your mixing process. At under 20 dollars, it’s an affordable way to eliminate measurement guesswork.
Check Current Price on Amazon →Le Creuset Signature Cast Iron Round Dutch Oven 3.5-Quart
Best for: Serious bakers who prioritize durability and aesthetics
Le Creuset’s iconic enameled cast iron Dutch oven is a premium investment that performs beautifully for sourdough baking. The superior enamel finish resists chipping and staining, while the precise heat distribution ensures even browning. Available in stunning colors, it doubles as a showpiece on your kitchen counter. Hand-crafted in France with a lifetime warranty, this is a heirloom-quality tool.
Check Current Price on Amazon →Your Sourdough Milk Bread Awaits
Sourdough milk bread represents the best of both worlds: the complex, slightly tangy depth of long-fermented sourdough paired with the tender, velvety crumb that comes from milk and butter. The process takes time, but most of that time is passive fermentation while you attend to other homestead tasks. With a good Dutch oven, a reliable scale, and proper technique, you’ll produce loaves that rival professional bakeries within your first few attempts.
The equipment matters, but so does patience and observation. Watch your dough, learn how it responds to your kitchen’s temperature, and adjust accordingly. Start with a basic setup (a Dutch oven and a scale) and add specialized tools as you gain confidence. Within weeks, you’ll have a repeatable process that fills your home with the aroma of freshly baked sourdough and feeds your family better bread than any grocery store could provide.
Frequently Asked Questions
Can I use whole wheat or rye flour instead of bread flour?
Yes, but with adjustments. Whole wheat absorbs more water, so reduce milk by 2 tablespoons. Rye can replace up to 25% of the bread flour without major changes. Expect slightly denser crumb and more complex flavor. Start with small substitutions and adjust based on results.
What if my starter isn’t doubling during bulk fermentation?
Your starter may be under-fed or your kitchen temperature too cold. Feed your starter more frequently (twice daily) for 3-5 days before baking. In cooler kitchens (below 68F), use longer fermentation times or place dough in a slightly warm spot like an oven with the light on.
How long can I keep the dough in the refrigerator?
Cold proofing can continue for up to 48 hours, though 8-16 hours is standard. Longer proofing develops more flavor but risks over-fermentation. If leaving dough past 16 hours, check it daily and bake when you see slow bubbles at the edges.
Why is my crust pale instead of golden brown?
Pale crust usually means insufficient heat or steam escaping too early. Ensure your oven is fully preheated for 45 minutes and keep the Dutch oven lid on for the full 20 minutes. You can also lightly spray the dough with water before baking to encourage browning.
Can I freeze the dough for baking later?
Yes. After shaping, freeze the dough for up to one month in a freezer bag. Thaw overnight in the refrigerator, then bake the next day. This works best if frozen after the first 2-4 hours of bulk fermentation, before overnight proofing.
As an Amazon Associate, Build & Bloom earns from qualifying purchases. We only recommend products we genuinely think are useful. Prices and availability vary; check Amazon for the latest.
Leave a Reply