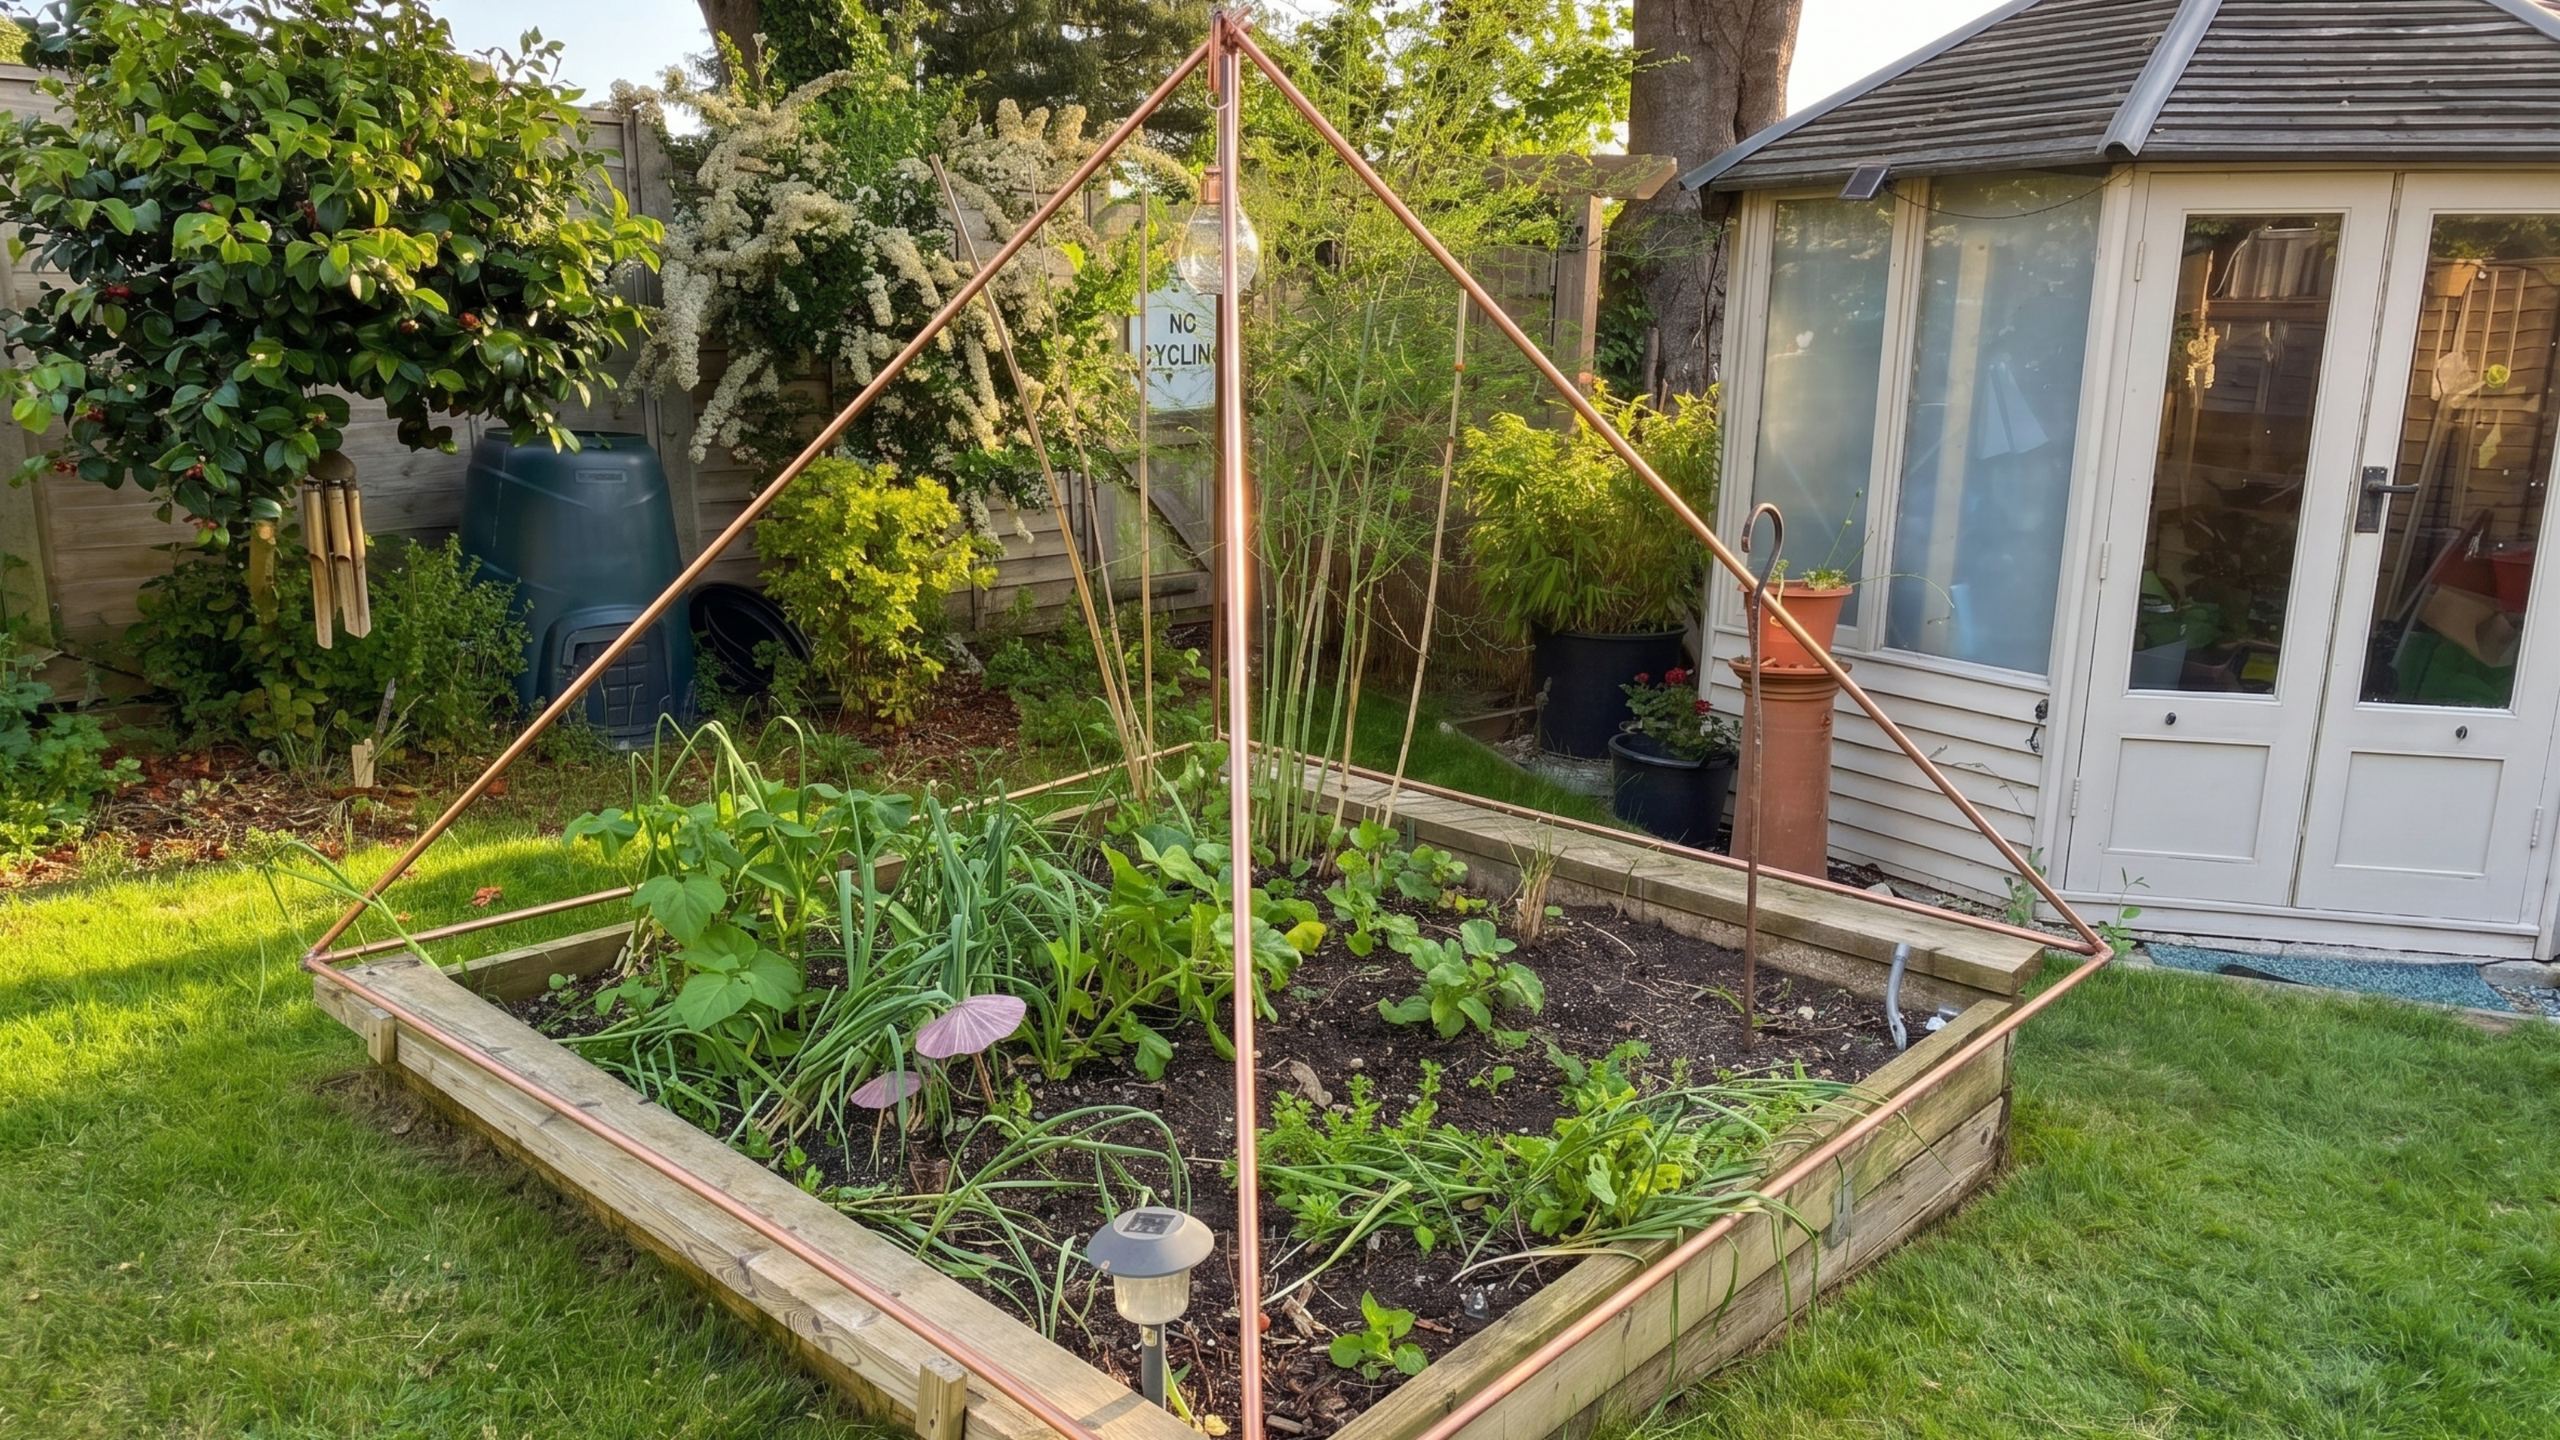

Your mother-in-law isn’t alone—gardeners across the homesteading community are discovering that copper pyramids can noticeably boost vegetable growth and vigor. Whether it’s better mineral absorption, improved soil conductivity, or simply the structural support plants benefit from, the results speak for themselves. If you’re curious about this garden hack and ready to build your own, this guide walks you through the entire process step by step.
How to Build and Install a Copper Pyramid in Your Garden Bed
Building a copper pyramid is straightforward and requires only basic tools and materials. The structure works best installed directly in the center of a raised bed or garden plot, where it can support climbing or vining plants while its conductive properties work below the soil surface.
Materials You Will Need
- Copper wire or copper tubing (1/4 to 1/2 inch diameter; 10-15 feet total depending on pyramid height)
- Wire cutters or tubing cutter for clean, straight cuts
- A measuring tape and straight edge or ruler for accuracy
- Heavy-duty work gloves to prevent hand fatigue and injury
- A piece of wood or a work table for bending and shaping the copper
- Optional: a heat source (like a kitchen torch) to soften copper for easier bending
Steps
Plan Your Pyramid Dimensions
Decide how tall you want your pyramid—typically 2 to 3 feet works well for most vegetable gardens. Calculate the base dimensions: for a 2-foot tall pyramid, plan a square base roughly 2 to 2.5 feet on each side. Sketch this out on paper with exact measurements before cutting any copper to avoid waste.
Cut Your Copper Pieces
You’ll need four identical pieces for the pyramid edges (from base corners to apex) and four pieces for the base frame. For a 2-foot pyramid, cut each slanted edge to approximately 2.5 feet and each base piece to your planned length. Use your cutting tool to make clean, straight cuts; rough edges can be smoothed with a file if necessary.
Form the Base Frame
Arrange your four base pieces into a square on a flat work surface. Use a corner clamp or have a helper hold them at 90-degree angles while you secure the corners. You can solder the joints for a permanent bond, or use heavy-duty copper-compatible metal fasteners if you prefer a removable structure.
Create the Apex Point
Bundle your four slanted edge pieces together at one end and secure them tightly with wire wrapping or a small metal band. This creates the peak of your pyramid. Test-fit it against your base frame to ensure the angles align properly before final assembly.
Connect the Edges to the Base
Position each slanted edge piece so its lower end aligns with a corner of the base frame. Secure these connections firmly using solder, welding, or heavy fasteners—this joint bears weight and stress. Ensure your pyramid stands square and level before tightening everything fully.
Add Cross-Bracing if Desired
For added stability and structure, consider running diagonal braces from the base corners up toward the apex. This creates triangular faces and allows vining plants more surface area to climb. Use shorter copper pieces and the same connection method as the main frame.
Install in Your Garden Bed
Position your completed pyramid in the center of your raised bed or garden plot. Press the base firmly into the soil, or secure it with ground anchors if your bed is shallow. Backfill with soil around the base, leaving the structure accessible for planting and maintenance.
- Copper work-hardens as you bend it; if softening is needed, carefully apply heat to a section, let it cool slightly, then continue bending for easier shaping.
- Paint or seal bare solder joints with a clear protective coat to prevent tarnishing and extend the pyramid’s life in wet garden conditions.
- Plant nitrogen-fixing companions (like beans) around the base to maximize the pyramid’s potential; the copper structure benefits soil health holistically.
What to Look For in Copper Garden Structure Materials
- Copper Gauge and Diameter: Thicker copper (1/4 to 1/2 inch) provides better structural integrity and conductivity than thin wire. Thicker stock also resists denting and warping from soil pressure or plant weight over the growing season.
- Material Purity: Pure copper (99%+) conducts electricity and minerals most effectively. Avoid alloys or plated materials, which lose effectiveness and may leach undesired metals into your garden soil.
- Tool Compatibility: Ensure your cutting tool or cutter is rated for the copper diameter you choose. A basic wire cutter works for thin wire, but thicker tubing requires a proper tube cutter or hacksaw for clean, straight cuts.
- Connection Method Durability: Whether soldering, bolting, or clamping, choose fastening supplies rated for outdoor/underground conditions. Stainless steel fasteners and weatherproof solder resist corrosion far better than standard hardware.
Copper Tubing (1/2 Inch OD, Soft Temper, 50 Feet)
Best for: DIY gardeners building sturdy, permanent pyramids
This soft-temper copper tubing is ideal for garden pyramid construction—thick enough to hold shape and support plant weight, yet flexible enough to bend by hand or with gentle heat. The 1/2-inch outer diameter balances durability with ease of handling, and 50 feet gives you material for a complete pyramid plus extra for experimentation or repairs. Soft-temper tubing avoids the brittleness of hard-drawn stock, making it perfect for the amateur builder.
Check Current Price on Amazon →Solid Copper Wire (10 Gauge, 100 Feet)
Best for: Gardeners building smaller pyramids or adding bracing details
Solid copper wire is an economical choice for smaller pyramid structures or as secondary bracing material. Ten gauge wire is rigid enough to hold form without support, yet remains bendable by hand for anyone without specialized tools. One hundred feet of wire typically covers a small to medium pyramid with room to spare, making this the budget-conscious option that doesn’t sacrifice quality.
Check Current Price on Amazon →Copper Wire Cutter (Professional Grade Diagonal Cutter)
Best for: First-time builders tackling copper without prior metalworking experience
A professional-grade diagonal cutter makes clean cuts in copper wire and smaller tubing without crushing or deforming the material. The ergonomic handles reduce hand fatigue during extended cutting sessions, and the sharp, durable blades stay effective even after repeated use. For beginners, a quality cutter ensures straight cuts and prevents frustrating material waste.
Check Current Price on Amazon →Copper Tube Cutter (Automatic Feed, Carbide Wheels)
Best for: Serious gardeners building multiple projects or commercial-scale structures
An automatic-feed tube cutter with carbide wheels delivers perfectly square cuts in thick copper tubing every time, eliminating the hand-pressure guesswork of manual cutters. Carbide wheels resist dulling far longer than steel, and the automatic-feed mechanism reduces operator fatigue on large projects. This is the premium choice for gardeners who plan to build multiple pyramids or expand their copper garden structures over time.
Check Current Price on Amazon →Build Your Copper Pyramid and Watch Your Garden Transform
A copper pyramid is one of the most satisfying DIY garden projects you can tackle—the build takes just a few hours, the materials cost under $50 to $100, and the results often speak for themselves. Whether you’re chasing the electroculture trend or simply want a beautiful, functional garden structure, the process of designing, cutting, and installing your pyramid deepens your connection to your growing space. Your garden becomes not just a place to harvest vegetables, but a space you’ve personally engineered for maximum productivity.
Start with quality copper materials and the right tools, follow the steps carefully, and don’t rush the installation. Secure your pyramid firmly in the soil, give it a season to work, and observe how your vegetables respond. Many gardeners report their best harvest ever after adding copper structures—and even if the science is still debating exactly why, the vegetables will tell the real story.
Frequently Asked Questions
Does the pyramid actually improve plant growth, or is it a garden myth?
While scientific consensus remains mixed, copper is known to improve soil structure and enhance nutrient uptake in plants. Many home gardeners report noticeably healthier vegetable growth and increased yields when using copper structures. Whether the benefit is purely botanical or partly psychological, the results are real enough that the project is worth trying.
Can I use galvanized or stainless steel instead of copper?
You can build the structure from alternative metals, but copper’s unique electrical and antimicrobial properties are what make the pyramid approach appealing. Galvanized steel may rust over time in soil, and stainless steel lacks copper’s conductivity. For best results and longevity, stick with pure copper.
How long does a copper pyramid last in the garden?
Copper is extremely durable and naturally resistant to corrosion. A well-built copper pyramid can last 10+ years or more, even in wet or acidic soil conditions. Protecting solder joints and fasteners with a weatherproof coating helps ensure decades of reliable service.
Do I need to solder the joints, or can I use bolts and clamps?
Soldering creates permanent, clean connections but requires a torch and basic welding skill. Bolting or clamping is faster and requires no special equipment; stainless steel bolts and heavy-duty clamps work well for outdoor garden structures. Both methods are effective; choose based on your comfort level and desired permanence.
What vegetables grow best with a copper pyramid structure?
Vining crops like beans, peas, cucumbers, and indeterminate tomatoes thrive with a copper pyramid for support and growth. Root vegetables and leafy greens also benefit from the soil conductivity. Plant a variety around and in the structure to maximize your garden’s productivity.
As an Amazon Associate, Build & Bloom earns from qualifying purchases. We only recommend products we genuinely think are useful. Prices and availability vary; check Amazon for the latest.
Leave a Reply